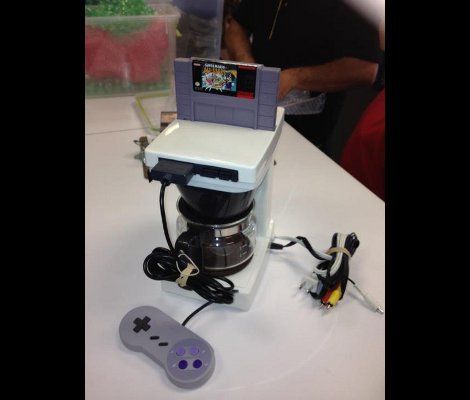
Super Nincoffee Jr.

Your morning routine doesn’t include enough old-school gaming. Break the caffeine habit and get your Mario on at the same time with the help of the Super Nincoffee Jr.

[Luigifreakout123] shares the details of the build in the video clip after the break. He starts by revealing that this is the second version he’s made. The first wasn’t a Jr., but instead used a full-sized Mr. Coffee unit. Neither make coffee, but instead serve as an enclosure for the gaming hardware. The on/off switch and original power cable are used to control the electricity to the console. Openings have been cut in the tops and front for a game cartridge and the two controller ports. A composite video and stereo audio cable comes out the back of the machine next to the power cord.

Yeah, it’s super simple, but sometimes that all it takes for a project to be a delight like this one is.

Continue reading “Super Nincoffee Jr.”

Atomic Clapperboard

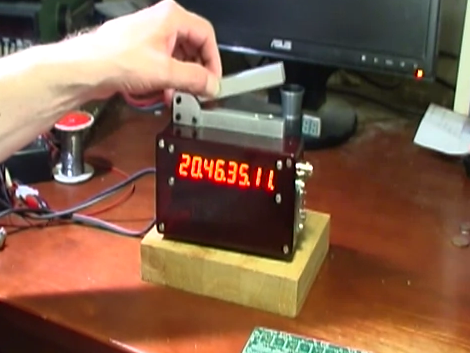
Whether you know it as a clapperboard, a slate, slate board, time slate, or by another name, you probably recognize this staple of movie making. It’s a handy way to help synchronize sound with video, and to keep track of clips when it comes time to edit. But this clapperboard is quite a bit more accurate than most. It’s got an atomic clock source for dead-on accuracy.

The project came from the growing availability of Rubidium clock source modules on eBay. They can be had for under $100 and you’ll enjoy accuracy of 0.1 ppm. [Luddite Tech] grabbed one for himself and included it in this build. As you can see in the clip after the break, the contrast of the eight-digit display is adjustable, and shines brightest when the marker is snapped. We’d guess the cable he connects at the beginning of the demo is used to set the initial time reference. After that the in-built WiFi can be used to push the time markers to a computer.

Continue reading “Atomic Clapperboard”

Home Security Anyone Can Build And Install

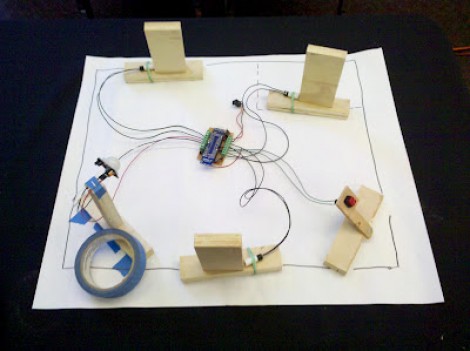
We’ve been seeing quite a few home security hacks around here lately and we think they’re a lot of fun. This is one that we missed a few weeks ago. [Sharpk] used his existing home security system as inspiration for a completely DIY security system. Above you can see the tiny models he used to help visualize how the system would be installed.

The board at the center is a JeeNode, a development board that pairs an ATmega328 with a wireless module. There are three magnetic door sensors which you can easily find at the home, hardware, or electronics store around the corner. They’re basically a reed switch and a magnet; one mounts on the door, the other on the jamb. There is also a panic button and a PIR motion sensor. [Sharpk] has even been working on a UI for the system. He crafted a 3D model of his home’s floor plan in SketchUp and uses it to indicate which part of the system has been triggered.

Now he just needs to add a keypad for arming and disarming the system.

Building An Isolation Booth For Your Home Recording Studio

[Brattonwvu] wanted to lay down some tracks with as high an audio quality as possible. To help get rid of the noise pollution of the everyday world he built this isolation booth in his attic.

The project started off with a trip to the home store for some 2×4 stock and OSB to use as sheathing. The framing is as you would expect, but to help deaden the sound he went with a surprising material. He’s filled the cavities between each 2×4 with stuffed animals and old clothes. The same is done in the walls and the inside surfaces are all covered in fabric to prevent echoing. The door has a lip and we can just make out what looks like weather stripping to provide a seal. There is just one opening in the box, where a PVC pipe allows electrical and microphone cables to pass through. [Brattonwvu] reports that you can hear your heartbeat in your ears when standing inside the sealed booth.

CPLD Motor Control

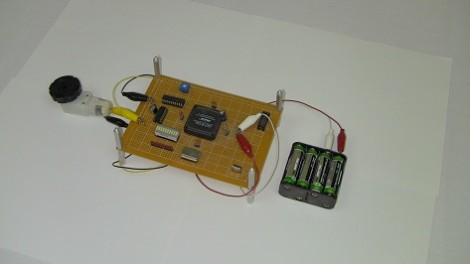
[Chris] continues cranking out the tutorials, this time around he’s showing how to use a CPLD for simple motor control. The demo hardware is pretty basic, he built his own FPGA/CPLD demo board a few years back which used a PLCC socket for easy interfacing. You should be able to use just about any gear you have on hand.

Of course the thing about these chips is that you’re working with hardware that can be run in parallel. [Chris] mentions that this is what makes it perfect for timing-critical applications. Here he’s using a motor driver that monitors a PWM signal, using the duty cycle to actuate the direction and speed at which the motor turns. After the break you can see a demonstration of the CPLD reading from an ADC chip and converting the value to a PWM signal. [Chris] has also used the same hardware for VGA signals; something that is usually a timing nightmare if done with a microcontroller.

If this leaves you thirsting for more CPLD goodness check out our own guide on the subject.

Continue reading “CPLD Motor Control”

MythTV Library On Apple TV Without A Jailbreak

[Dan] wrote in to share a link to his MythTv to Apple TV setup. He found a way to make the recordings he made on his Linux box available on the 2nd Generation Apple TV. Our first thought is that he would use XBMC on a jailbroken device  but that is not the case. The secret is to roll iTunes into the mix.

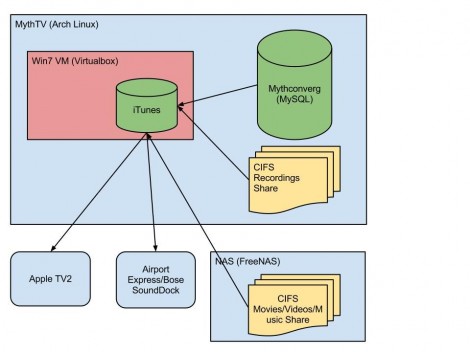
Take a look at the diagram above. The system starts with an Arch Linux box that runs MythTV, an open source program which allows you to record from tuner or encoder hardware. But actually watching those recordings on an iOS device is difficult for a couple of reasons. First, Apple likes to keep their devices locked up tight in hopes that you buy your entertainment rather than watching over-the-air records. Second, if you’re recording ATSC channels the files may be 1080i or 1080p, neither of which can be handled by the Apple TV 2. [Dan] gets around this by first using the command line version of Handbrake to transcode the recordings to an h264 format. He then uses iTunes running on an Windows 7 virtual machine (on the Linux box) to host the transcoded files in a library the Apple TV can access.

TI’s Inexpensive Piccolo And Stellaris Dev Boards

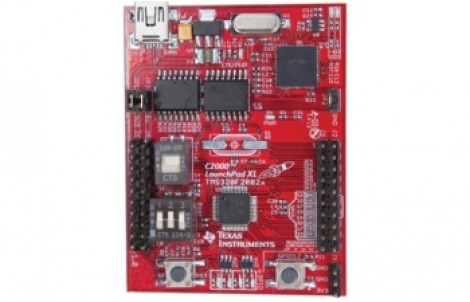
Texas Instruments is trying to take the success it had with the LaunchPad and apply it to other chip architectures. The board seen above is their new C2000 Piccolo LaunchPad. It’s a development board for the F28027 chip. This 32-bit offering is a part we know nothing about. A first look shows a clock speed between 40 and 60 MHz, 64k of Flash memory, and a JTAG programming interface. It sounds like an unrestricted copy of Code Composer Studio is also available to use as the development environment. At $17 won’t break the bank, but we also don’t feel that welling of excitement to get in on one of these units.

What does get us excited is the Stellaris LaunchPad offering. It’s not available yet (which always makes us want it more), but you can enter a drawing to get a free one when they are released. Be warned, with only 25 up for grabs the odds are against you. There are no details, other than a target price of $4.99 for the ARM development board. We’ve had a lot of fun with the STM32 ARM board, and this might be a new adventure to undertake.

[Thanks Máté]