The Twelve Days Of… Self-replicating

Okay, it’s more like the 23 days but who’s counting? [Kliment] is giving the gift of self-replication this holiday season by uploading one new printable part a day. If you follow along and print each one you’ll have a Prusa Mendel by Christmas (this started on 12/2 so you’ll need to catch up). The Prusa is a variation on the Mendel that uses bushings wherever possible, reducing the need for bearings down to just two.

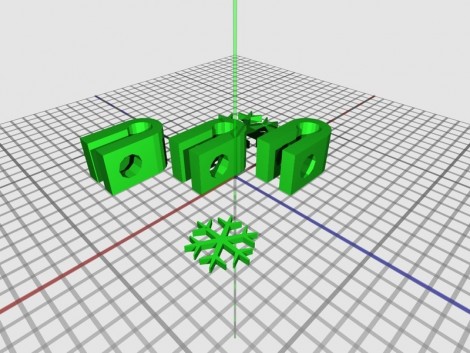
So yeah, you need to have access to a 3D printer in order to make the parts for this 3D printer, but that’s how it always works. [Kliment] has gone the distance to make this little exercise enjoyable. The parts that take longer to print are reserved for the weekends, some have been altered to include a holiday theme, and all of them have been optimized to fit on a Makerbot build platform.

[Thanks Christopher]

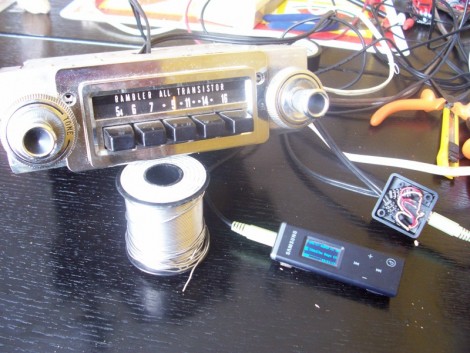
Vintage Car Audio Gets MP3 Input

[Nali] is fixing up a 1966 Rambler Ambassador and decided to give the audio a bit of an upgrade. Instead of replacing the head unit he added a connector for audio input. The method he used is simple, inexpensive, and allows the original unit to continue functioning as a radio. He cut the feed wires going to the volume knob and patched in a headphone jack. The jack he used has an internal switch that is meant to switch off a pair of speakers when headphones are plugged in. The jack will allow the original signal from the radio tuner to pass through whenever there isn’t a connector plugged in. It seems like this is easier on older hardware than it is on modern equipment.

This isn’t where his entertainment enhancements stop. [Nali’s] working on a 7″ in-dash Linux machine so keep your eye on his thread to see what he comes up with.

[Thanks Joel383]

Christmas Tree Low-water Monitor

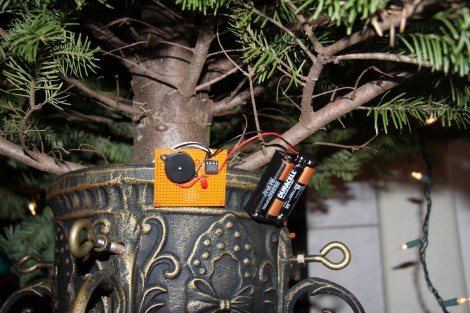
The end of the year is rapidly approaching and there’s a good chance you have a slowly dying tree in your living room. Help it hold on a little longer by using [Eric Ayars’] Christmas Tree water monitor. He’s built a sensor out of a piece of strip board. Three bus strips on the board allow for a variety of alerts. When all three are submerged everything is ok. When the two longer traces are still under water but the third is not an LED will blink to let you know it’s time. If you don’t pay attention and there’s no water left, a piezo buzzer makes noise until you add water (or the coin cell runs out of juice).

This project centers around an ATtiny85 that [Eric] programmed using an Arduino, one of the methods we covered in our AVR Programming Tutorial. But if this simple circuit isn’t high-tech enough for you, we saw a similar method last year that will send an alert to your iPhone.

How To Work With EL Wire

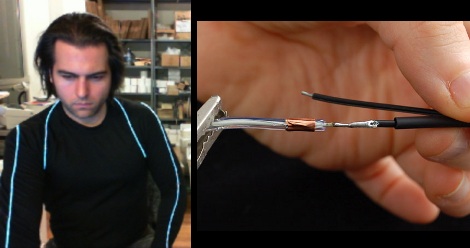
As you can see, [Phillip Torrone] has a nice start on his Tron costume for the movie premiere. Electroluminescent wire is what makes these costumes glow and if you’ve never worked with the stuff before you’re in for a treat. Adafruit posted a tutorial explaining how to work with EL wire. The process isn’t hard, but they’ve got a few nice tips, like using copper tape as a platform for soldering the corona wires. There is also a discussion of the math involved with properly powering your setup.

In this case, Adafruit is using ready-made power inverter units. If you’ve interested in hacking together your own inverter take a look at the background information from [Jeri Ellsworth].

Nails And Some Blacksmithing

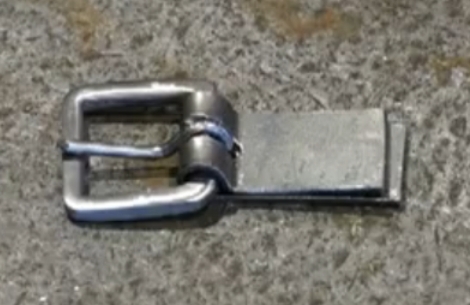
Here’s a blacksmith turning 4 inch framing nails into buckles. In the clip after the break he starts by heating and bending the nail around a square form. Next the excess gets cut off and both sides of the square frame are ground flat while in a vise. A smaller nail serves as the prong and a flat piece of metal is shaped so that this can be connected to a leather strap. This ends up as part of the support system for a full suit of armor.

We’ve seen a lot of great welding projects over the years, but today’s blacksmithing video leaves us wanting. If you’ve got a favorite project that involved this kind of work tip us off about it and we’ll see if we can get some more hacks for the Smithies out there.

Continue reading “Nails And Some Blacksmithing”

Tuesday Two-Fer: Battery Cases And ABS Lettering

These are both interesting, unrelated, and can’t quite stand on their own so we threw them into one post.

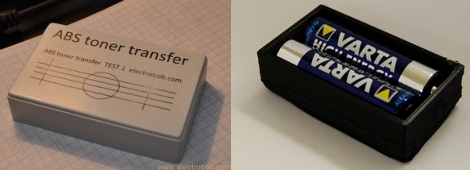
On the left you see the product of using toner transfer on ABS plastic. [Bogdan] tried this out as a way to make front panels for his enclosures. It really shouldn’t work very well because ABS has a lower melting point than toner does. But it seems that it takes a while for the ABS to heat up. If you’re quick, ironing for about 10 seconds, you can get the toner to stick to the plastic and then soak the paper off, leaving your printed design looking nice and clean.

To the right you see a printed battery case. [Nikolaus Gradwohl] ran across the same problem we’ve face many times: how to attach batteries to your projects? We’ve duct-taped them together, used the blister packs they’re sold in, Dremeled them out of thrift-store toys and just about every other thing you can imagine. He decided to make them easy to manufacture with a 3D-printer. This is accomplished with an OpenSCAD file he wrote. Plug in the size and number of batteries and a printable package will be automatically generated.

Original Shell Houses A Game Boy Advance SP

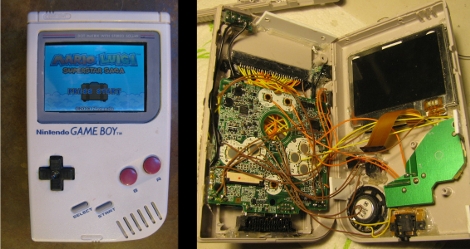
[Jackson] decided he wanted to give his original Game Boy a bit more power so he replace the internals with those from a Game Boy Advance SP. This keeps the case work to a minimum, as the original was larger than the SP. He kept the buttons, speaker, headphone jack, and power switch but modified the enclosure to use the volume, charger, and battery from the newer hardware. The cartridge connector was relocated to match the slot in the back half of the case, with the color screen being the biggest giveaway that someone’s monkeyed with the device. Not a bad use for a dead Game Boy, as least you’ll be playing this one instead of dedicating it to virtual storage.