Open-Source Laser Shooting Simulator

Looking to practice your marksmanship skills at home? Check out the homeLESS (Home LasEr Shooting Simulator), an open-source tool for marksmanship practice. [Laabicz] developed this system as a cheaper alternative to commercial laser shooting simulators, which are just as simple but very expensive.

[Laabicz]’s simulator primarily uses modified airsoft pistols that are fitted with batteries (installed in the magazine) and a laser in the chamber. Any gun can be used with the system as long as you can figure out how to attach a laser and trigger switch. To power the laser, a small capacitor is charged from batteries when the trigger switch is off. Once the trigger is pressed, the capacitor discharges through the laser and makes a short pulse of light.

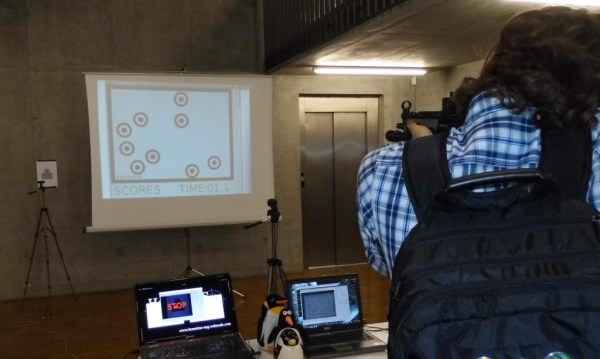
The simulator is written in Processing and requires a projector and a webcam. The Processing sketch projects configurable moving targets on a screen or wall, and the webcam detects when a laser is triggered over any of the targets. The software supports multiple target types (including moving targets) and is quite configurable. Check out the video after the break to see the system in use.

Continue reading “Open-Source Laser Shooting Simulator”

Measuring The Length Of WS2812 Strips

[Tim] discovered a simple way to measure the length of WS2812 addressable LED strips from a microcontroller. This is great for any project that can have an arbitrary length of addressable LED strip attached to it.

The simplest (and perhaps most reliable) way to measure strip length is by feeding the serial output pin of the end of the strip back to the microcontroller. The microcontroller keeps clocking bits into the strip until it receives data from the end of the strip. [Tim] didn’t want to run an additional signal to the end of his strip, so he found another solution.

[Tim] used the ADC of his microcontroller (an ATtiny) to measure supply voltage droop as LEDs are turned on. Each LED draws around 60mA at full brightness, so [Tim] sequentially turned on each LED and watched the ADC for slight voltage changes. If the voltage changed, there must be an LED at that address. [Tim] does note that this method is extremely dependent on the power supply used and only works on short strips. Check out his blog post for more details.

Running A Web Server On The ESP8266

We’ve written lot about the ESP8266 lately, but people keep finding more awesome uses for this inexpensive module. [Martin] decided that using the ESP8266 with an external microcontroller was overkill, and decided to implement his project entirely on the module with a built-in web server.

[Martin] started out with the ESP8266 web server firmware developed by [sprite_tm]. This firmware provides a basic web server that supports multiple connections and simple CGI scripts right on the module. The web server firmware opens up a ton of possibilities with CGI scripting. When booting up in AP mode, you can even connect the ESP8266 to another access point right from the your browser.

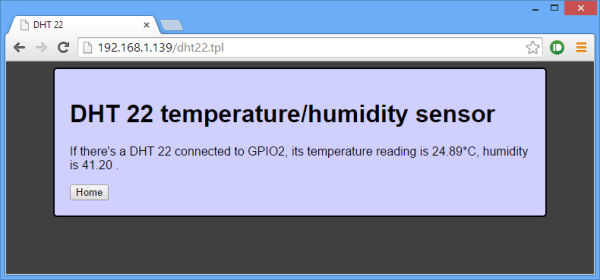
[Martin] decided to connect a DHT22 temperature/humidity sensor to the module as a proof of concept. He used a DHT22 library written for the ESP8266 to read data from the sensor, and wrote a CGI script to display the data on a web page. [Martin] also added buttons to control a GPIO pin as a proof of concept. He posted his source code and a binary (see the end of his post) so you can try out his application and mod it for your own project.

Programming An Arduino Over WiFi With The ESP8266

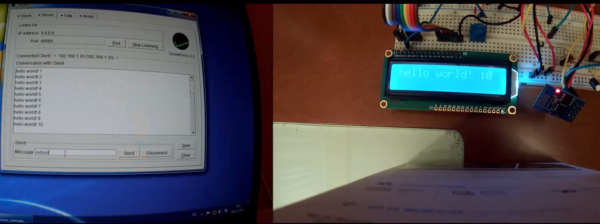
A lot of people have used ESP8266 to add inexpensive WiFi connectivity to their projects, but [Oscar] decided to take it one step further and program an Arduino over WiFi with the ESP8266. [Oscar] wrote a server script in Python that communicates with firmware running on the Arduino. The Arduino connects to the server on startup and listens for a “reboot” command.

When the command is received, the processor resets and enters the bootloader. The python script begins streaming a hex file over WiFi to the ESP8226, which relays it to the Arduino’s bootloader. Once the hex file is streamed, the microcontroller seamlessly starts executing the firmware. This method can be used with any AVR running a stk500-compatible bootloader.

[Oscar]’s writeup is in Spanish, but fortunately the comments in his Python and Arduino code are in English. Check out the video (in English) after the break where [Oscar] demonstrates his bootloading setup.

Continue reading “Programming An Arduino Over WiFi With The ESP8266”

Hacking A $20 WiFi Smart Plug

The Kankun smart plug is an inexpensive device that lets you switch an outlet on and off over wifi. The smart plug only works with an Android or IOS app that ships with the device, which limits its usefulness to turning things on and off from your phone.

In an attempt to make this device more useful, [LinuxGeek] probed the device with nmap and discovered that it runs OpenWRT. After trying various common default passwords he discovered the login was root/admin. While [LinuxGeek] hasn’t sniffed the protocol yet, others have hacked it a bit further. The plug apparently uses UDP packets to communicate with the Android app, but the packets are unfortunately encrypted.

Rather than hack at the protocol, they wrote code that toggles the GPIO pin from a CGI script and developed a small Windows application that hits the CGI script for simple control from a computer. There’s also a Google+ group where more information and a couple other hacks for these plugs are posted. For $20 (from AliExpress) and with a bit of hacking, this smart plug could be a great way to add wireless control to a home automation system.

Transmitting Data Long-Distance With Morse Code

[Konstantinos] wrote in to tell us about his CDW project: a digital encoding scheme for ham radio that uses CW (continuous wave) Morse code for digital data transfer. [Link updated 1/5/16] CW operation with Morse code is great for narrow-bandwidth low-speed communication over long distances. To take advantage of this, [Konstantinos] developed a program that takes binary or text files, compresses them, and translates them to a series of letters and numbers that can be represented with Morse code.

The software translates the characters into sequences of Morse code pulses, and plays an audio stream of the result. His software doesn’t support decoding Morse from an audio stream, so [Konstantinos] recommends using one of many existing programs to get the job done. Alternatively those with a good ear and working knowledge of Morse can transcribe the characters by hand.

After receiving a broadcast, the user pastes received characters back in the software. The software re-assembles the binary file from the Morse characters and decompresses the result. [Konstantinos] also added a simple XOR encryption feature, but keep in mind that using encryption on ham radio bands is technically illegal.

2.5kW Of Beverage-Cooling Awesomeness

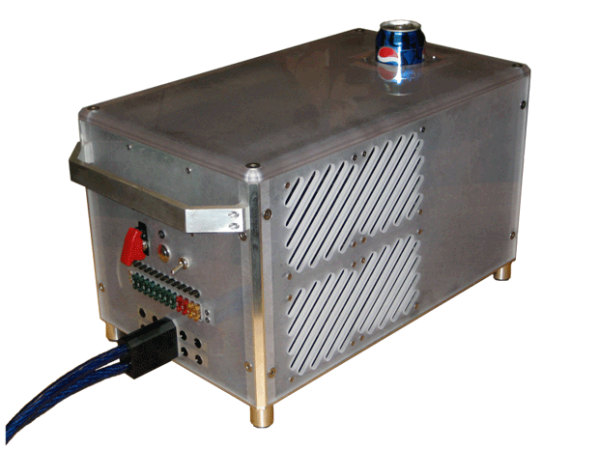
We’ve covered many thermoelectric beverage coolers in the past, but none come close to the insane power of the AbsolutZero. [Ilan Moyer] set out to design a beverage cooler that chills a drink from room temperature to 5 degrees Celsius as quickly as possible, and it looks like he succeeded. The AbsolutZero consumes around 2.5kW of power and runs 8 water-cooled thermoelectric modules to quickly chill a drink.

[Ilan] put his machinist skills to work and fabricated many custom parts for this build. He machined water blocks for each thermoelectric cooler out of solid copper which draw heat away from each thermoelectric cooler. He also fabricated his own bus bars to handle the 200A+ of current the system draws. To transfer heat from the beverage to the thermoelectric modules, he turned and milled a heat spreader that perfectly fits a can of any beverage.

[Ilan]’s design uses a closed-loop water cooling system and 4 radiators to dissipate all of the heat the system produces, which is quite a lot: thermoelectric modules are typically only 10-15% efficient. The whole design is buttoned up in a custom polycarbonate enclosure with a carrying handle so you can conveniently lug the massive setup wherever quickly chilled beverages are needed. Be sure to check out [Ilan]’s build photos to see his excellent machining work.

Thanks for the tip, [Stefan].