An External Autofocus For DSLRs

Most modern DSLR cameras support shooting full HD video, which makes them a great cheap option for video production. However, if you’ve ever used a DSLR for video, you’ve probably ran into some limitations, including sluggish autofocus.

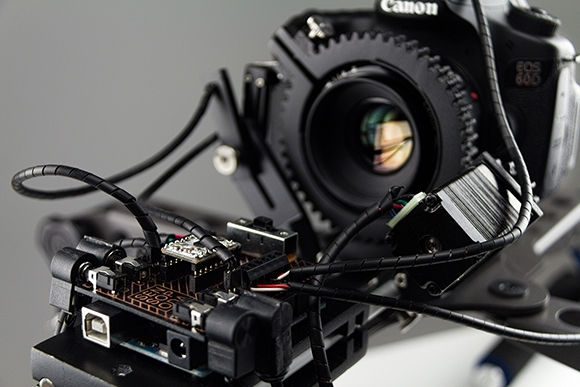
Sensopoda tackles this issue by adding an external autofocus to your DSLR. With the camera in manual focus mode, the device drives the focus ring on the lens. This allows for custom focus control code to be implemented on an external controller.

To focus on an object, the distance needs to be known. Sensopoda uses the HRLV-MaxSonar-EZ ultrasonic sensor for this task. An Arduino runs a control loop that implements a Kalman filter to smooth out the input. This is then used to control a stepper motor which is attached to the focus ring.

The design is interesting because it is rather universal; it can be adapted to run on pretty much any DSLR. The full writeup (PDF) gives all the details on the build.

How To Get 50 More Zed From Your Rigol DS1054Z

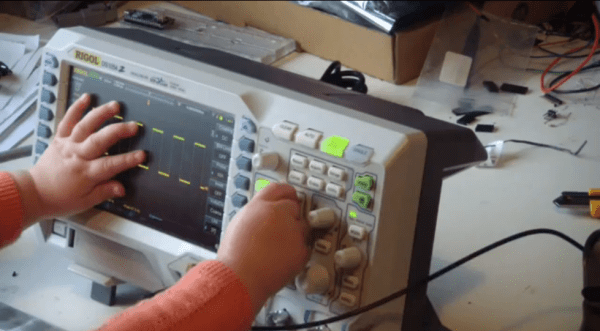
[Chris] has been spending a lot of time in the wife’s sewing room lately, and things got pretty serious late last night as he hacked his shiny new Rigol DS1054Z to unlock the 1104Z capabilities lurking within.

The rumors are true, and ungoverning the software is as simple as looking up your serial number and knowing the right URL for generating a valid license. [Chris] ran into a dud site, but that’s the price of doing business in the shadowy parking garage basements of the interwebs. Once he knocked on the right door and uttered the secret word, however, he became the proud owner of 50MHz additional bandwidth, decoders for SPI, I²C, and RS-232, twice the storage depth, and all teh triggers that ship with the 1104Z.

Can’t rationalize the purchase even at the ridiculously low price point? Here’s one way to make it happen. You’ll laugh, you’ll cry, you’ll learn some French.

Continue reading “How To Get 50 More Zed From Your Rigol DS1054Z”

$2 FM Transmitter For Raspberry Pi

We love re-purposed consumer gear. This project uses a cheap, discontinued cellphone gadget to create a Raspberry Pi controlled FM radio transmitter.

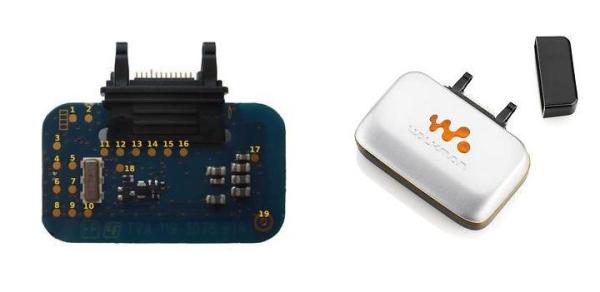
The Sony-Ericsson MMR-70 radio transmitter apparently used to connect to a cell phone and broadcast music. But the Walkman cellphones in question are a little bit old in the tooth, so one can buy the transmitter units for cheap on the resale market. What makes the transmitters even more interesting is that you can activate and deactivate the radio, change frequency or output power, and even send RDS station and song information.

It turns out (link in German) that the radios have an AVR ATMega32 microcontroller and a NS73 radio transmitter module, which can be entirely controlled over I2C. (Schematic here as PDF.) The units also have handy test points strewn all around. Once the test points were mapped out, one could completely ignore the on-board AVR microcontroller and control the FM transmitter module directly using the Raspberry Pi’s I2C outputs.

And that’s where [Manawyrm] stepped in. She wrote an I2C daemon for the Raspberry Pi that lets you control the FM transmitter via simple commands. All you have to do is solder up a bunch of test points, install [Manawyrm]’s software, write a batch script, and you’re on the air. For instance, this makes building a FM radio retransmitter for online streamed audio a one-day project. You can see his working example on youtube. Of course, you’ll want a web-based remote control interface to go with that.

If you’re interested in hacking along, and don’t have a Raspberry Pi application in mind, Sparkfun used to sell the NS73 radio transmitter so you can find lots of good information about the chip. We’d love to see a stand-alone broadcasting gizmo that actually utilizes the onboard AVR chip, but our hats are off to [Manawyrm] for making the Raspberry Pi version so accessible.

Protocol Snooping Digital Audio

More and more clubs are going digital. When you go out to hear a band, they’re plugging into an ADC (analog-to-digital converter) box on stage, and the digitized audio data is transmitted to the mixing console over Ethernet. This saves the venue having to run many audio cables over long distances, but it’s a lot harder to hack on. So [Michael] trained popular network analysis tools on his ProCo Momentum gear to see just what the data looks like.

[Michael]’s writeup of the process is a little sparse, but he name-drops all the components you’d need to get the job done. First, he simply looks at the raw data using Wireshark. Once he figured out how the eight channels were split up, he used the command-line version (tshark) and a standard Unix command-line tool (cut) to pull the data apart. Now he’s got a text representation for eight channels of audio data.

Using xxd to convert the data from text to binary, he then played it using sox to see what it sounded like. No dice, yet. After a bit more trial and error, he realized that the data was unsigned, big-endian integers.  He tried again, and everything sounded good. Success!

While this is not a complete reverse-engineering tutorial like this one, we think that it hits the high points: using a bunch of the right tools and some good hunches to figure out an obscure protocol.

Nothing’s As Vain As A Phone Taking A Selfie Of Itself… With Itself

The selfie: pop culture’s most frivolous form of self-expression is also probably one of the most human acts you could find yourself doing in a day. Everyone is guilty of snapping a quick pic from time to time with the expectation that it will leave an impression on those who see it. All of the implications surrounding why we do this support our deep-seated need to sculpt an identity for ourselves using others as the hammer and chisel. So, consider how upside-down the world would feel if you caught a robot posing for a shot in the mirror? What about one whose sole function was to take selfies and post them? If this breaks your mind a little, that was the intention. This #selfie robot by artists [Radamés Ajna] and [Thiago Hersan] is the first development in a larger body of work called “memememe”, which is meant to comment on our culture’s obsession with the trending, selfing nature of social media. This specific project explores the relationship between conversation and identity in a situation where there is no second party.

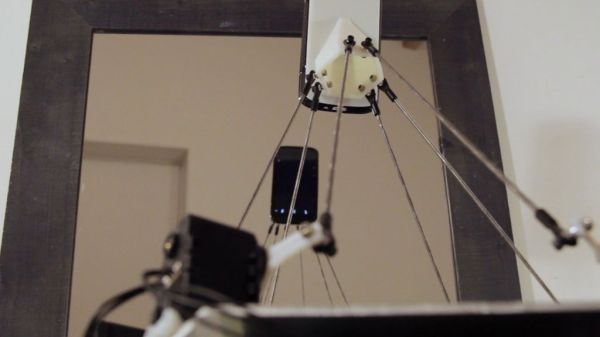
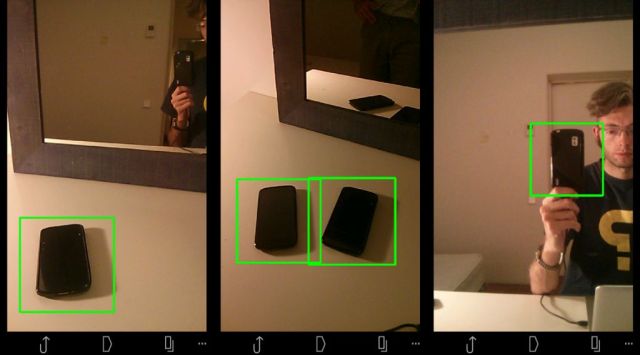
selfieBOT2Hardware-wise, the #selfie bot is a Stewart platform made from six servo motors and a few pieces of carefully measured pushrod connected with swivel-ball-links. An android phone is mounted on the end effector which acts functionally as the robot’s face and eyes. To make it self-aware in a sense, [Ajna] and [Hersan] created their own recognition software with Open CV using a collection of sample images of various phones as reference points. As soon as the robot recognizes itself in the mirror as indicated by specific words flashing on its screen, it takes a picture, immediately uploading it to its own tumblr account. [Ajna] and [Hersan] have a nice description of their process on the project’s Instructable’s page which you can check out to see how they used Haar Cascades to create their custom object recognition. Additionally, if you’d fancy building your own robot to covertly place in your living room to snap pictures of other phones, you could check out their code on github.

Watch it selfie :

Continue reading “Nothing’s As Vain As A Phone Taking A Selfie Of Itself… With Itself”

Hackaday Prize Judge Elecia White Writes Tell-All Blog Post

The awarding of The Hackaday Prize is nearly upon us!  With just over a day left to go, Launch Judge Elecia White has decided to spill the beans and write a blog post about which of the five finalists she thinks should win. We don’t want to spoil the surprise… but what the heck, she wants them ALL to win.

ChipWhisperer because it brings high-end hardware security tools to the masses.

SatNOGS because it brings space to your back yard,

PortableSDR because of its great waterfall display,

ramanPi because come on, it’s a freaking spectrometer!

Open Source Science Tricorder because it uses sensors to help us see the science in the world around us.

Elecia knows how much time, effort, and passion went into these projects, and how each one embodies the open and connected spirit of The Hackaday Prize. Only one day remains before the big event in Munich, and the announcement of the winner.

Transmitting Data Long-Distance With Morse Code

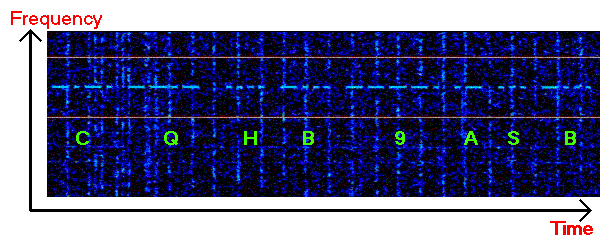
[Konstantinos] wrote in to tell us about his CDW project: a digital encoding scheme for ham radio that uses CW (continuous wave) Morse code for digital data transfer. [Link updated 1/5/16] CW operation with Morse code is great for narrow-bandwidth low-speed communication over long distances. To take advantage of this, [Konstantinos] developed a program that takes binary or text files, compresses them, and translates them to a series of letters and numbers that can be represented with Morse code.

The software translates the characters into sequences of Morse code pulses, and plays an audio stream of the result. His software doesn’t support decoding Morse from an audio stream, so [Konstantinos] recommends using one of many existing programs to get the job done. Alternatively those with a good ear and working knowledge of Morse can transcribe the characters by hand.

After receiving a broadcast, the user pastes received characters back in the software. The software re-assembles the binary file from the Morse characters and decompresses the result. [Konstantinos] also added a simple XOR encryption feature, but keep in mind that using encryption on ham radio bands is technically illegal.