slab flattener

Router Jig Makes Quick Work Of Flattening Irregular Shaped Wood

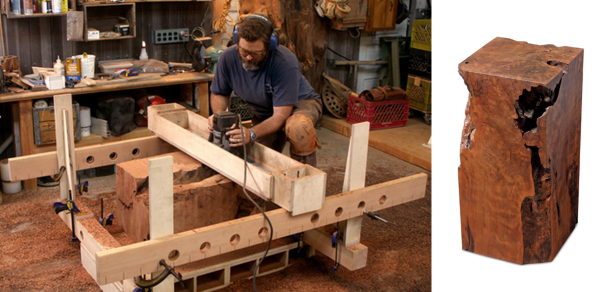
[Nick Offerman] is a pretty serious wood worker. He likes to make crazy stuff including organic looking tables out of huge chunks of wood. Clearly, the wood doesn’t come out of the ground shaped like the above photo, it has to be intensely worked. [Nick] doesn’t have a huge saw or belt sander that can handle these massive blocks of wood so he built something that could. It’s a jig that allows him to use a standard wood router to shave each side down flat.

The process starts by taking a piece of tree trunk and roughing it into shape with a chainsaw. Once it is flat enough to not roll around, it’s put into a large jig with 4 posts. Horizontal beams are clamped to the posts and support a wooden tray which a wood router can slide back and forth in. The router’s cutting bit sticks out the bottom of the tray and slowly nibbles the surface flat. Once one side is flat, the block is rotated and the flat side is used as a reference to make all the other sides square to the first. After flattening, sanding and finishing the block results in a pretty sweet piece of functional artwork.

tubenetradio

TubeNetRadio Project Modernizes 1959 Tube Radio

Years ago, [Luk] came across an old tube radio. He’s since wanted to convert it to an internet radio but never really got around to it. Now that we are living in the age when a micro computer can be had for a mere $35, [Luk] decided it was time to finish his long lost project.

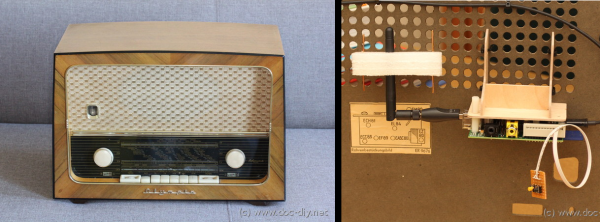
He chose a Raspberry Pi for the brains of his project because it is an inexpensive and well documented product perfect for what he wanted to do. [Luk] had a goal, to modify the radio as little as possible in order to get it to play both internet radio and locally stored MP3s. The radio from 1959 is certainly old, but it had a feature you may not expect. It had an AUX input with a separate volume knob out front. As is the radio itself, the input was mono. To connect the Raspberry Pi to the radio, [Luk] had to make an 1/8th inch stereo to banana plug adapter, a great solution that did not require any modification to the original radio.

WiFi is accessed though an off-the-shelf USB wireless module. After evaluating tapping into a 5vdc source somewhere in the radio, it was decided to use a wall wart to power the Raspberry Pi. A plug for the wall wart was spliced in after the radio’s main on/off switch. That way the radio and Raspberry Pi both turn on and off together. There is plenty of room for all of these added components inside the radio’s case.

The RaspPi can be fully controlled over the WiFi network but has a couple buttons wired up to the GPIO pins for limited manual control. The buttons for these controls fit perfectly in the round vent holes in the back panel of the radio’s case. Although the buttons are visible, no permanent modifications had to be made! [Luk] reports that everything works great, as do the original functions of the radio.

RoomMote home automation

RoomMote, A DIY Remote For Your Room Project

[Rohit] wrote in to tell us about a project he has created. Like most projects, his solves a problem. Sometimes while sleeping, a mosquito will infiltrate his room. He has a mosquito repellent machine but there are 2 problems, he has to get up to turn it on/off and it smells bad when in use. [Rohit] only needed a remote-controlled mosquito repelling machine but decided to make a 6 channel system he calls the RoomMote.

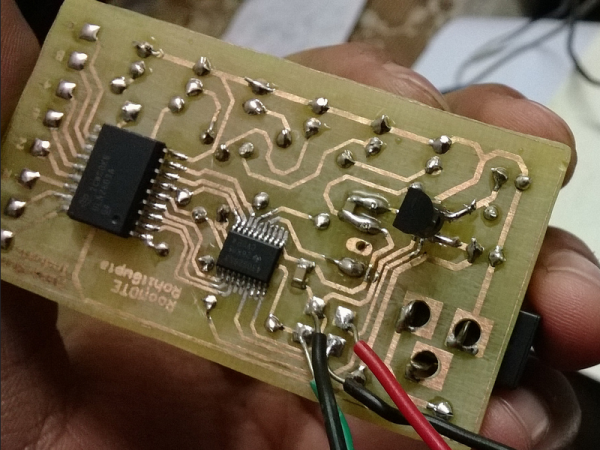
From the beginning, the plan was to use an old Sony TV remote to do the transmitting. The receiver unit was completely made from scratch. [Rohit] designed his own circuit around a surface mount MSP430 chip and made a really nice looking PCB to fit inside a project box he had kicking around. The MSP430 chip was programmed to turn relays on and off based on the signals received from the Sony remote.  These relays are inside an electrical box and control AC outlets. Just plug in your light, radio or mosquito repellent into the appropriate outlet for wireless control. Code for the MSP430 is made available on [Rohit’s] project page for anyone wanting to make something similar.

In addition to the relays, there is an RGB LED strip attached to the custom circuit board. By using more of the Sony remote’s buttons, the LED strip can output 6 pre-programmed colors, some mood lighting for the mosquitoes!

Continue reading “RoomMote, A DIY Remote For Your Room Project”

wireless reset button

Door Bell Used To Reset WiFi Router

We’ve all have had to reset our routers or modems at some point because they were acting up. The typical scenario is; unplug the device, wait 30 seconds, plug it back in and wait for it to boot back up. While not hard, this can be an annoyance, especially if accessing the router or power cord is inconvenient. [Taylor] wrote in to tell us about his wireless router that seems to need to be reset more than he’d like. Although the simplest solution may be to get a new router, he thought it would be fun to do something a little more exciting by making a wireless reset controller.

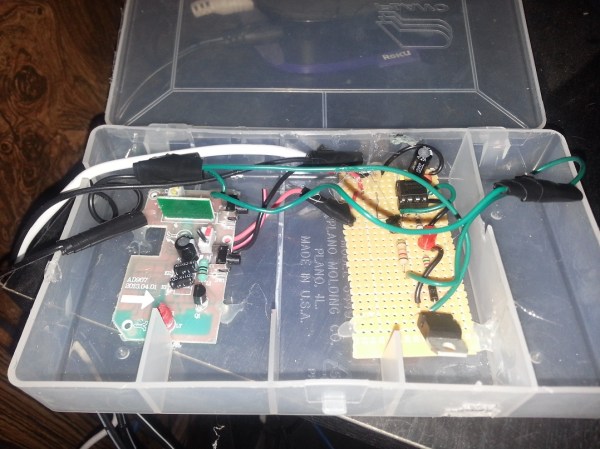
[Taylor] started with an ordinary power strip. He spliced in a relay to the hot side of the AC line, connected to the common and normally-closed pins of the relay. That way, when the relay is not activated, the power strip is powered. Next, a wireless doorbell was re-purposed to act as the transmitter and receiver. The speaker was removed and the output lines connected to a mono-stable 555 timer circuit that [Taylor] made. When the circuit receives a signal from the door bell speaker lines, it will activate the relay for about 30 seconds. Since the relay was wired to supply voltage to the power strip when not activated, activating the relay cuts the power for 30 seconds effectively resetting the router. Now, whenever the router needs a reset, doing so is as easy as pushing the door bell button from anywhere in the house.

garage door indicator

Indicator For Forgetful-Minded Garage Door Users

[Gareth] had a friend who regularly forgot to close his garage door after parking his car and heading inside. Since [Gareth] was familiar with basic electronics and an overall good pal, he offered to make a device that would indicate whether the garage door was open or not.

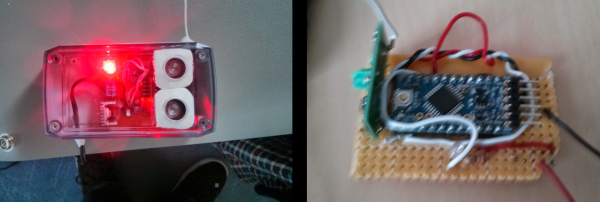
The project starts off simple with an Arduino and ultrasonic distance sensor. Both are mounted to the ceiling of the garage with the ultrasonic sensor pointed down. When the garage door is open, the sensor outputs a shorter distance measurement than when the garage door is closed.

Now that the system knows when the door is open or closed, the next part was sending a signal inside the house. He could have run a wire up through the house walls to an LED indicator but decided to go wireless with a 433mhz transmitter. There is a second Arduino inside equipped with a 433mhz receiver. When the garage door is open, the Arduino inside the house flashes an LED reminding the forgetful occupant to close the door.

[Gareth] made all his code for both the sensor/transmitter and the receiver available on his site for anyone interested in making something similar.

diy wet media blast cabinet

DIY Wet Media Blast Cabinet

Most people have heard of sand blasting, a process used for cleaning parts by spraying a high pressure air and sand mixture. At this speed, the sand becomes abrasive and will remove paint, rust and general gunk leaving a clean surface behind. There is one downside to the process, breathing the silica dust created by the sand blasting process can lead to a lung disease called silicosis, which is not curable and can even lead to death.

[Roger] wanted to clean his motorcycle parts and decided to build a wet media blasting cabinet. Unlike sand blasting, wet media blasting mixes the cleaning media with water instead of air. The media and water slurry is sprayed at the part needing cleaning and has the same effect as sand blasting without creating any dust.

diy wet media blast cabinetAs you can clearly see from the image, the main blasting chamber is made from a 55 gallon plastic drum. It even has a removable lid on one side to make loading in parts easy. A large hole was cut into the drum in order to install a window. Look close – there is even a wind shield wiper from a car installed on the inside of the window to aid in seeing the part being cleaned!
Underneath the blasting chamber is another plastic drum cut in half. This serves as a slurry tank. A regular pool pump is used to both agitate the slurry mixture and power the spray nozzle. Overall, [Roger] is happy with his blast cabinet made from found parts and says it has become his all-time favorite cleaning device. He says that the part surface finish obtained was well worth the effort building the blast cabinet.

Dust Separator

DIY Dust Cyclone A Traffic Cop Would Be Proud Of

Sure, having a wood shop is super handy but it also can get real dusty. Hooking up a shop vac to suck up dust coming off a wood-cutting machine works for all of 3 minutes before the vacuum’s filter gets clogged with dust. There is a solution, though, and it is called a dust separator.

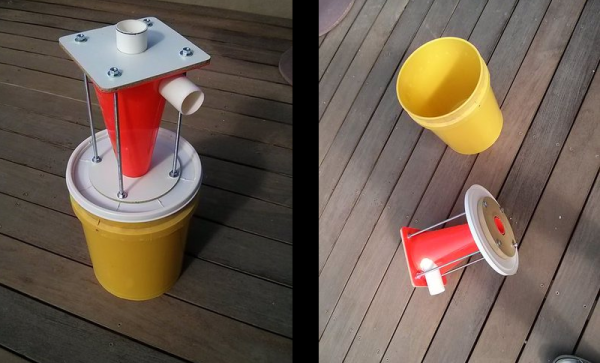
A dust separator does just as its name suggests, it separates dust from air. There is a common type of dust separator made in the DIY community, it has a cone-shaped body and is generally referred to as a cyclone-style. [Dror] built his own cyclonic dust collector out of an odd object… a traffic cone. Looking at it now, we wonder why this isn’t much more common!

The dusty air enters the PVC pipe and ends up spinning around the inside of the cone. Since the dust particles have mass, they are thrown to the outside of this chamber as they spin. They lose speed and drop down into the 5 gallon bucket below. The dust-free air then outlets through the top of the dust separator which is connected to a shop vac.

You’ll notice that [Dror] decided to use threaded rod to hold his separator pieces together. While this may seem like overkill, he had tried several glues and could not get any to stick to the traffic cone!

If you’d like to get in on the dust separator action but don’t have a traffic cone, they can also be 3D printed or made from metal.