Cheap-Thermocam Gets An Impressive Rehaul

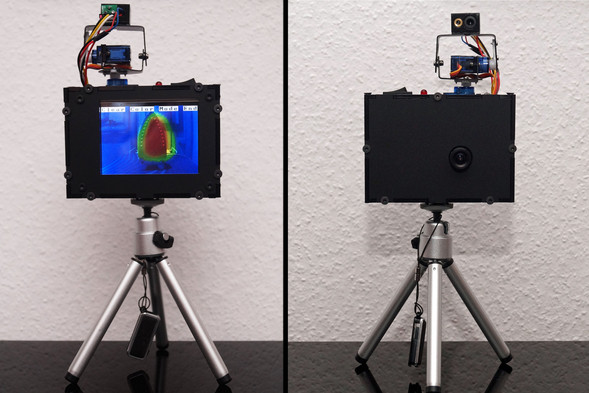
[Max Ritter] is a 21 year old student of information technology at the University of Applied Science at Weingarten, Germany. Three years ago he brought us the DIY Cheap-Thermocam, a tool for thermal imaging that cost <$100. Since then he’s made a few upgrades.

The original Cheap-Thermocam made use of an Arduino, the sensor from a thermometer gun and a few XY servos. In about 2 minutes the XY servos can scan and measure 1344 points using the thermometer’s sensor, creating a heat-vision map of 42 x 32 pixels — not amazing, but it worked — and it was cheap!

The new version (V3) has its own ARM Cortex M3 processor, it measures 3072 points in 2 minutes from -70°C to 380°C with an accuracy of 0.5°C, and it exports its images at a resolution of 640 x 480 –close to commercial offerings! It’s not capable of real-time scanning, but for the majority of purposes you need one of these for — it’s really not that necessary.

Continue reading “Cheap-Thermocam Gets An Impressive Rehaul”

Plater Makes It Easy To Fill Your Bed Plate

plater

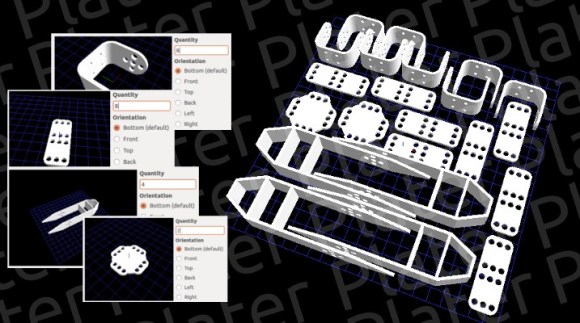
If you’re a 3D printing power user, you probably try to fit as many parts onto a single print job as possible. Most printing software has this built in to let you do that, but [Grégoire Passault] and his team thought they could do it better with their program Plater — it’s open source too.

They decided to make Plater after designing Spidey: an open-source 4-legged robot that makes use of 22 3D printed parts. The first few times they printed this took a long time because they had to manually arrange the parts — there had to be a better way!

Plater is a fairly simple program that lets you take in a bunch of STL files, set your print bed size and part spacing and then it creates an STL with as many parts in it as it can, organized on your print bed. Then you just have to load it up into your favorite slicing program and you’re good to go.

Seems like an excellent tool to add to your metaphorical 3D printing tool-belt!

Chocolate Quadrotor Proves You Can Make Anything Fly

Chocolate Quadrotor

With the advancements in quadrotor parts and technology over the years, it’s become possible to make just about anything fly if you can strap some high-speed rotors to it. Introducing the first edible quadrotor!

[Michael] enjoys building and flying quadrotors. His girlfriend enjoys baking and making chocolates. One day she had a crazy idea — what if they made a quadrotor together, combining their unique skill sets? [Michael] was a bit skeptical at first. After all, chocolate doesn’t really compare to aluminum or carbon for a frame material… and chocolate melts at room temperature. Regardless — they were curious enough to try it out and see for sure.

First they built a wooden prototype and then created a silicone mold from it. Using Styrofoam and metal spacers for the electronics mounts they filled the mold with chocolate and let it set. A bit of assembly later and they had a chocolate quadrotor. It flies too.

Continue reading “Chocolate Quadrotor Proves You Can Make Anything Fly”

RetroPie Portable Build Uses No Fancy Tools!

retro pie portable

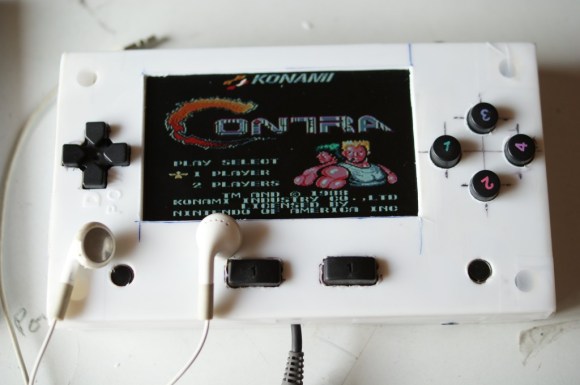
RetroPie Portable builds are great fun, but lots of them make use of expensive tools like 3D printers and laser cutters, which tends to dismay — [Kaushlesh] proves you don’t need any of that!

To build his unit he’s using a Raspberry Pi, a USB controller, a 6 x 4″ project box, a cheap LCD screen, a hot glue gun, and various electrical components — you will still need some soldering skill to complete this project!

By modifying the case he assembled the control boards by taking apart the USB controller. Protoboard made for an easy way to mount his new buttons, with it simply hot glued in place. Quite a bit of soldering later and everything is connected. He notes you’d better make sure everything works as you go otherwise it will be hard to find out what’s wrong when it is assembled!

Future upgrades include a rechargeable li-ion pack and built in speakers (he’s currently using headphones). Take a look after the break!

Continue reading “RetroPie Portable Build Uses No Fancy Tools!”

Automatic Laser Level Made From Hard Drive Components?

hard drive laser level

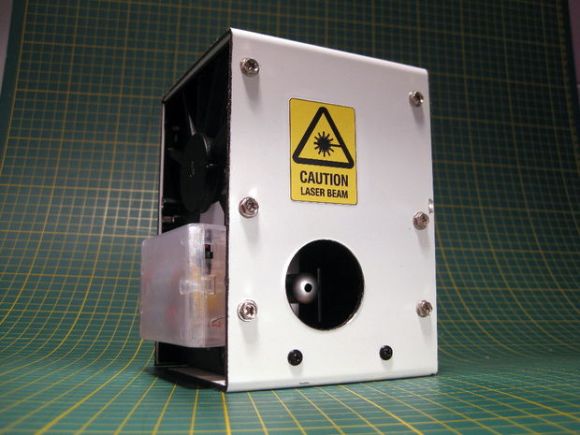
[Crispndry] found he needed a laser level, but didn’t want to spend a few hundred dollars on a tool he might only get a few uses out of… So he decided to build one himself.

If you’re not familiar, a laser level projects a laser beam, level to wherever you put it — it works by having a very precise gimbal assembly that keeps the laser perpendicular to the force of gravity. To build his, [Crispndry] needed a highly precise bearing assembly in order to build his gimbal — what better to use one out of a hard drive?

He used the main bearing from the platter for one axis, and the bearing from the read and write arm for the second axis. A square tube of aluminum filled with MDF is then mounted to the bearings, creating a weighted pendulum. The laser pointer is then attached to this with an adjustment screw for calibration.  Continue reading “Automatic Laser Level Made From Hard Drive Components?”

Automated Home Manufacturing Combining 3D Printing With Robotics

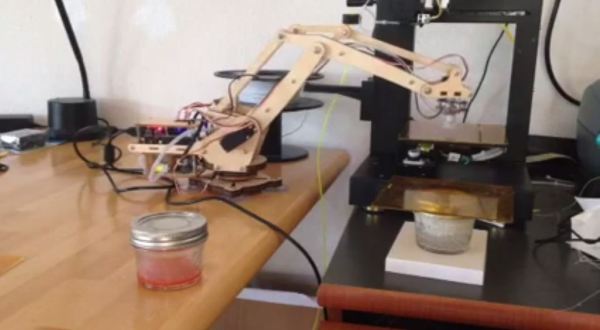
[Florian] has been hard at work creating this automated setup to queue jobs for his 3D printer in order for it to run while he’s not around. It’s not quite finished but the concept is there and he’s started doing some tests! 

He’s using the uArm, which was a highly successful kickstarter earlier this year — it’s an Arduino-compatible microcontroller driven 4-axis parallel-mechanism robot arm, based off of the industrial ABB PalletPack robot.

As soon as he got all the parts he setup a quick test to replace the build platforms using the uArm.

Continue reading “Automated Home Manufacturing Combining 3D Printing With Robotics”

Soda Can Theremin Made In Minutes

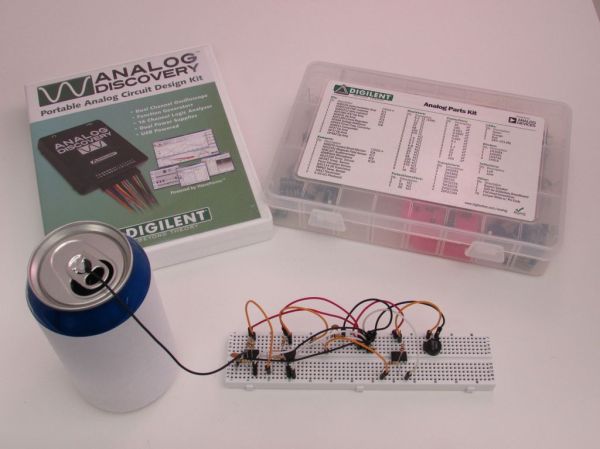
Looking for a fun weekend project? How about building your very own sci-fi Theremin using just a soda can and a few simple components you probably already have.

Not familiar with Theremins? It’s an electronic instrument that can be played without any physical contact. Essentially, the antenna (soda can) acts as half of a capacitor — your hand acts as the other. By varying the distance of your hand to the soda can, you change the capacitance, which can then be used to modulate a sound. It was invented in 1928 by the Russian inventor [Leon Theremin], and you can actually see a video of him playing it on YouTube — we’ve never seen this before, but we must say it’s actually quite impressive!

Anyway, back to the hack. All you need are some op-amps, a few capacitors, some resistors, a diode, a breadboard, and of course — a speaker. [Will’s] gone into great detail in how each circuit works with both schematics and diagrams of the breadboard configuration — it’s a great little project even kids can follow along.

Take a listen after the break.

Continue reading “Soda Can Theremin Made In Minutes”