Educational Circuit Box For Young Aspiring Hackers

image4

Here’s a great idea: an Educational Circuit Box you can make to get kids interested in electronics! What looks like a boring project box with wires sticking out might just become a box of wonder and curiosity for young ones.

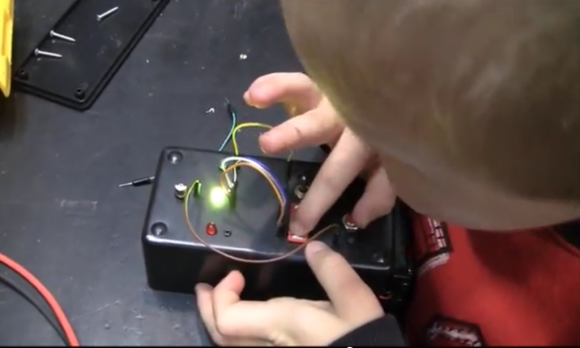
[Fileark] built this for his son, and has happily shared it on his blog for others to recreate. As you can probably guess from the picture, it makes use of a project box, LEDs, buttons, switches, and female header pins. Using the included breadboard jumpers picked up off of eBay, it allows your kid to learn about circuits by plugging in different components and seeing what happens.

The majority of the parts he used were salvaged from scrap electronics he had laying about. It’s a great way to turn e-waste into something fun and educational for kids! For more information about the project, stick around after the break to see [Fileark] explain (and his son demonstrate!) it in a video.

Continue reading “Educational Circuit Box For Young Aspiring Hackers”

People Of Southampton Unite! There’s A New Makerspace In Town!

somakeitmovein_small

The UK Southampton Makerspace, So Make It, has just moved into its first dedicated space, and are holding a grand opening on February 1st!

They have officially been around since early 2013, when they shared a 500sqft space in the back of a bicycle shop warehouse. It wasn’t much, but it was a pretty good temporary home. Toward the end of 2013, they realized they were big enough to justify a private space and decided to try crowd funding. They were fairly successful in raising the startup cash.

Let all of us from Hack a Day (and you!) be the first to congratulate So Make It on acquiring their own private space!

Do we have any Southampton readers in our midst? If so, stick around after the break for full details from So Make It on when and where you can join in the festivities!

Continue reading “People Of Southampton Unite! There’s A New Makerspace In Town!”

The PiBoy

piboy

What do you do with a broken Gameboy, a 3″ LCD, a pile of wires, a USB SNES controller, a 32gb SD card, and a Raspberry Pi? You make a pocket emulator, of course!

[Anton] decided he wanted to build an emulator awhile ago. He had a few specific goals in mind: it had to be hand-held, portable, child safe, and usable without a keyboard. He started by stripping the broken Gameboy down to its external shell, then removing all of the internal plastic mounting features with a hot soldering iron. Next was the challenge of fitting everything into the case and powering it. Because his 3″ LCD runs off 12V, [Anton] needed a way to get 5V to the Pi. Lucky for him, it turned out that his LCD’s controller board had a 5V test point/expansion pin-out!

From there it was just a matter of reusing the original Gameboy’s speaker, closing up the case, and loading the emulator! As always, there’s a demo video after the break.

Continue reading “The PiBoy”

DIY Scroll Saw

Scroll saws are super handy tools, but it’s sometimes hard to justify buying one for a single project. So why not make it your project? [SDX42] shows us how, using a…wait a second, is that an old sewing machine?

First a little back story. He picked up an old sewing machine that had been thrown out by its previous owner: they said it didn’t work right. He took it anyway and decided to fix it up. He encountered two problems. First, it turned out to be a lot harder to fix than he first imagined. Second, he realized he had no use for a sewing machine. What he did need, however, was a scroll saw.

A sewing machine is actually fairly similar to a scroll saw. They both work by converting rotary movement into linear reciprocation. The only difference is the layout. [SDX42] flipped the mechanism upside down and built a scroll saw frame on top of the stripped-down sewing machine. It’s a bit more complicated than that, but we’ll let him explain it to you in the video after the break.

Continue reading “DIY Scroll Saw”

DIY Pipe Freezing Kit

Have you ever needed to freeze a water pipe to do a quick plumbing job without shutting off all the water? It’s actually a fairly common practice for contractors, except they use a rather expensive tool to do it. As it turns out, there’s actually a fairly cheap and easy DIY solution you can do with minimal supplies or experience.

[Go Repairs] shows us that all you need is some pipe insulation (or a large sponge), a plastic bag, two zip-ties, and a air duster can. Wrap the insulation and plastic bag around the pipe, and zip-tie it in place. Holding the air duster can upside down, release the majority of the contents into the insulation. Congratulations, you’ve just frozen your pipe. Continue reading “DIY Pipe Freezing Kit”

Reviving A Stubborn Laptop Battery

We’ve all gotten bored of certain toys and left them on the shelf for months on end. But what do you do when this prolonged period kills the batteries? Well if you’re [Andrew] you take apart the battery pack and bring it back to life!

[Andrew] picked up one of those Panasonic Toughbooks awhile back and although it’s hardly a top of the line laptop specs-wise, it does have some pretty cool features: it’s shock-proof, splash-proof, and extreme-temperature-proof. It even had a touch screen before touchscreens were cool. Despite its durability, however, the laptop was left to sit for a bit too long, and the battery pack no longer accepted a charge.

[Andrew] quickly disassembled the battery pack and began measuring the cells with his trusty multimeter, assuming just one cell had gone bad. Curiously though, no cells reported 0V. What he did find was that each cell and sub-pack reported 2.95V, which is 0.05V below the “safe operating limits” of typical lithium ion cells. Continue reading “Reviving A Stubborn Laptop Battery”

An Elegant Kegerator For Less Than $100

keg

Looking for a fun weekend project? How about making your very own kegerator for about $100? Well, minus the keg of course.

First you’ll need a run of the mill mini-bar fridge. These can be had for free if you prowl student neighborhoods at the end of a semester; it’s amazing what you can find being thrown out. Next you’ll have to modify it a bit: remove the shelving and pop a hole in the top. The trickiest part is building the top out of wood, although [jypuckett] shows us that it’s really not that difficult, and wood stain is your friend!

The most expensive part of the build is probably going to be the fittings, hoses, and tap, but that’s a small price to pay for your very own kegerator.

While it’s not quite as fancy as this over-engineered kegerator, the six-tap freezer chest kegerator, or as vintage as this 1950’s General Electric fridge kegerator, it is a great example of making one for cheap, that works, and looks good.

It also raises the question: if it’s this easy to make, why haven’t you made one yet?!