Raspberry Pi Wall Calendar

Do you let Google know every aspect of your personal and social life? Do you have a spare LCD monitor kicking around? Why not make your own Raspberry Pi Wall Calendar?

[Alex] recently bought his first home (congratulations!), which happened to have a TV wall mount in the kitchen. Personally, we don’t think TVs belong in the kitchen, and neither did [Alex]. Not wanting to tear the mount out of the wall (and thus require home renovations too soon), he devised a clever solution: why not make a digital calendar?

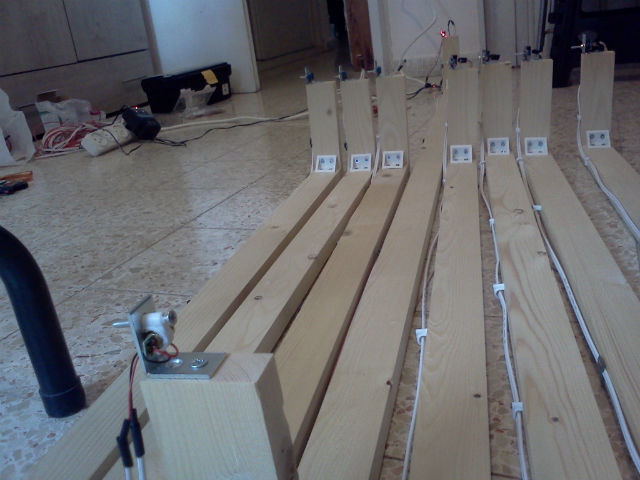
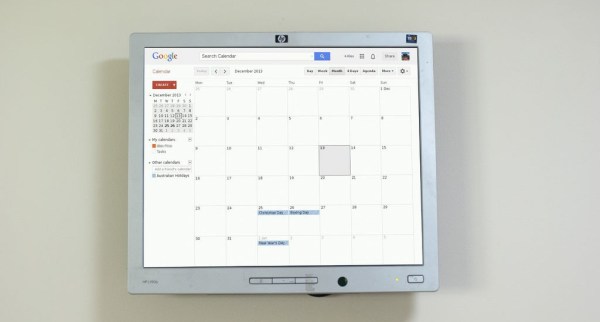
[Alex] connected a Raspberry Pi model B to the LCD monitor, which provides convenient access to his Google Calendar. His Instructable is both meticulous and approachable, so novice hackers should have no trouble replicating this build. The only improvement we can think to suggest is substituting a touchscreen LCD, which would allow him to interact with the schedule.

Whether you “let” Google know about your life— or it just knows—this is certainly a handy hack for the 21st century home!

Flying Spaghetti Monster Display

[Anthony Liekens], one of our favorite hackers from Belgium, recently completed this large (and awesome!) Flying Spaghetti Monster LED display!

With so many different holidays in December, [Anthony] decided he wanted his family to celebrate a slightly less traditional deity. The body is a massive 4′ by 8′ wooden board that we think [Anthony] cut out by hand, with a total of 300 RGB LEDs driven by an Arduino. Chicken wire mesh provides support for the LEDs in the FSM’s mouth and eyes. [Anthony] built everything in his very own backyard hackerspace called the Open Garage, which is a fantastic neighborhood hackerspace (and we should know—we stayed at his place during our European Hackerspace Tour!)

[Anthony] has a bunch of videos showing off the display on his personal YouTube channel, but stick around after the break for a quick sample that features the Flying Spaghetti Monster in the front window of his home.

Continue reading “Flying Spaghetti Monster Display”

Arduino Controlled Beer Brewing Machine!

[the_meatloaf] just put the final touches on his fully automated beer brewing machine using an Arduino.

The project was part of his computer engineering degree, and it took [the_meatloaf] and two mechanical engineer friends a year to design and build the entire system from scratch. An Arduino Mega with a 4-button interface allows you to program, save, load, rename, and run up to 26 different recipes saved to the EEPROM.

An automated system like this removes most of the guesswork from an otherwise complex brewing process. The machine starts by heating the water in the first keg using a 2000W heating element, after which the water transfers into the mash vessel via servo valves, where it’s stirred by a mixing motor. The machine then drains the wort (the resulting liquid after mashing) and sparges (adds more water to the mash tun) the grains as programmed: thanks, [Chris,] for clarification! The wort is brought to a boil for the programmed amount of time, while a servo-controlled “hopper” automatically adds the hops.  Finally, a counter-flow heat exchanger rapidly cools the solution to room temperature using ice water, then dispenses the solution for fermentation.

Though [the_meatloaf’s] biggest project to date was quite the accomplishment, he unfortunately won’t get to enjoy it. The sponsors who covered the $1000 budget reclaimed the machine. Drat.

[via Reddit]

3D Printed, Solderless Circuits

3d printed board

If you’re looking for yet another alternative to etching your own PCBs, then check out this new Instructable on 3D printing test circuits!

[Mikey] decided to try out this method when he needed a small board prototype. He designed the perfboard to have a standard thickness—only 1/16th thick (~1.6mm)—with thin, recessed channels on one side and through holes on the other. [Mikey’s] circuit board allows you to stuff your components in, hold them down with a piece of tape, and then fill the channels with some kind of conductive material. In this example he’s used a highly conductive paint.

This 3D printed option probably won’t suit all your circuit-building needs, but it could provide an excellent shortcut for your next hack! As always, there’s a video after the break.

Continue reading “3D Printed, Solderless Circuits”

Roboxotica (Barbot Festival In Vienna)

minecraft-cocktailbot--verse-publications

Just this past week was this year’s Roboexotica 2013! The annual event was the world’s first and is perhaps the finest festival of cocktail serving robotics out there!

Founded 15 years ago in San Francisco, Roboexotica brings together scientists, hackers, and artists from all around the world to build the most awesome drink dispensing technologies. It’s also an opportunity to discuss innovation, science fiction, and the world of robotics to come — after utilizing some of the robots of course!

The photo above is of one of the popular bots from this year — it’s called the Minecraft Cocktailbot. It dispenses the liquor out of its floppy drive, but only when you control it from inside a game of Minecraft!

More of the barbots present at Roboxotica can be found on the main site. We think our second favorite is the Bunnybot. It defecates peanuts — the mightiest of all  in pellet-form bar food.

Stick around after the break to see the Minecraft Cocktailbot in action!

Continue reading “Roboxotica (Barbot Festival In Vienna)”

Portable Musical Stairs

musical stairs

[Amir] recently finished a pretty cool project — Portable Musical Stairs! He designed and built it so it could be temporarily installed in schools for musical therapy sessions with autistic children — a fun activity for all ages!

The system utilizes lasers and photo sensors that come with a built in digital output with a sensitivity potentiometer, which makes it super easy for the Arduino Leonardo to interpret. The reason they are using 2 by 4’s for the system is because of the width of the stairs. At 1.75m across, a laser misaligned by only 1 degree results in it being about 3cm off!

On the software end of things, the Arduino acts as a HID input to the computer to create the sounds. [Amir] has put together a free sound sampler on his website makeysoundy.com, and we must say, it’s pretty fun! You can assign notes to different keys, which makes it super easy to make a similar project to this!

Stick around after the break to see the stairs in action!

Continue reading “Portable Musical Stairs”

Inverted Christmas Tree Made Of Nespresso Tubes

1468516_376724969131752_925434023_n

What happens when you put a few geeks in a room with a curtain rod, 240 Nespresso tubes, some planks, some tape, fairy lights, and a Raspberry Pi? Well, apparently this!

There’s not too much information on how they made it, but there is a pretty extensive gallery of photos. When we consider how much packaging we waste, it’s nice to see some being reused for a project, at least temporarily! The Nespresso tubes are pretty nice looking which certainly lends itself to this project, but our real question is who drank all the coffee…

The LED fairy lights are voice controlled using a Raspberry Pi model B, nothing too fancy, but a nice added affect. Check out the video after the break — the voice commands are in French though!

Continue reading “Inverted Christmas Tree Made Of Nespresso Tubes”