[Amazing Science’s] Simple Electric Train

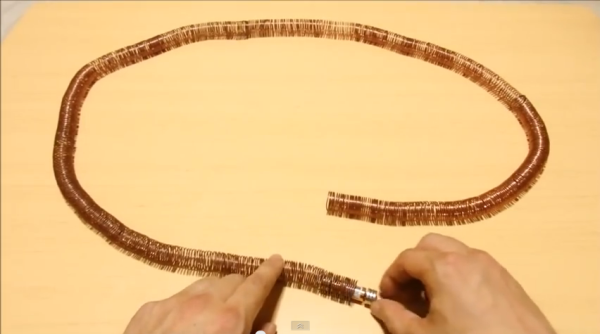
Making an electromagnet is as simple as wrapping some wire around a nail and taping the wire to both ends of a battery. When you’re done, you can pick up some paper clips – it demonstrates the concept well, but it could use some more oomph. [Amazing Science] has done just that, making an “electric train” (YouTube link). All that’s needed is some coiled copper wire, a battery and magnets thin enough to fit through the coils. The magnets snap onto both ends of the battery. Put the battery inside the coil and watch the fun! The electromagnetic force generated by the current moving through the coil pushes against the magnets attached to the battery, pushing the battery along the way.

[Amazing Science] plays with the setup a bit. Connect both ends of the coil together and the battery will travel in a loop until it’s drained. Add a small hill, or even another battery/magnet set to the mix, and watch them go! We may even make a version of this ourselves to take with us to family gatherings this holiday season – it’s simple, fun, and can teach the young ‘uns about science while we swig some egg nog.

[via Reddit]

Continue reading “[Amazing Science’s] Simple Electric Train”

Turn Cordless Tool Batteries Into USB Chargers

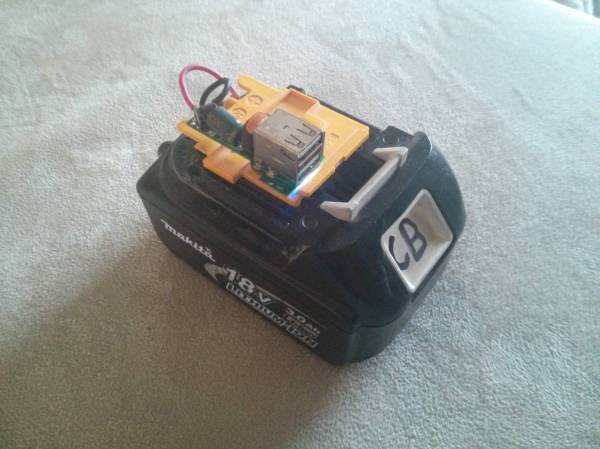
It is the unspoken law of cordless tools – eventually you will have extra batteries lying around from dead tools that are incompatible with your new ones. Some people let them sit in lonesome corners of the garage or basement; others recycle them. [Eggmont] was facing this dilemma with a Makita battery from a broken angle grinder and decided to make a USB charger out of it.

[Eggmont] took the simplistic approach, using an old cigarette lighter-to-USB adapter. First, [Eggmont] removed the battery connector from the bottom of the broken angle grinder. Next, the casing surrounding the cigarette lighter plug was removed so that the adapter’s wires could be soldered to the contacts on the battery connector.  The USB ports were then glued onto the top of the connector. The adapter was rated 9-24V input, so it was fine to use it with the 18V tool battery. Since the battery connector is still removable, the battery can be recharged.

Tool manufacturers are tapping into the market of repurposing old batteries for charging mobile devices. Both DeWalt and Milwaukee Tool have now created their own USB adapters that connect to their batteries. Or, you can purchase the Kickstarter-funded PoweriSite adapter for DeWalt batteries instead. Compared to their cost, [Eggmont’s] project is very economical if you already have the battery at hand – you can find the USB adapter for less than $10 on Amazon.

Tweet Messages From Punch Cards

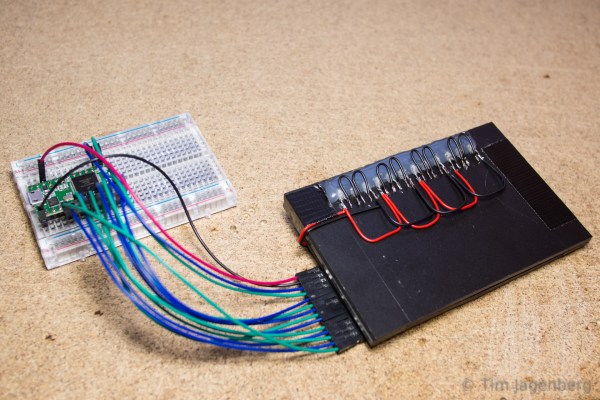
It all started with a conversation about the early days of computing. The next thing he knew, [Tim Jagenberg’s] colleague gave him a stack of punch cards and a challenge.  [Tim] attempted to read them with a mechanical contact and failed.  Undeterred, he decided to make a punch card-to-keyboard interface using optical parts from disassembled HP print stations.  Specifically, he took apart the slotted optical interrupter switches to use their IR-LEDs and photo-transistors. Next, [Tim] drilled holes into two pieces of plastic, gluing the LEDs on one piece of plastic and the photo-transistors on the other. The photo-transistors tell the Teensy 3.1 whenever a hole is detected.

[Tim] developed an interpreter on the Teensy that reads the punch card according to IBM model 029 keypunch codes. The Teensy enumerates as a USB keyboard when connected to a computer. As a punch card is read, the Teensy outputs the decoded characters as key presses.  When a punch card has been completely read, an ‘Enter’ key press is transmitted.  Tweeting the punch cards is no more complicated than typing the text yourself. Naturally, the first message posted on Twitter from the stack of punch cards was “Hello World!”  [Tim’s] binary and source code is available for download on Github.

We’ve enjoyed covering the backstory of the punch card and a previous project reading these cards using a digital camera setup. It’s always interesting to see the clever ways people use current technology and can-do attitude to read data from obsolete systems that would otherwise be lost.  We wonder what is on the rest of those punch cards?  Let’s hope [Tim] has more punch card tweets soon!

Sand Cast Banana For Scale Is So Metal

If you’ve been on Reddit over the past year, you’ve likely encountered the “banana for scale” meme. [BFG121] felt that the size variation of bananas would not do – there needed to be a standard. He decided to make a metal banana out of re-purposed aluminum. He created his own furnace out of everyday objects including a hair dryer, metal bucket, cement, fire clay, and sand. [BFG121] used a typical banana as the reference for his sand casting mold. After melting the aluminum in his homemade furnace, he poured it into the empty mold, making sure there was an extra hole for the displaced air to escape. The end result is a perfect replica of a banana. [BFG121] made two aluminum bananas, and stamped each one with a serial number. One was given to Imgur headquarters while the other was auctioned on eBay. The winning bid (#39) was $67 USD, a very good ROI.

If you want to learn more about metal casting, check out myfordboy’s channel on YouTube.  You can also see an example of the “banana for scale” in this Hackaday article about a giant spirograph. Our only suggestion to [BFG121] is to send some to ASTM, NIST, and BIPM!

[via Reddit]

Hand-Machined Companion Cube Can Be Destroyed And Rebuilt

[Michael Gainer] is a big fan of Portal, and it shows in the Weighted Companion Cube he made. [Michael] hand-machined the many pieces that comprise the Cube’s body and medallions out of 6061 aluminum. Dykem was used to transfer the marks for accurate machining, and the color is powder-coated to a heat tolerance of 400F. A CNC was used to make the distinctive hearts. [Michael] notes the irony was “very Portal” in having them cut by a heartless machine when everything else was done manually. The attention to detail is striking, the level of design more so when [Michael] proceeds to incinerate the poor Companion Cube with a brush burner. In the video shown at the link above, the Cube falls apart as the glue holding it together melts. When all is said and done, just grab more glue to bring that Cube back to its six-sided glory. Repeat to your heart’s content. Huge success! We have to be honest, after seeing all those pieces, we aren’t sure we’d want to do this very often. Companion Cubes have been featured in various iterations on Hackaday before, but they were never built with the idea of repeatedly destroying and rebuilding them. This novel take would make GlaDOS proud.

[Michael] has plans to put an Android device inside it with some light and temperature sensors. He wants to give it a voice resembling Portal’s turrets so it can whine when it needs to be charged or scream when it’s too hot or cold. He dubs this next project the “Overly Attached Weighted Companion Cube.” It wouldn’t be a good idea to incinerate this upcoming version, though we’d probably be inclined to if it demanded so much of our attention!


Test Your Signal With The WiFi Cup

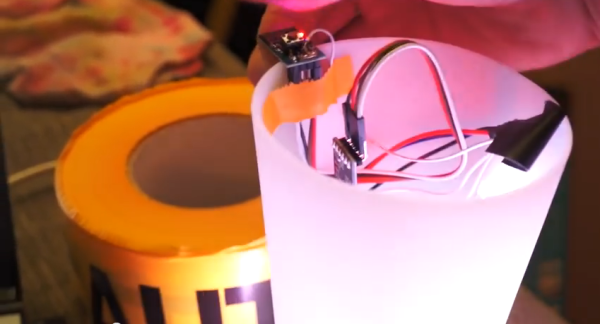
[CNLohr] wanted to test the WiFi range in his house. One look at his roommate’s cup and an unorthodox idea was born. The WiFi Cup used an ESP8266 to connect to his home network. For output, [CNLohr] also added a WS2812 LED strip to the cup. The ESP8266 was programmed to send UDP packets to [CNLohr’s] laptop. When the laptop responded back, the ESP8266 turned on the LEDs, lighting up the cup. The cup’s response to signal strength was very quick – about a second.

[CNLohr] took the WiFi Cup around the house. He was surprised to detect the connection in corners he didn’t expect; in fact, the signal wasn’t weakening at all! He proceeded to walk outside with it, hoping to see the signal strength decrease. As a testament to his roommate’s robust router, the cup merely flickered. Hoping for a better test, [CNLohr] switched out the router for a cheaper TP-Link with shorter antennas. While the initial ping test showed a slower response time, the cup detected WiFi around the house just fine. It only wavered for a couple of moments when it was placed inside a metal bucket. We have to wonder how thin [CNLohr’s] walls are. WiFi never works that well in our house!

Continue reading “Test Your Signal With The WiFi Cup”

Mobile Planter Chases The Sun

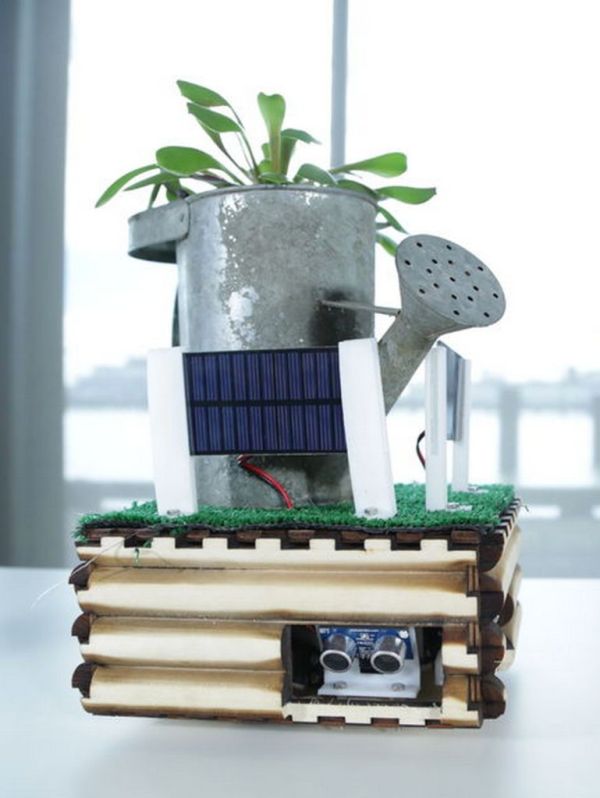
There are two types of people: ones with green thumbs, and ones that kill their cacti  because they forgot to water them for over a year. Sadly, we are of the latter group. We currently have a resilient spider plant that looks like it could use more sun. Now there’s a way for it to catch those rays wherever they may shine, thanks to [Dot Matrix] of Instructables. She made a mobile planter that actively seeks out sunlight.

The planter’s base was made of plywood, topped with fake grass and a watering can to hold the plant. Anything above the planter base can be modified to whatever desired aesthetic. A CRT planter may be too heavy, but there are countless ways to personalize it. [Dot] used an Afinia 3D printer to make various mounts and brackets with ABS plastic. The planter was controlled by an Arduino Micro and used a pair of 0.5W solar panels and Parallax PING))) sensors to decide how it should move from its current position. If the planter would fall or hit an object moving forward, it would reverse and turn on wheels powered by Parallax continuous rotation servos. It would evaluate its new position, repeating the process if it was in danger. Once the planter was safe, it used the solar panels to detect the most sunlight: the sum of the panels determines the area’s brightness while the individual panels’ readings were used to move the planter towards a brighter area. The sun-seeking continued until the sunniest spot was found (defined in the code). Here, the planter remained idle for 10 minutes before restarting the process.

We think [Dot’s] planter is a fun way to keep plants happy and healthy in spite of us. See a video of the planter after the break.

Continue reading “Mobile Planter Chases The Sun”