DeWalt Literal Hack Upgrades Battery

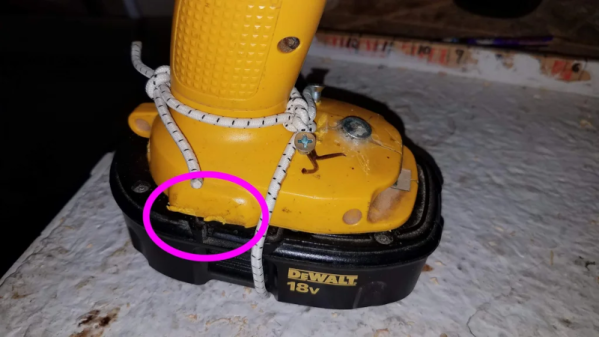
There are several important decisions you make in your life: Coke or Pepsi; vi or emacs; PC or Mac. But, lately, you need to pick a battery ecosystem for your tools. DeWalt? Black & Decker? Or just cheapies from Harbor Freight? But what happens when your vendor of choice changes their batteries? That’s the situation [jleslie48] found when a DeWalt 14.4V battery died. All the new tools require 18V batteries, so buying an old battery for one tool didn’t make sense. Time to literally hack the old tool to accept the new battery.

Presumably, nothing in the drill will mind the higher voltage. It is all a matter of mechanics and nothing a Dremel tool won’t fix. Since the tool was old and the 18V batteries relatively new, [jleslie48] decided to limit modifications to the tool only leaving the batteries intact for use with the newer tools.

The only problem once you remove the pins and clips that interfere with the battery fit, it won’t actually stay on the drill. We might have turned to duct tape or zip ties, but bungee cord works, too, as you can see in the finished product.

Honestly, though, the bungee is good because you can stretch it to remove the battery for charging. We might have just cannibalized the drill for its motor, but next time you have a tool with no battery, it might be worth looking to see if you could modify the tool.

Bungees are great for robots, too. Or, you can lay siege on your neighbors.

Heavy Metal Power Bank Uses Tool Batteries

At one time or another, most of us have seen a gadget for sale and thought we could build something similar for cheaper. Of course, we’re almost always wrong. Not about being able to build it, mind you. But when you add up the cost of the materials, the tool or two you almost inevitably end up buying, and the time spent chasing perfection, you’re lucky if you haven’t doubled the original price.

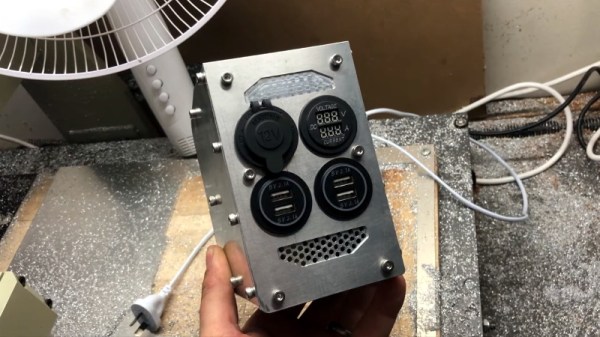
We’re not sure how much money [Taylor Hay] ended up saving by building his own portable power bank. But we do know it’s a gorgeous piece of hardware that’s certainly built far better than the average consumer gadget. The CNC-cut aluminum side panels look like something pulled out of a tank, and while we know some might balk at the 3D printed internal frame, we’re confident you could use this thing as an impromptu step stool without a problem.

Inside there’s 150 watt 240 VAC inverter, complete with a temperature-controlled fan to keep it cool under load. There are also four USB ports providing 2.1 A each, a standard 12 VDC accessory port, and a LED display that shows battery voltage and current being drawn. Rather than come up with his own battery pack, [Taylor] used a 3D printed interface that accepts an 18 V Milwaukee cordless tool battery. Naturally, the design could be adapted to take another brand’s cells if you were so inclined.

Around these parts, we know that a good project doesn’t have to be cheaper or even more practical than what’s already on the market. There’s an inherent value in building something exactly the way you want it that you simply can’t put a monetary price on.

Continue reading “Heavy Metal Power Bank Uses Tool Batteries”

Mobile Power From Cordless Tool Batteries

For years, [Michael Davis] has been using a large lead-acid battery to power the electronic components of his custom Dobsonian telescope; but that doesn’t mean he particularly enjoyed it. The battery was heavy, and you always had to be mindful of the wires connecting it to the scope. Looking to improve on the situation somewhat, he decided to build an adapter for Ryobi cordless tool batteries.

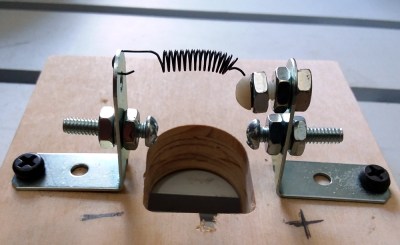
[Michael] had already seen similar 3D printed adapters, but decided to make his the traditional way. Well, sort of. He used a CNC router to cut out the distinctive shape required to accept the 18 V lithium-ion battery pack, but the rest was assembled from hardware store parts.

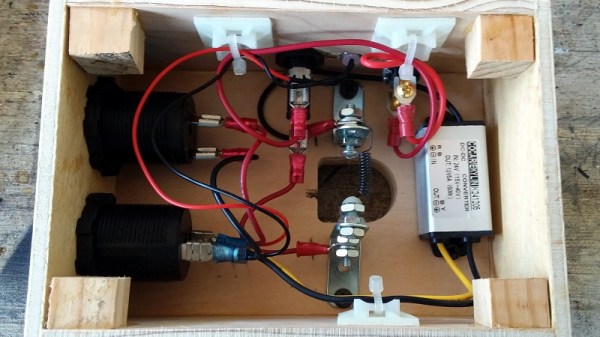
Bent mending plates with nuts and bolts were used to create adjustable contacts, and a spring added to the top ensures that there’s always a bit of tension in the system so it makes a good electrical contact. This setup makes for a very robust connector, and as [Michael] points out, the bolts make a convenient place to attach your wires.

With the logistics of physically connecting to the Ryobi batteries sorted out, the next step was turning that into useful power for the telescope. A stable 12 V is produced by way of a compact DC-DC converter, and a toggle switch and fuse connect it to a pair of automotive-style power sockets. Everything is held inside of a wooden box that’s far smaller and lighter than the lead-acid monster it replaced, meaning it can get mounted directly to the telescope rather than laying on the ground.

If you want to build a similar adapter, the 3D printing route will potentially save you some time and effort. But we have to admit that the heavy-duty connection [Michael] has rigged up here looks quite stout. If you’ve got an application where the battery could be knocked around or vibrated lose, this may be the way to go.

A Custom Saw Designed For Close Quarters Making

It probably goes without saying that we’d all love to have a huge, well-appointed, workshop. But in reality, most of us have to make do with considerably less. When trying to fit tools and equipment into a small space you need to get creative, and if you can figure out a way to squeeze multiple functions out of something, all the better.

Wanting to get as much use out of his space as possible, [Chris Chimienti] decided that his best bet would be to design and build his own folding combination table. Using interchangeable inserts it can switch between being a table saw and a router, and with its extendable arms, also serves as a stand for his miter saw. Of course when not cutting, it makes a handy general purpose work surface.

In the videos after the break, [Chris] takes viewers through the design and construction of what he calls the “Sinister Saw”, which is made somewhat more complicated by the fact that he obviously doesn’t have a table saw to begin with. Cutting out the pieces for the table itself and the panels that would eventually become home to the router and circular saw took some careful work with clamps and saw horses to make sure they were all perfectly square.

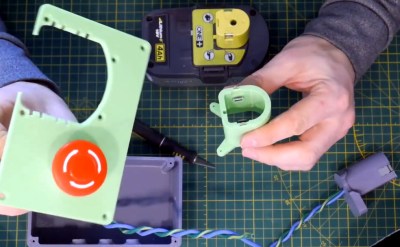
But the wooden components of the Sinister Saw are only half of the story. The table is able to extend by way of an aluminum extrusion frame, and there are numerous 3D printed parts involved for which [Chris] has provided the STL files. We particularly like the box that holds the emergency stop button and relocates the tool’s battery to the front panel, which looks to be an evolution of his previous work in 3D printing cordless tool adapters. We could certainly see this part being useful on other projects that utilize these style of batteries.

In the other extreme, where you want to build your own tools and have plenty of space, you could try making everything out of giant slabs of stone.

Continue reading “A Custom Saw Designed For Close Quarters Making”

The Trouble With Cordless Power Tools

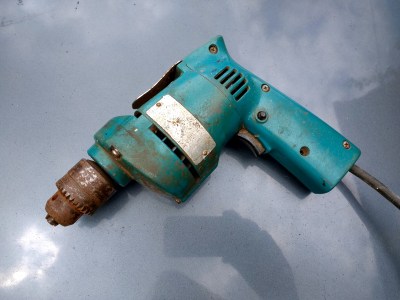
If you grow up around a small engineering business you are likely to gain something of an appreciation for power tools. You’ll see them of all ages, sizes, manufacturers, and technologies. When thinking of the power tools constantly on hand in the workshop of a blacksmith like my dad for instance, I’m instantly seeing a drill and an angle grinder. The drill that most comes to mind is a Makita mains powered hand drill, and given that I remember the day he bought it to replace his clapped-out Wolf in 1976, it has given phenomenal service over four decades and continues to do so.

41 years of hard use, and still going strong.
41 years of hard use, and still going strong…

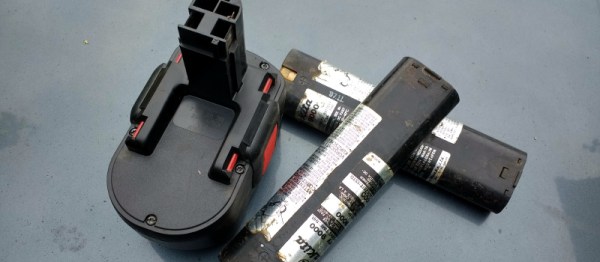
Of course, the Makita isn’t the only drill in his possession. A variety of others of different sizes and speeds have come and gone over the years, and there is always one at hand for any given task. The other one I’d like to single out is I think the most recent acquisition, a Bosch cordless model he bought several years ago. It’s similar in size and capabilities to the Makita save for its bulky battery pack, and it is a comparably decent quality tool.

So, we have two drills, both of similar size, and both of decent quality. One is from the mid 1970s, the other from the end of the last decade. One is a very useful tool able to drill holes all day, the other is little more than a paperweight. The vintage model from the days of flared trousers is a paperweight, you ask? No, the not-very-old Bosch, because its battery pack has lost its capacity. The inevitable degradation due to aged cell chemistry has left it unable to hold enough charge for more than maybe a minute’s use, and what was once a tool you’d be glad to own is now an ornament.

Continue reading “The Trouble With Cordless Power Tools”

Metalworking Hacks Add Functionality To Snap-On Tool Chest

Problem: you’re a student mechanic and you’ve already poured a ton of money into a Snap-On roller cabinet loaded with the tools of the trade, but you still need sensible storage for your cordless tools. Solution: a DIY version of Snap-On’s PowerCab cordless tool station at a fraction of the cost.

rnqvgsoMechanics seem to have a love-hate relationship with Snap-On tools. Some love the brand, others hate it, but the majority seem to hate that they love the tools. It sounds like [GenTQ] reached her limit on brand loyalty when even her 50% student discount wasn’t enough to entice her to add Snap-On’s admittedly very cool KRL1099 cabinet for cordless drivers and chargers. So it was off to Harbor Freight for their seven-drawer side cabinet for less than $200. The cabinet was gutted of drawers, a frame for the new slide-out was welded up, and sheet steel was fabricated into organizer shelves and a new drawer front. A power strip and drag-chain were added to feed the chargers, and the new drawer went off to the powder coater for a matching paint job.

It may not have the Snap-On badge, and purists may cringe at the mixed-marriage with Horror Fright, but we like the results just fine. And she saved something like $1200 in the process. We think Harbor Freight gets a bad rap, deservedly so for some tools, but there are hidden gems amid the dross just ripe for the hacking, as [GenTQ] ably shows.

[via r/DIY]

Recursive Soldering Iron Hacking

We’ve all done it. You’re walking out the door or maybe you’ve even gotten on the road when the question hits, “Did I leave the [coffee pot | stove | hair curler | soldering iron ] on?” [Daniel Johnson’s] problem was even worse. He couldn’t tell if his Hakko-936 soldering iron was off because the LED indicator wasn’t always on. Instead it flashed. He fixed that problem and along the way hacked his battery powered soldering iron since he was out of batteries. Now that’s perseverance.

Hacked Soldering Iron to Hack Soldering Iron
Soldering Iron Hack Recursion

The Hakko’s LED turned on whenever the power turned on to heat the tip. That was about every 5 seconds once the tip was hot. But just as a watched pot never boils, a watched LED never seems to flash. After determining the LED was driven by a comparator he decide to unsolder it as part of his hack. He wisely decided using the Hakko on itself was not a good idea so reached for the battery-powered portable iron, which was sadly battery-free. Undaunted, he wired the portable to a power supply and when 4.5 volts didn’t melt the solder cranked it up to 6 volts.

Back to the Hakko, he replaced the red LED with a RBG LED but used only the red and green leads. The green was tied to the 24v power supply through a hefty 47k ohm resistor, and the red was tied to the comparator. A little masking tape to hold things in place and provide insulation finished the job. Now when the Hakko is on the green LED is lit and the red LED shows the heating cycle. Quite clever.