One easy way to make a very accurate clock is with a WiFi-enabled microcontroller like an ESP32 and a display: set up NTP, and you’ll never be off by more than a minute. This water clock project by [Liebregts] is not like that — there are no electronics to speak of, and if the clock is ever in sync to within a single minute, well, we’d be surprised.
We’re impressed to see it working regardless. Sure, it’s not exactly high-tech; the floating siphon mechanism [Liebregts] is using to get a steady flow out of the main reservoir dates back to 250 BC. On the other hand, since this style of time keeper has been out of fashion since the fall of Rome, [Liebregts] couldn’t just grab something off GitHub or ask ChatGPT to design it for them. This is real human engineering. The reservoir is even scaled to the four-hour timing of [Liebregts] workday — it gets refilled at lunch along with its maker.
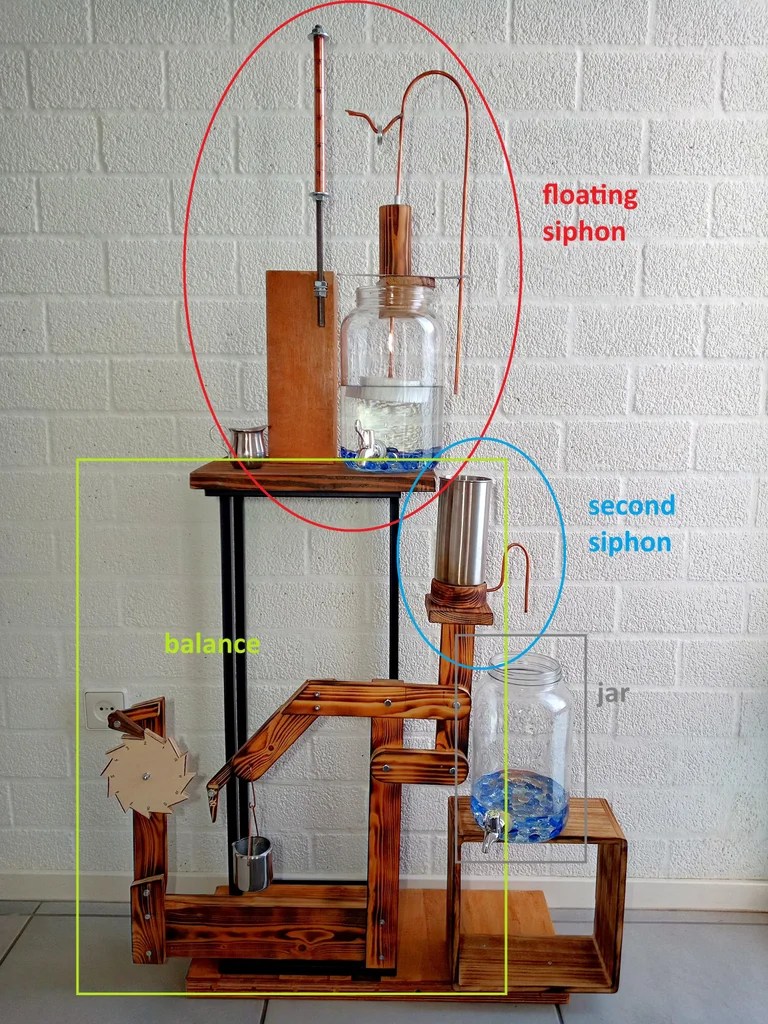
In a clever build detail, the floating siphon tube also holds a pointer to an hour indicator. For minutes, his mechanism seems unique, though it’s related to another ancient trick, the Pythagorean cup. Pythagoras’s devious cup had a hidden siphon that spilled its contents if you filled it beyond a set level, and so does the secondary reservoir of [Liebregts] water clock.
Since the secondary reservoir is linked to a counterweight with a pivot, it goes up and down over the course of approximately 5 minutes — but rather than linking that to another linear indicator, [Liebregts] is using that mechanism to advance a saw-toothed gear that is marked with 5-12 in analog-clock fashion for a touch of modernity. See it in action in the demo video below.
That last part might confuse a time traveler from Ancient Rome or Greece, but they’d instantly recognize this creation as a clock, which many modern observers might not. Still, once they learn to read it you can be sure that [Liebergts]’s friends will never be late to a gladiator fight again — and not just because Constantine banned them in 325 AD. Apparently nobody listened to that ban anyway.
Continue reading “Get To The Games On Time With This Ancient-Style Waterclock”