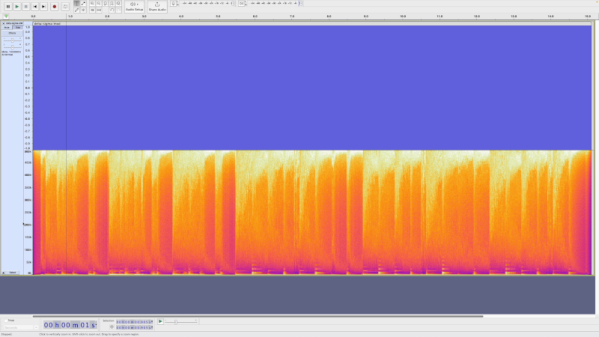
Bill, Steve, And Gary… Computer Pioneers

If you ask your neighbor who Bill Gates or Steve Jobs is, they’d probably know. But mention Gary Kildall, and you are likely to get a blank stare unless you live next door to another Hackaday reader. [Al’s Geek Lab] has a great three-part documentary on Gary Kildall who, in case you didn’t know, was the man behind CP/M, a very influential operating system in the early days of computing and one that set the stage for the PC revolution.

You probably know the folktale that when IBM was looking for an operating system, Bill Gates took the meeting, and Gary Kildall went surfing instead. But like most capsule histories, there is plenty more to the story, and it isn’t as simple as people make it out.

We forget, sometimes, how innovative Digital Research — Kildall’s company — was for the time. We think of CP/M as the venerable CP/M 2.2, which was fine. But there was multitasking CP/M and GEM — a precursor to the graphical user interface found everywhere today. Sure, it looks antiquated now, but it was light years in front of everyone else.

If you watch the whole series, you’ll learn that the IBM story isn’t totally apocryphal, but the truth is much different. Kildall didn’t want the IBM deal, and for what seemed like good reasons at the time. Of course, Gates negotiated a deal with IBM that would build a huge company, so it is easy to look back and say that not taking the deal was a mistake, but we would have probably made the same decision as Kildall at that time.

This isn’t the first time we’ve wondered what a world where CP/M won would have looked like. If you want to look inside CP/M, you can. Of course, it still powers many retrocomputers and even has some surprising clones.

Continue reading “Bill, Steve, And Gary… Computer Pioneers”

Saving A Scope From The Dumpster

If you read Hackaday, you probably get the title of [SunEstra’s] post: A Casual Date with the Dumpster. Many great hacking projects start with finding one man’s trash. This June, [SunEstra] rescued an old Tektronix 2465B oscilloscope, which appeared to be in good shape. Why we never find four-channel 400 MHz scopes in the dumpster is hard to explain, but we are still happy for him, if not a little jealous.

As you might expect, powering up the scope was a disappointment. Relays clicked. Lights flashed. But no display. Adjusting the grid bias on the CRT brought up the display, but it also brought up something else: an error message.

The scope was complaining of “test failure 05-40.” A look through the manual reveals that is “positive level too positive.” Huh. Too much of a good thing, we guess. The test checks the A5 board, so a visual inspection there was the first step.

Unsurprisingly, there were electrolytic capacitors leaking electrolyte. This is, apparently, a well-known problem with this scope. Replacing the electrolytics with some similar tantalum capacitors. In a few cases, the corrosion had eaten pads off the PCB, and some were damaged during the removal. It took a little ingenuity to connect the new parts on the board.

The result? A working scope. Maybe the scope will help repair the next thing that comes out of the dumpster. Sometimes, the best dumpster dives involve intercepting the gear before it hits the dumpster. We keep hoping to run into one of these on the curb (the linked post seems dead, but the video is still there).

Getting Geared Up For Home Powder Coating

[Blondihacks] wanted to do powder coating for a model train without a lot of special equipment. She started with an Eastwood kit that runs about $230. Depending on the options, you can get the gun by itself for between $110 – $170. However, you will need more than just this kit. You can see how [Blondihacks] used the kit in the video below.

The idea behind powder coating is simple: an electrostatic charge attracts a powder — usually some polymer — and makes it stick to an item. Then heat or UV light turns the powder into a hard finish much tougher than paint. Powder coating can be thicker than paint and doesn’t run, either.

The gun requires a small air compressor, and you need an electric oven, which could be a toaster oven. It probably shouldn’t be an oven you plan to use for food. It should also be in a well-ventilated area, plus you’ll want a respirator or dust mask. [Blondhacks] used a portable paint booth so as not to spew powder everywhere, which looked nice, although you could just use a big cardboard box. A custom jig to hang the parts while spraying, and she was ready to go.

If you are on a budget, by the way, you can get a kit from Harbor Freight for a bit less. It probably has fewer accessories, and we don’t know how it compares, but it is an option for much less money. Either way, you need a small air pressure regulator, and you also need a dryer and a filter for the air because you need dry and clean air so as not to contaminate the powder.

The part is grounded, and the gun charges the powder as it sprays. Once coated, you stick the part in the oven for about 20 minutes. The results look good and, compared to a painted part, the coating was super tough. For intricate parts, you can heat the part and then dip it in fluid-like powder. If you prefer to stick to regular powder coating, we have some tips.

Continue reading “Getting Geared Up For Home Powder Coating”

That’s Not A Junker… That’s My Generator

If you live somewhere prone to power outages, you might have thought about buying a generator. The problem is that small generators are cheap but — well — small. Big generators are expensive. [Jake von Slatt] had an idea. He has a “yard car” which we thought might be a junk car but, instead, it is an old car he uses to drive around his yard doing tasks. It has a winch and a welder. Now it has a big generator, too. You can follow the project in the three videos found below.

The project started with a scrap generator with a blown motor. Of course, the car has a motor so — in theory — pretty simple. Remove the generator from the motor and graft it to the car’s motor. But the details are what will kill you.

Continue reading “That’s Not A Junker… That’s My Generator”

Ham Radio Mini Beam

Years ago, ham radio operators more often than not had land, and usually there weren’t any restrictions on what kind of antenna they could erect on that land. These days you are more likely to live with less or no land, and even if you do own property, you might have restrictions that prevent you from putting up any kind of visible antenna.

But even if that’s not the case, you might not have room for an old-fashioned “tri-bander” or “cubical quad” that the hams of old preferred. [Waters & Stanton] has a 65-year-old design for a miniature beam that he explains, and it produces a good beam antenna in a reduced amount of space. You can watch a video about the antenna below.

The design uses a doublet — a dipole fed with a balanced line and tuned at the feed point. A 22-foot doublet can cover 20 meters down to 10 meters without traps. Adding a director and reflector element provides directionality and gain. A unique arrangement allowed a 12-foot boom to support multiple elements on some bands by introducing a central coil on some elements. For example, the director is tuned to 15 meters using a center coil. But the coil is shorted with a 10 meter quarter stub that acts as a short on that band. You can see a complete explanation in the video.

We were hoping to see a build and some on-the-air testing, but, apparently, that is left as an exercise for the viewer. We imagine that 65 years ago, you’d use a grid dip oscillator to tune the stubs. Today, an antenna analyzer would do the job easily.

Continue reading “Ham Radio Mini Beam”

Aluminum Battery Is Sustainable

If you think of metals in a battery, you probably think of lithium, mercury, lead, nickel, and cadmium. But researchers in Australia and China want you to think about aluminum. Unlike most battery metals, aluminum is abundant and not difficult to dispose of later.

Their battery design uses water-based electrolytes and is air-stable. It is also flame retardant. The battery can provide 1.25V at a capacity of 110 mAh/g over 800 charge cycles. The idea of using aluminum in a battery isn’t new. Aluminum is potentially more efficient since each aluminum ion is equivalent to three lithium ions. The batteries, in theory, have higher energy density compared to lithium-ion, but suffer from short shelf life and, so far, practical devices aren’t that close to the theoretical limits of the technology.

Continue reading “Aluminum Battery Is Sustainable”

Cold Metal Fusion For 3D Printing

When you see the term cold fusion, you probably think about energy generation, but the Cold Metal Fusion Alliance is an industry group all about 3D printing metal using Selective Laser Sintering (SLS) printers. The technology promoted by Headmade Materials typically involves using a mix of metal and plastic powder. The resulting part is tougher than you might expect, allowing you to perform mechanical operations on it before it is oven-sintered to remove the plastic.

The key appears to be the patented powder, where each metal particle has a thin polymer coating. The low temperature of the laser in the SLS machine melts the polymer, binding the metal particles together. After printing, a chemical debinding system prepares the part — which takes twelve hours. Then, you need another twelve hours in the oven to get the actual metal part.

You might wonder why we are interested in this. After all, SLS printers are unusual — but not unheard of — in home labs. But we were looking at the latest offerings from Nexa3D and realized that the lasers in their low-end machines are not far from the lasers we have in our shops today. The QLS230, for example, operates at 30 watts. There’s plenty of people reading this that have cutters in that range or beyond out in the garage or basement.

We aren’t sure what a hobby setup would look like for the debinding and the oven steps, but it can’t be that hard. Maybe it is time to look at homebrew SLS printers again. Of course, the powder isn’t cheap and is probably hard to replace. We saw a 20 kg tub of it for the low price of €5,000. On the other hand, that’s a lot of powder, and it looks like whatever doesn’t go into your part can be reused so the price isn’t as bad as it sounds. We’d love to see someone get some of this and try it with a hacked printer.

We have seen homebrew SLS printers. There’s also OpenSLS that, coincidentally, uses a laser cutter. It wouldn’t be cheap or easy, but being able to turn out metal parts in your garage would be quite the payoff. Be sure to keep us posted on your progress.