We don’t indulge too often in looking back, but [Chloe Albanesisu] at PC Magazine did and wrote the tech obituary for all the tech gadgets and services that died over this past year. Some of the entries are a bit predictable: Twitter died to be replaced by X, which is exactly like it, only different. Others we hardly noticed, like Netflix stopping its DVD shipments.
Google Glass died again, but this time it was the enterprise edition. Amazon gave up on both donating money through shopping and print subscriptions via Kindle.
Glass wasn’t the only Google casualty. Gmail lost its basic HTML version and shut down its smart whiteboard product, Jamboard. They also sold off their Internet domain business in an effort to focus on core businesses. Other notable Google shutdowns include their popular podcast app and Usenet support for Groups. Oh, and don’t forget their experiment in offering Pixels phones as a subscription. That’s done, too.
As you might expect, PC Magazine’s list is a bit consumer-oriented. What hacker-centric products and services vanished this year that you’ll miss? The Sculpteo Marketplace? XYZ Printing? Start up companies collapsed in 2023 at an alarming rate, but you didn’t hear about most of them. Were there any you were especially disappointed about? Let us know in the comments.
How many plastic spoons, knives, and forks do you think we throw away daily? [Stefan] noted that the compostable type is made from PLA, so why shouldn’t you be able to recycle it into 3D printing stock? How did it work? Check it out in the video below.
[Stefan] already has a nice setup for extruding filament. However, unsurprisingly, it won’t accept spoons and forks directly. A blender didn’t help, so he used an industrial plastic shredder. It reduced the utensils to what looked like coarse dust, which he then dried out. After running it through the extruder, the resulting filament was thin and brittle. [Stefan] speculates the plastic was set up for injection molding, but it at least showed the concept had merit.
In a second attempt, he cut the ground-up utensils with fresh PLA in equal measures. That is, 50% of the mix was recycled, and half was not. That made much more usable filament. So did a different brand of compostable plasticware.
The real test was to take dirty plasticware. This time, he soaked utensils in tomato sauce overnight. He cleaned, dried, and shredded the plastic. This time, he used 20% new PLA and some pigment, as well. We aren’t sure this is worth the effort simply on economics, but if you are committed to recycling, this might be worth your while.
There is a big difference between building one of something and building, say, 100 of the same item. It isn’t surprising, then, that 3D printing in bulk differs from printing one object at a time. Of course, filling up your build plate is not a new idea. But [Keep Making] wants to encourage you to think in three dimensions and fill up your build volume in the Z axis, as well.
When you fill your X and Y axes, it is easy to see how the parts separate. But with stack printing, you must separate the parts from different layers. Each part has a single-layer gap, and the top surfaces are ironed for a better finish. Sometimes the prints may stick, and the video shows how to use a screw to pop off recalcitrant prints. The technique produces one side that isn’t as nice a finish as the other side, but it isn’t bad, and for many applications, you don’t care, anyway.
Before you get too excited about your own designs, you might try a simple test file and get your print settings dialed in. Obviously, if you need just two or three copies of something small, it is easier to step and repeat them across the build surface. But if you need to maximize your throughput or make multiple copies of large objects, this might be the technique for you.
Like all Hackaday readers, we pride ourselves on having at least a passing acquaintance with how most things work. But we suspect to a lot of people, things we take for granted — computers, air conditioning, motors, and cell phones — are just black magic. That’s how we feel about sewing machines. Sure, there’s a motor. There’s a needle and some thread. But how does the machine make a stitch? We always wondered, but after watching a recent video from [Veritasium] we can at least claim we have an idea.
First, he shows the intrinsic problem: sewing by hand requires you to reverse the direction of the needle, and it isn’t clear how to make a simple machine to do that. Sure, today you could probably make a robot that sews like a human does, but sewing machines have been around for a very long time.
In addition to showing how a chain stitch and lock stitch work, the video shows the history of the machines, including 50,000-year-old needles and the progression of innovations required to get to the modern sewing machine. In addition, he shows a large model sewing machine to clearly explain the concepts.
You might think you don’t care about sewing, but machine sewing has touched nearly everyone. The video says that in 1900, a family might spend 15% of their income on clothes. In 2003, that number drops to under 4%, yet the family will have many more clothes than they did in 1900. This is possible because of machine sewing and other innovations.
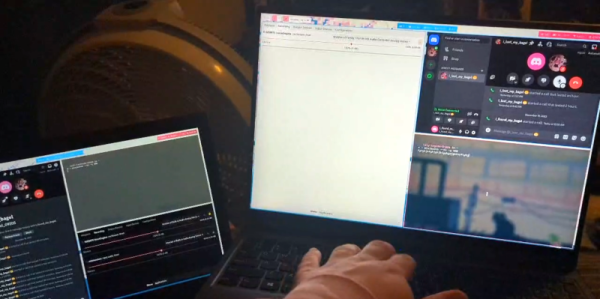
Some hacks are useful and some are just… well… for the fun of it, and we can appreciate that. Take, for example, [Cool Blog’s] recent experiments with dialup networking. If you think about it, the BBS systems of yesterday have been replaced with more modern tools like Discord. So why not run modems using audio chat over Discord and get the best of both worlds?
This was both easier and harder than we would have expected. The first hurdle was the lack of any actual modems. Luckily, there are software modem emulators like minimodem that makes a PC soundcard work like a modem. It supports some basic protocols, and that’s probably a good thing since the digital audio channel is probably unable to support anything too sophisticated.
Using some crude audio routing 300 baud data did flow. Increasing the baud rate all the way to 2,100 worked reliably. Combining some more sophisticated audio flows and managing sockets with systemd made the process easier. The goal was to, eventually, telnet over the link but that never worked. We would guess that it could work if you spent enough time.
But the proof is in the pudding, and the basic idea works. Why do it? We can’t think of a good reason. But if you want to give it a shot, you can find what you need on GitHub.
Hams still use modems. While we tend to have a soft spot for retrocomputing gear, we don’t miss acoustic couplers at all.
If you really want to look at how much something costs, you need to look at total cost of ownership, not just the sticker price. Same goes for things like pollution and carbon footprint. A vehicle, for example, might have a low carbon footprint in operation but require more carbon in the manufacturing or disposal processes. Researchers have noted that FPGA accelerators get replaced and may wind up as e-waste in as little as two years. They propose REFRESH, an architecture that recycles old FPGAs into new ones by joining multiple FPGA dice with a simple interposer to coordinate the work.
The idea is not as radical as it might first seem. Many modern chips use chiplets anyway, so this is a reasonable extension of that idea. You simply need a way to harvest the old devices.
Will Rogers once said that veterinarians are the best doctors because their patients can’t tell them where it hurts. I’ve often thought that electronic people have a similar problem. In many cases, what’s wrong with our circuits isn’t visible. Sure, you can visually identify a backward diode, a bad solder joint, or a blown fuse. But you can’t look at a battery and see that it is dead or that a clock signal isn’t reaching some voltage. There are lots of ways to look at what’s really going on, but there is no substitute for a scope. It used to be hard for the average person to own a scope, but these days, it doesn’t require much. If you aren’t shopping for the best tech or you are willing to use it with a PC, oscilloscopes are quite affordable. If you spend even a little, you can now get scopes that are surprisingly capable with features undreamed of in years past. For example, many modern scopes have a dizzying array of triggering options. Do you need them? What do they do? Let’s find out.
I’ll be using a relatively new Rigol DHO924S, but none of the triggering modes are unique to that instrument. Sometimes, they have different names, and, of course, their setup might look different than my pictures, but you should be able to figure it out.
What is Triggering?
In simple terms, an oscilloscope plots time across the X-axis and voltage vertically on the Y-axis. So you can look at two peaks, for example, and measure the distance between them to understand how far apart they are in time. If the signal you are measuring happens repeatedly — like a square or sine wave, for example — it hardly matters which set of peaks you look at. After all, they are all the same for practical purposes.
Pretty square waves all in a row. Channel 2 is 180 degrees out of phase (inverted). But is that all there is?
The problem occurs when you want to see something relative to a particular event. Basic scopes often have level triggering. They “start” when the input voltage goes above or below a certain value. Suppose you are looking at a square wave that goes from 0 V to 5 V. You could trigger at about 2.5 V, and the scope will never start in the middle of a cycle.
Digital scopes tend to capture data before and after the trigger, so the center of the screen will be right on an edge, and you’ll be able to see the square waves on either side. The picture shows two square waves on the screen with the trigger point marked with a T in the top center of the display. You can see the level in the top bar and also marked with a T on the right side of the screen.
What happens if there are no pulses on the trigger source channel? That depends. If you are in auto mode, the scope will eventually get impatient and trigger at random. This lets you see what’s going on, but there’s no reference. If you are in normal mode, though, the scope will either show nothing or show the last thing it displayed. Either way, the green text near the top left corner will read WAIT until the trigger event occurs. Then it will say T’D.