The 3D Printed Computer Space Takes Shape

A few weeks ago we brought you news of a project to recreate the flowing lines of the first computerised arcade game, Computer Space, as a full-size 3D printed replica. We left the project with all the parts put together to make a complete but unfinished shell that was very recognizable as a Computer Space cabinet but had neither finishing nor internals. Now we’re very pleased to bring you the conclusion of the project, as it moves from unfinished 3D print to playable cabinet.

The video below the break is a journey of print finishing to a very high standard with that lustrous blue glitter resin, but oddly it’s most interesting to find out about the manufacturing quirks of the original. How the rear door was imprecisely cut from plywood and fixed on with gate hinges, how the ventilation holes differ from cabinet to cabinet, and how the collection vessel for those quarters was an old tin. The monitor is a newer broadcast CRT in this version and the electronics are naturally  modern, but if you didn’t know, you’d be hard pressed to spot that you weren’t playing the real thing.

Finally we see the gameplay which is admittedly frustrating, and a little bit of punditry as to why this wasn’t the commercial success of the following Pong. It’s a fascinating look at the early computer game industry.

Have a look at our coverage of the first episode of this project.

Continue reading “The 3D Printed Computer Space Takes Shape”

Fully 3D Printed Case Is Stacked High With Mini PCs

Over the years we’ve seen no shortage of 3D printed cases designed to hold several Raspberry Pi computers, often with the intent to use them as convenient desktop-sized platforms for experimenting with concepts such as server load balancing and redundancy.

The reason the Pi was always the star of the show is simple enough to explain: they were small and cheap. But while the Pi has only gotten more expensive over the years, x86 machines have gotten smaller and cheaper. Which is how a project like the N100 Obelisk was born.

Continue reading “Fully 3D Printed Case Is Stacked High With Mini PCs”

3D Printed Fidget Knife Snaps Back And Forth All Day Long

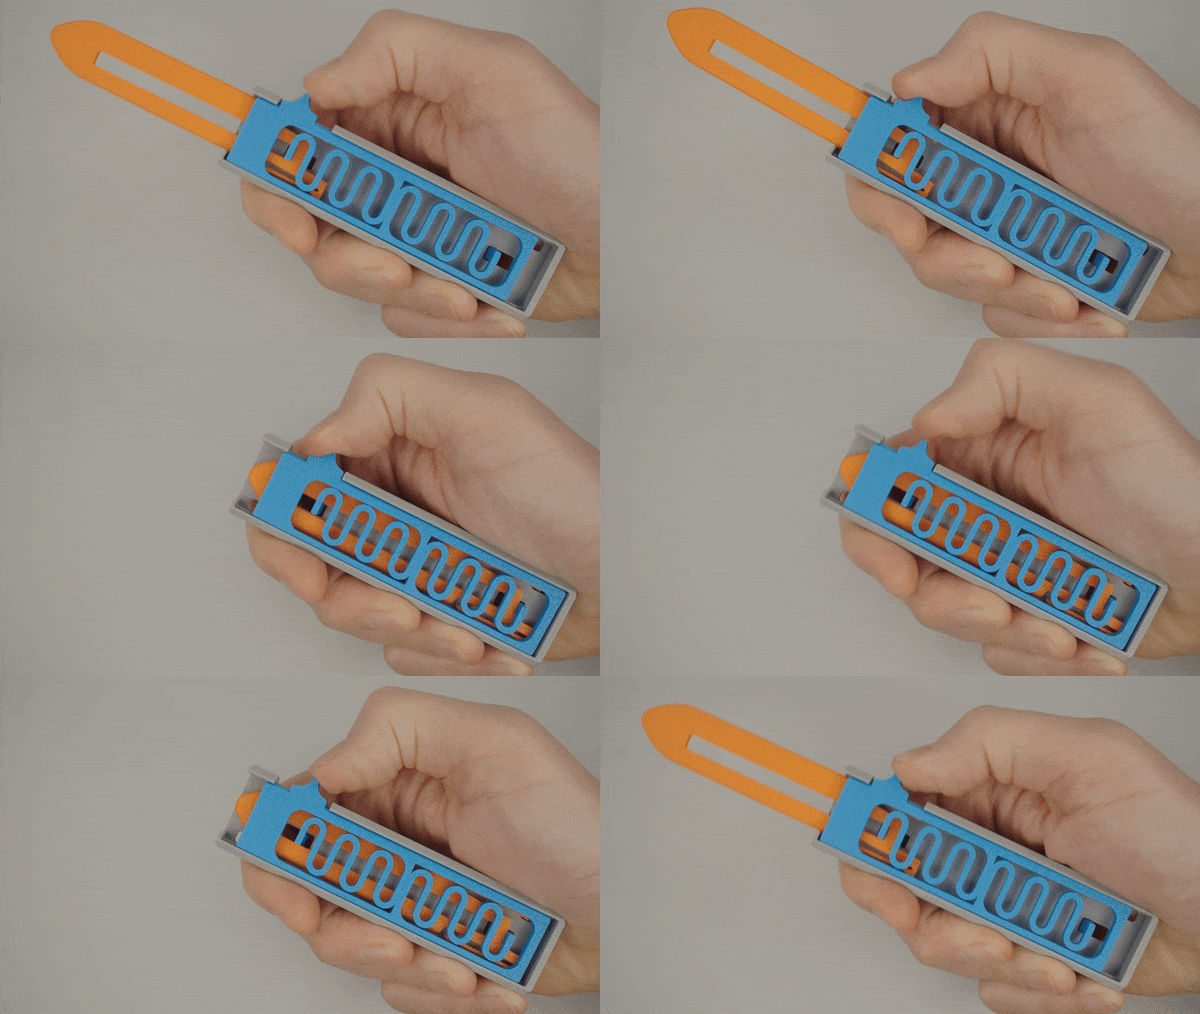
Fidget toys all have a satisfying mechanical action to engage with, and [uhltimate]’s OTF (out the front) “fidget knife” model provides that in spades. The model snaps open and closed thanks to a clever arrangement of springs and latches contained in only three printed pieces.

Here’s how it works: at rest, the mock blade (orange in the image above) is latched in the closed position. As one presses the slider forward, the bottom spring begins to pull up against the blade until it moves far enough to release the latch. When the latch is released, the tension built up in the spring propels the blade outward where it again latches in the open position. Retraction is the same essential process, just in the opposite direction (and using a latch on the opposite side of the blade, which faces the other direction.)

As you may imagine, effective operation depends on the material. The model is designed to be printed in PLA, but [uhltimate] also provides a part variation with a stiffer spring for those who find that basic model isn’t quite up to the task for whatever reason. Smooth surfaces are also helpful for hitch-free operation, but lubrication shouldn’t be necessary.

If this sort of thing is up your alley, don’t miss the satisfying snap action of this 3D printed toggle mechanism, either!

Continue reading “3D Printed Fidget Knife Snaps Back And Forth All Day Long”

3D Printing In Custom PLA With A TPU Core

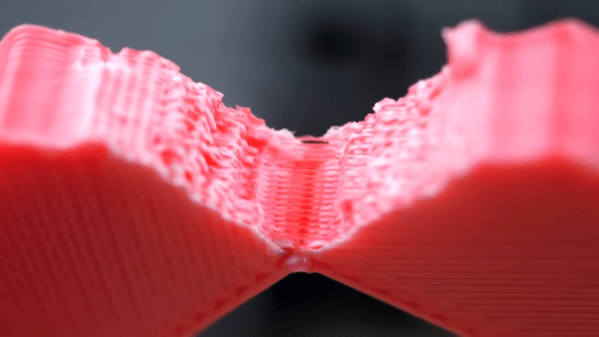
[Stefan] from CNC Kitchen explored an unusual approach to a multi-material print by making custom PLA filament with a TPU core to make it super-tough. TPU is a flexible filament whereas PLA is hard almost to the point of being brittle. The combo results in a filament with some unusual properties, inviting some thoughts about what else is possible.

Cross-section of 3D print using white PLA with a red TPU core.

[Stefan]’s video covers a few different filament experiments, but if you’d like to see the TPU-PLA composite you can skip ahead to 18:15. He first creates the composite filament by printing an oversized version on a 3D printer, then re-forming it by running it through a Recreator to resize it down to 1.75 mm.

We have seen this technique of printing custom filaments before, which is useful to create DIY multi-color filaments in small quantities right on a 3D printer’s print bed with no special equipment required. This is an effective method but results in filament with a hexagonal profile, which works but isn’t really ideal. By printing his custom composite at 4 mm diameter then resizing the filament down to 1.75 mm, [Stefan] was able to improve overall printability.

That being said, TPU and PLA have very different characteristics and don’t like to adhere to one another so the process was pretty fiddly. TPU-cored PLA might be troublesome and uncooperative to make, but it can be done with some patience and fairly simple equipment.

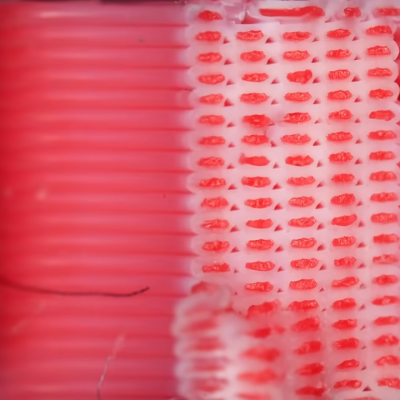
Despite the difficulties, test prints were pretty interesting. PLA toughness was roughly doubled and under magnification one can see a lattice of TPU strands throughout the prints which are unlike anything else. Check it out in the video, embedded below.

Continue reading “3D Printing In Custom PLA With A TPU Core”

A Vernier Take On A 3D Printer Extruder Indicator

A common way to visualize that a 3D printer’s extruder motor — which feeds the filament into the hot end — is moving is to attach a small indicator to the exposed end of the motor’s shaft. As the shaft turns, so does the attached indicator.

Small movements of the motor are therefore turned into larger movements of something else. So far, so simple. But what about visualizing very small extrusions, such as those tiny ones made during ironing?

[Jack]’s solution is a Vernier indicator for the extruder. Even the smallest movements of the extruder motor’s shaft are made clearly visible by such a device, as shown in the header image above. Vernier scales are more commonly found on measurement tools, and the concept is somewhat loosely borrowed here.

The usual way these lightweight indicators are attached is with a small magnet, and you can read all about them and see examples here.

This new design is basically the same, it simply has a background in a contrasting color added into the mix. [Jack]’s design is intended for the Bambu A1 printer, but the idea can be easily adapted. Give it a look if you find yourself yearning for a bit more visibility in your extruder movements.

Hackaday Podcast Episode 269: 3D Printed Flexure Whegs, El Cheapo Bullet Time, And A DIY Cell Phone Sniffer

This week, it was Kristina’s turn in the hot seat with Editor-in-Chief Elliot Williams. First up in the news — the results are in for the 2024 Home Sweet Home Automation contest! First and second place went to some really gnarly, well-documented hacks, and third went to the cutest pill-dispensing robot you’ll probably see before you hit the retirement home. Which was your favorite? Let us know in the comments.

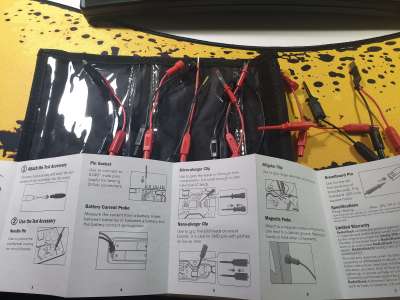
A collection of multimeter probe extenders from Radio Shack.
Kristina’s lil’ wallet of extender probes, courtesy of Radio Shack.

Then it’s on to What’s That Sound. Kristina failed once again, but you will probably fare differently. Can you get it? Can you figure it out? Can you guess what’s making that sound? If you can, and your number comes up, you get a special Hackaday Podcast t-shirt.

Then it’s on to the hacks, beginning with a DIY cell phone sniffer and a pen that changed the world. Then we talk bullet time on a budget, the beautiful marriage of 3D printing and LEGO, and, oh yes, flexure whegs. Finally, we get the lowdown on extender probes, and posit why it’s hard to set up time zones on the Moon, relatively speaking.

Check out the links below if you want to follow along, and as always, tell us what you think about this episode in the comments!

Download and savor at your leisure.

Continue reading “Hackaday Podcast Episode 269: 3D Printed Flexure Whegs, El Cheapo Bullet Time, And A DIY Cell Phone Sniffer”

3D Printed Wheels Passively Transform To Climb Obstacles

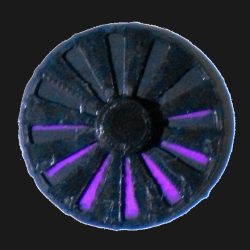
Wheels do a great job at rolling over all kinds of terrain, particularly if you pair them with compliant tires. However, they’re not perfect, and can get stumbled by things like large vertical steps. Enter the PaTS-Wheel — a compliant mechanism that can tackle such obstacles with ease.

The PaTS-Wheel takes advantage of printable flexural hinges. Under regular conditions, it exists as a simple round wheel. However, when presented with a step obstacle, its individual segments can bend and flex to grab on to the step and hoist the vehicle up. It all happens passively as a result of the wheel’s structure, no actuators or control system are needed to achieve this action.

The video below does a great job of explaining the concept in raw engineering terms, as well as showing it in action. If you really want to drill down though, dive into the research paper. The design outperformed smooth wheels and whegs in climbing ability, and was able to match smooth wheels in simple tests of flat ground power consumption. The results are very impressive.

We’ve seen other transforming wheels before, like these wheg-like constructions, but nothing so passive and elegant as these. Video after the break.

Continue reading “3D Printed Wheels Passively Transform To Climb Obstacles”