When you think of air conditioners, you tend to think of rather bulky units, with the window-mounted appliances probably among the most compact. There’s however no real minimum size limit to these AC units, as long as you can get an appropriate compressor. If you also manage to pick up a small, DC-powered compressor like [Hyperspace Pirate] did, then you might be tempted to make a hand-portable, battery-powered AC unit.
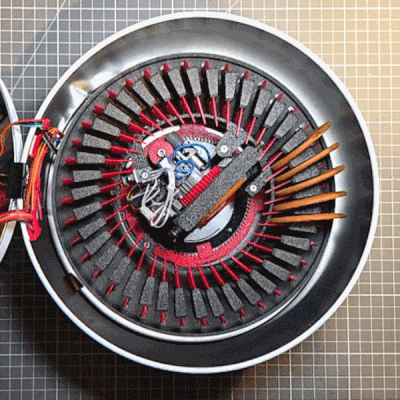
At their core vapor-compression AC units are very simple, featuring the aforementioned compressor, a condensing coil, expansion valve and the evaporator coil. Or in other words, some radiators looted out of other devices, various plumbing supplies and the refrigerant gas to charge the AC unit with.
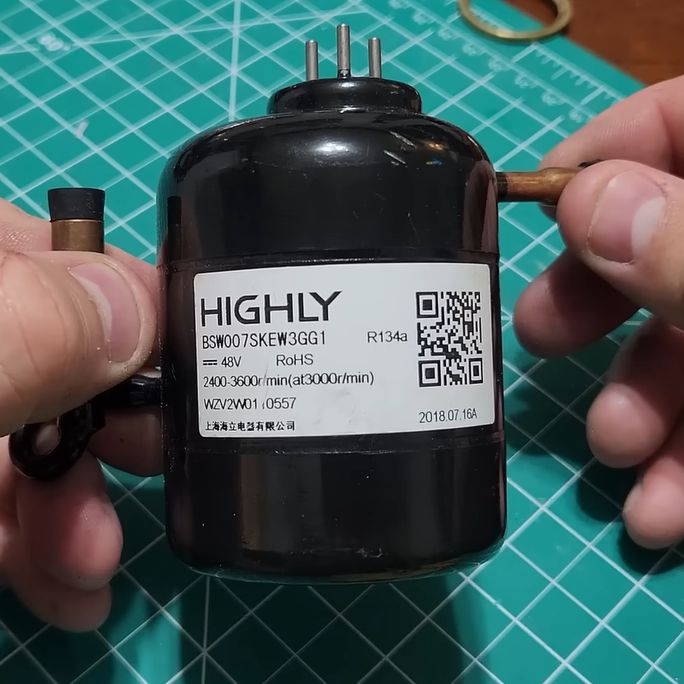
Since the compressor uses a BLDC motor, it has three terminals that a typical ESC connects to, along with two 2200 mAh Li-on battery packs that can keep the portable AC unit running for a while.
As for the refrigerant gas, although the compressor lists R134a, this is both quite expensive and illegal in parts of the world like the EU. Alternatives are butane (R600) as well as isobutane (R600a), but due to unfortunate circumstances the use of propane (R290) was forced. Fortunately this worked fine, and after some testing and running of numbers it was found that it had about 42 Watt cooling power, with a coefficient of performance (COP) of around 1.
Considering that most AC units have a COP of 3.5 – 5, this shows that there’s still some room for increased efficiency, but at the very least this portable, battery-powered AC unit provides cold air on one side, and hot air on the other while completely blowing Peltier thermocouples out of the water in terms of efficiency.
Continue reading “Mini Battery-Powered Vapor-Compression Air Conditioner”