Hackaday Podcast 153: A 555 Teardown To Die For, Tetrabyte Is Not A Typo, DIY Injection Molding, And Using All The Parts Of The Trash Printer

Join Hackaday Editor-in-Chief Elliot Williams and Managing Editor Tom Nardi on another whirlwind tour of the week’s top stories, hacks, and projects. We start off with some breaking Linux security news, and then marvel over impeccably designed pieces of hardware ranging from a thrifty Z table for the K40 laser cutter to a powerful homebrew injection molding rig. The finer technical points of a USB device that only stores 4 bytes at a time will be discussed, and after taking an interactive tour through the internals of the 555 timer, we come away even more impressed by the iconic 50 year old chip. We’ll wrap things up by speculating wildly about all the bad things that can happen to floating solar panels, and then recite some poetry that you can compile into a functional computer program should you feel so inclined.

Take a look at the links below if you want to follow along, and as always, tell us what you think about this episode in the comments!

Direct Download (58 MB)

Continue reading “Hackaday Podcast 153: A 555 Teardown To Die For, Tetrabyte Is Not A Typo, DIY Injection Molding, And Using All The Parts Of The Trash Printer”

injecto doing it's thing

Tiny Homemade Injection Molder

With 3D printing continually gaining ground, some hackers might not see the need for traditional injection molding. After all, you can tweak the code or the model and print dozens of different iterations with fairly minimal lead time. Things get trickier when you need to print hundreds or thousands of the same thing and that ten-hour print time adds up quickly. [Actionbox] built a tiny injection molder they dubbed INJEKTO to speed up their manufacturing.

The design was optimized to be accessible as it is held together with brackets and cheap aluminum flat stock. The hardest part to source is the heating chamber, as it is a piece of turned aluminum. A PID controller keeps the temperature relatively stable and heats the plastic pellets you can dump in the top. Next, you’ll need an external air compressor to power the dual 2″ pneumatic pistons. The pistons push the plastic out of the spring-loaded extruder nozzle. [Actionbox] is already planning on a second version with 4″ pistons that provide significantly more force to extrude larger amounts of plastic as the current version tops out at about 27 grams.

Injection molding still needs a heavy-duty mold to inject into, which can be hard to machine. So until we can 3D print an injection mold, this multi-head 3D printer is something in between a 3D printer and an injection molder, as it can print a dozen of the same thing, speeding up that print time.

Continue reading “Tiny Homemade Injection Molder”

Injection Molding Silicone Parts For Under $50

You’ve likely seen many tutorials on making silicone parts using 3D printed molds online. The vast majority of these methods use a simple pour method to fill the mold. This relies on careful degassing and gentle pouring to reduce the presence of bubbles in the final result. [Jan Mrázek] has been working on an alternative method however, that allows for injection molding at low cost in the home shop.

The process relies on the use of printed resin molds. [Jan] notes that this generally necessitates the use of condensation-cure silicones, as additive types don’t cure well in resin molds. The condensation silicone is mixed up, degassed, and poured into a standard cartridge. From there, it’s installed in a silicone delivery air gun, which uses compressed air to force the silicone out of the nozzle and into the waiting mold.

It’s basically using a bunch of home DIY gear to create a cheap injection molding solution for silicone parts. [Jan] notes that there are a few mods needed to mold design to suit the process, and that 400-800 kPa is a good pressure to inject the silicone at.

Having the silicone injected under pressure is great for complex mold designs, as it forces the material into all the little difficult nooks and crannies. Of course, we’ve seen other methods for making silicone parts before, too. Be sure to sound off in the comments with your own favored techniques for producing quality silicone parts. Video after the break.

Continue reading “Injection Molding Silicone Parts For Under $50”

Hackaday Podcast 128: 3D-Printing Injection Molds, Squiggly Audio Tape, Curvy Mirrors, And Space Cadets

Hackaday editors Elliot Williams and Mike Szczys bubble sort the best hardware hacks so you don’t miss ’em. This week we’re smitten by the perfection of a telephone tape loop message announcer. We enjoyed seeing Blender’s ray tracing to design mirrors, and a webcam and computer monitor to stand in for triple-projector-based fractal fun. There’s a bit of injection molding, some Nintendo Switch disassembling, and the Internet on a calculator. We close the show with a pair of Space stories, including the happy news this week that Wally Funk finally made it there!

Take a look at the links below if you want to follow along, and as always, tell us what you think about this episode in the comments!

Direct download (60 MB or so.)

Places to follow Hackaday podcasts:

Continue reading “Hackaday Podcast 128: 3D-Printing Injection Molds, Squiggly Audio Tape, Curvy Mirrors, And Space Cadets”

Injection Molds From Your 3D Printer

Last time we checked in with [CrafsMan] he had bought a benchtop injection molding machine. This time, he shows off how to 3D print molds. If you have ever had to spend to make tooling for injection molding, you’ll appreciate being able to make molds relatively inexpensively.

To test his workflow, [CrafsMan] created a little 3D figurine and brought it into TinkerCad. From there he created a mold and used Lychee Slicer to print it using resin.

Continue reading “Injection Molds From Your 3D Printer”

DIY Injection Molding Press

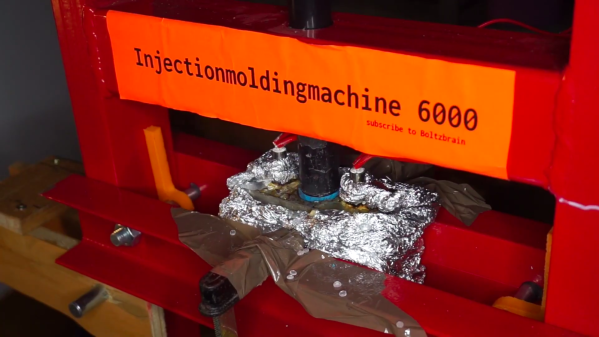
While 3D printing has now become easily accessible and cheap, there are still several use cases where you need the advantages offered by injection molding, even for small batch runs. Professional small-batch injection molding can be pretty expensive, and buying a manual machine can cost quite a bit. Of course, there are a number of DIY injection molding projects to choose from, but they usually involve a fair amount of tools and labour. [Bolzbrain] wanted to bypass all of the heavy cutting, welding and frame assembly work, so he’s built himself a DIY Injection Molding Press for cheap using an off the shelf, six ton hydraulic press. At final count, he ended up spending about €150 for the machine and another €120 for tools to build the machine. He also managed to locate a cheap, local CNC service that gave him a good deal on machining the Dies. But of course you can’t put a price on the lessons learnt and the satisfaction of having built it by hand.

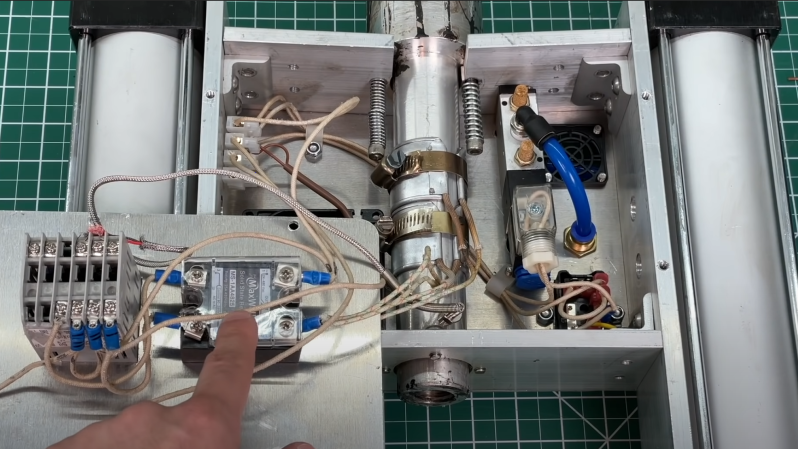
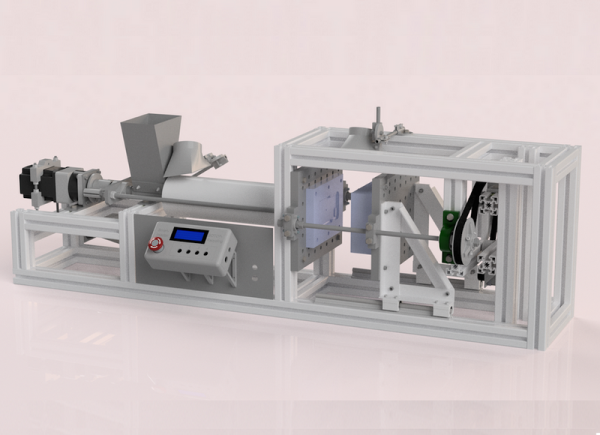
Choosing the hydraulic press is a great idea as it provides the high pressure needed for the job without the operator having to exert a lot of effort, which is a big drawback with some of the other DIY machines. As a bonus, the structural frame is quite sturdy and well suited for this purpose. The other main part of such a machine is the heated injection block and there are several different ways of doing it. After some amount of studying probable solutions, he decided to build a heated aluminium block through which the plastic granules can be rammed using the hydraulic piston. Heating is provided by a pair of 500W heaters and a type ‘k’ thermocouple does temperature sensing. An industrial PID controller adjusts the block temperature via a solid state relay. Overall, the electrical and mechanical layout cannot get any simpler.

[Bolzbrain] did a great job of documenting his build over a series of videos and more wizened hackers watching them will squirm in their seats spotting the numerous fails. He bought the cheapest pedestal drill machine that he could buy and watching the drill struggle while making a 26mm hole in the aluminium block is quite jarring.

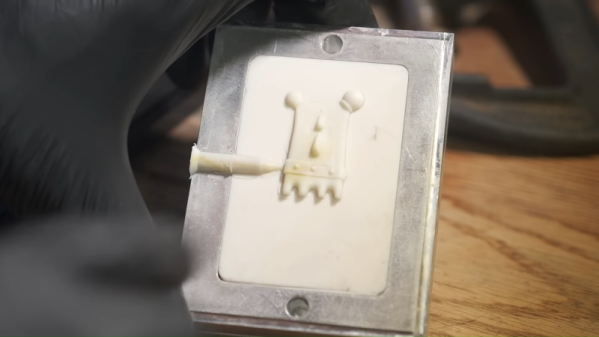
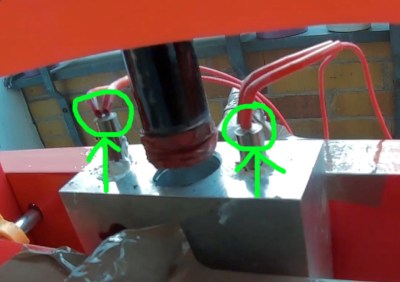
The electrical wiring has a lot of scope for improvement – with 220V AC heaters, exposed wiring and jury rigged panel held up with a pair of clamps. Installing and removing the die is a task and requires a lot of fiddling with several C-clamps — something which needs to be repeated for every shot. Maybe toggle clamps could help him to ease die fixing and removal. Once he figures out about mold release agents and wall draft angles, he won’t have to struggle trying to remove the molded article from the die. Then there’s the issue of proper runner design so that the thermo-plastic can quickly fill the mold cavity completely without any pockets.

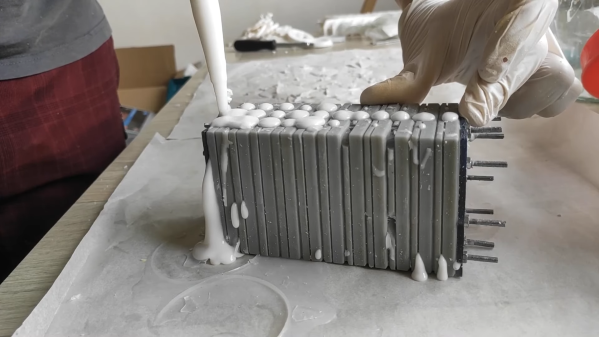
But in the end, all that matters is that he is getting reasonably good molded parts for his purposes. With more tweaking and incremental improvements, we’re sure he’ll get better results. The video after the break is a short overview of his build, but the project page has a series of detailed videos covering all aspects of the project. And if you’d like to get an introduction to desktop injection molding, check out “Benchtop Injection Molding for the Home Gamer

Continue reading “DIY Injection Molding Press”

Reduce, Reuse, Injection Mold

Many people have the means now to create little plastic objects thanks to 3D printing. However, injection molding is far less common. Another uncommon tech is plastic recycling, although we do occasionally see people converting waste plastic into filament. [Manuel] wants to solve both of those problems and created an injection molder specifically for recycling.

The machine — Smart Injector — is automated thanks to an Arduino. It’s pretty complex mechanically, so in addition to CAD models there are several PDF guides and a ton of pictures showing how it all goes together.

Continue reading “Reduce, Reuse, Injection Mold”