A Tiny Bench Power Supply

One of the more popular projects for beginners in electronics is a power supply. Yes, you can always go to Amazon and buy a nice power supply, but unfortunately, we haven’t set up our Amazon affiliate links yet. Instead, we’ll have to go with the next best thing and check out [Tron900]’s mini bench power supply build. It’s extremely capable and cute as a button.

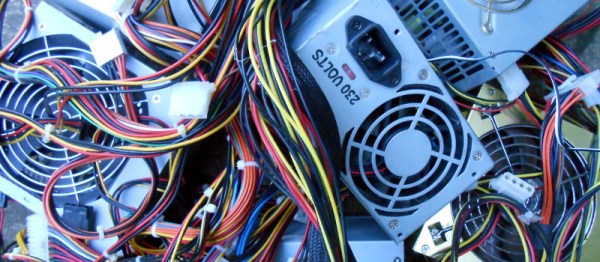
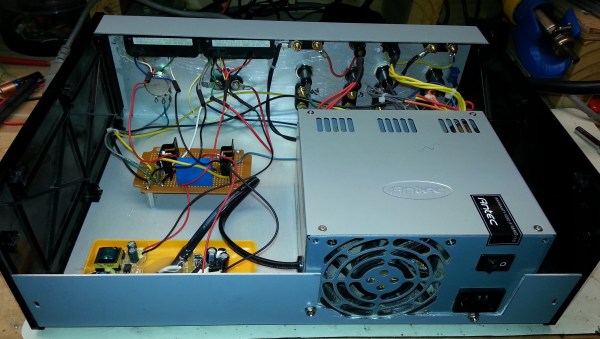
The design goals for this project were to build a small and compact unit using mostly salvaged and recycled components, with all through-hole circuitry. The best guide you’ll ever find for a DIY power supply is one of [Dave Jones]’ earlier video series going over the construction of an adjustable power supply based on an LT3080. [Tron] didn’t have this regulator on hand and wanted to base his design around an op-amp instead. After rummaging through his parts, he found what he was looking for: a TIP3055 power transistor, a neat enclosure that could double as a heatsink and an AD680 voltage reference.

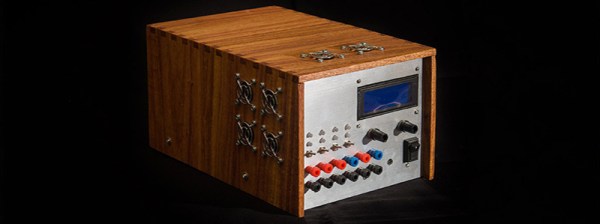
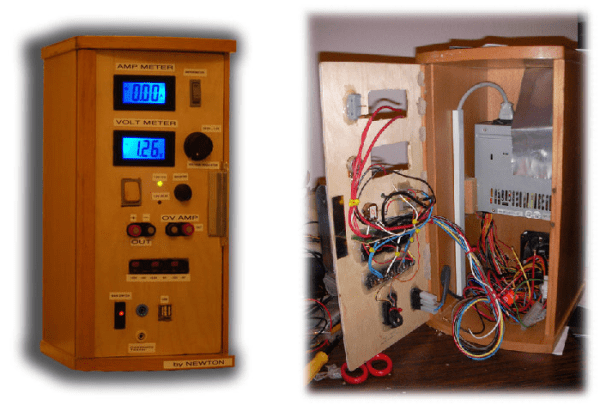
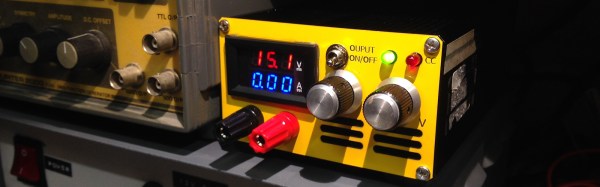
The design of this power supply was simulated in SIMETRIX, and after a few revisions [Tron] had a circuit that worked reasonably well. The circuit was populated on a piece of perfboard, a fantastic front panel was constructed, and one of those ubiquitous volt/ammeter panels added.

This is just a one-off project, but the results are fantastic. This is a very small, very capable power supply that does everything [Tron] needs. It’s accurate enough, at least when measured with a fancy benchtop HP meter, and looks adorable. What more could you want in a benchtop power supply?

Not Quite 101 Uses For An ATX Power Supply

The PC power supply has been a standard of the junk box for the last couple of decades, and will probably continue to be for the foreseeable future. A product that is often built to a very high standard and which will give years of faithful service, yet which has a life of only a few years as the PC of which it is a part becomes obsolete. Over the decades it has evolved from the original PC and AT into ATX, supplying an ever-expanding range of voltage rails at increasing power levels. There have been multiple different revisions of the ATX power supply standard over the years, but they all share the same basic form factor.

So a pile of ATX supplies will probably feature in the lives of quite a few readers. Most of them will probably be old and obsolete versions of little use with today’s motherboards, so there they sit. Not small enough to ignore, yet Too Good To Throw Away. We’re going to take a look at them, try to work out what useful parts they contain, and see a few projects using them. Maybe this will provide some inspiration if you’re one of those readers with a pile of them seeking a purpose.

Continue reading “Not Quite 101 Uses For An ATX Power Supply”

Hackaday Prize Entry: A Better Bench Power Supply

Back in February, [The Big One] started building the bench power supply to rule them all. His previous power supply was just an ATX computer power supply. It worked, but that didn’t give him fancy stuff like different channels of individually adjustable voltages. Since then, we’ve spun up the 2015 Hackaday Prize, and [The Big One] has changed his DIY power supply into a Hackaday Prize entry that competes well against $1000 mid-range commercial units.

The single most expensive component in this power supply are a pair of isolated switched power supplies rated for 15V and 7A. This is a change from [The Big One]’s original plan to use a big ‘ol transformer; a switched mode supply is smaller, lighter, costs about the same, and is much better suited to the modular nature of the project.

The final design for this power supply has some interesting features: up to six channels are possible, voltage and current can go all the way down to zero, and everything can be controlled over USB. Those are amazing features that won’t be found in any $100 cheapo bench power supply, and [The Big One]’s amazing documentation for this project makes it a perfect entry for The Hackaday Prize.

The 2015 Hackaday Prize is sponsored by:

More Power For Raspberry Pi USB Ports

Since the Raspberry Pi 2 was released, everyone building RetroPi emulators has been graced with four USB ports. For those of us doing useful stuff with the Pi, those ports are a little anemic: you can’t plug in a webcam and a WiFi module at the same time without suffering CPU brownouts. The maximum current all USB peripherals can draw from the USB port is 600mA. By changing a value in the /boot/config.txt file, this current limit can be increased to 1.2A for all four ports.

Pisquare
The yellow line traces the signal from the GPIO to the USB power switch.

Because the USB current limit is set in software, there must be a few bits of hardware that do the actual work. Tucked away below the right hand of the GPIO header is the hardware that does exactly that. It’s an AP2253 current-limited power switch (PDF), and the current is adjustable by tying a resistor to pin 5 on the chip.

Pin 5 on the AP2253 is connected to two resistors. One resistor goes directly to a ground plane, while the other is switched through a FET. The gate of this FET goes to another resistor, and when a GPIO pin is high, these resistors are wired in parallel. This means the resistance is halved when the GPIO pin is high, doubling the current limiting circuit in the AP2253.

This setup provides a relatively easy mod to increase the current limiting of the USB ports so they can provide 4x500mA, meeting the USB spec. The AP2253 power switch’s current limiting can be set by a single resistor, anywhere from 10kΩ to 232kΩ. By removing R50 and R4, and replacing R50 with a 10kΩ resistor, the current limiting of the AP2253 switch will be set to its maximum, 2.1A. Divide that by four, and you have 500mA per port, just like every other computer on the planet.

There is a reason the Raspberry Pi foundation set the current limiting of the USB ports so low. The Pi was originally intended to run off of a micro USB phone charger. There aren’t many phone chargers out there that will supply more than 1A, and the CPU and related peripherals will take half of that. If you’re going to change the /boot/config.txt file, you’re going to need a beefy power supply. Increasing the current limiting of the USB ports to 2A will require an even bigger, beefier supply.

diy ATX power supply

Is This Power Supply Bigger Than A Bread Box? No, It Is One.

[newtonn2] must have had food on his mind when he was deciding to embark on a power supply project. The enclosure is quite different…. it is a Bread Box! Even so, flipped up on end we must say it looks pretty cool. [newtonn2’s] previous power supply had crapped out and he needed a replacement supply ASAP, it was a loaf or death situation for this electronics enthusiast.

Similar to a lot of DIY bench power supplies, this one would also be based on an ATX computer power supply. These are good high-current supplies that output voltage in several convenient amounts and in this case are are all routed to their own spring terminals mounted on the enclosure. Even though those standard voltages might be good enough for most, [newtonn2] is extremely kneady and wanted a fully adjustable output so he designed up an adjustable voltage regulation circuit using an LM350 regulator. A volt meter and an amp meter indicates the power being supplied on the adjustable circuit.

Since his last power supply was toast, [newtonn2] wanted this one to be easily repairable. The ATX power supply inside can be replaced in two minutes because nothing is hard wired. The only connections are the ATX connector and power cord. For cooling, holes were drilled in the side of the enclosure so that fans could be installed. This was the yeast he could do to keep the temperature of the interior components down.

In the end [newtonn2] completed his goal of building a pretty unique and functional bench top power supply without spending a lot of dough. Check out his Instructable for extremely detailed build instructions including schematics for how all his components are wired.

Not Your Average Power Supply Hack

Not Your Typical ATX Power Supply Hack

Power supplies are essential for at home tinkering and electronics hacking. Unfortunately, they’re really quite expensive, and a bit out of reach for most hobbyists. Computer ATX power supplies are a cheap alternative, although they usually tend to lack the features of real bench power supplies… unless you hack yours like [Mark Schoonover]!

When [Mark] set out on this project he wanted to use as many recycled components as possible, but still come up with an extremely functional bench top power supply. He snagged a 500W ATX power supply from one of his kid’s old desktop PC’s, grabbed some old wall-warts for individual current limited supplies (apparently ATX PSU’s don’t have 5V rails anymore?), and put it all into a nice big project box.

He’s even thrown in a voltage regulator with current metering and a nice set of 7-segment displays!

Continue reading “Not Your Typical ATX Power Supply Hack”

Bench Power Supply Resetting Thingy

As is common among some hackers, [Henry] re-purposed an ATX power supply unit to function as a bench power supply for testing circuits on a breadboard (much like this fancy example).

However, safety mechanisms on some modern PC PSUs do not automatically reset after over-current protection has kicked in, which soon became annoying for [Henry]. In order to make his power supply more hacker-friendly, he wired up and programmed an ATtiny85V, using some Arduino libraries, to do that for him. This simple project is a great example of using a hack to improve a pre-existing hack.