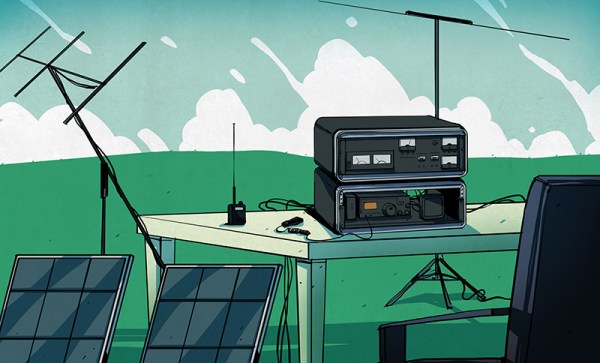
“Hi! I’m Rud, Kilo Five Romeo Uniform Delta.” That’s me introducing myself at a ham meeting. Ham radio operators kid that we don’t have last names, we have call signs.
Becoming an Amateur Radio Operator (ARO), our more formal name, is not difficult and opens a world of interesting activities, including hacking. As with anything new, becoming actively involved with an existing club can be daunting. The other hams at a meeting are catching up with their buddies and often seem uninterested in the new guy standing nearby. Some groups will invite new members to stand and introduce themselves early in the meeting, which helps break the ice.
Regardless of how anyone else acts at the meeting there is one ham who is always looking for someone new – the ham who manages public service events, where amateur radio operators help establish communications for large public gatherings. These can be local bike rides, walks, or runs; I’ve even seen hams working an art show. In the nomenclature adopted since 9/11, these are “planned incidents” in contrast to “unplanned incidents” like hurricanes, tornadoes, forest fires, snow storms, and other natural or man made disasters. Working planned incidents is training for unplanned incidents when that need arises. The basic activities for AROs are the same.
Here in the Houston there are two very big events that enlist hundreds of hams. The big one in January is the Houston Marathon. The other large event is the Houston to Austin Multiple Sclerosis 150 (MS 150) mile bike ride in April. That event starts on Saturday morning, takes a break mid-way on Saturday evening, and finally wraps up late on Sunday evening. Starting in the fall there are warm-up events for the Marathon and in the late winter bike rides to prepare riders for the MS-150. There are also other marathons, Iron Man races, walks, runs, and races throughout the year. Wherever your are, there are probably events nearby and they can always make use of your radio capability.
Continue reading “Ham Radio Public Service Activities – Rewarding And Useful” →


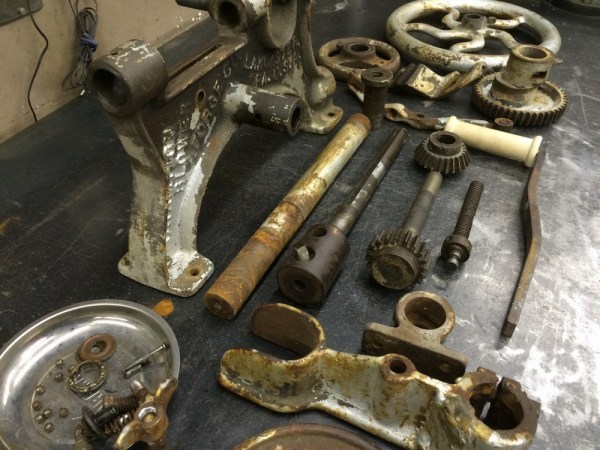
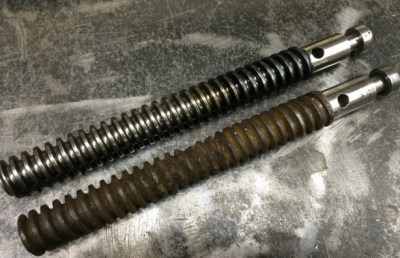 There are three things that [Gord] has going for him. First off, the Champion Blower and Forge Co. built them to last. Second, he’s not really working on a deadline; the museum doesn’t need it back until May. And third, [Gord] has the tools he needs to do this right.


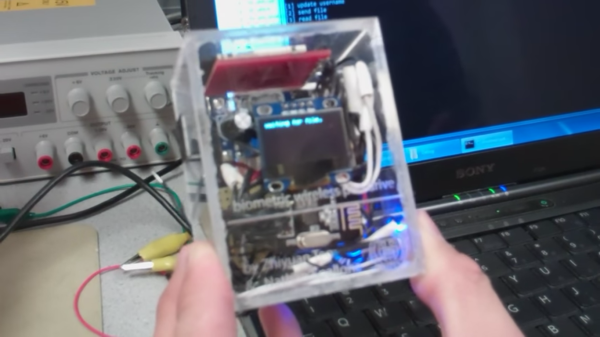
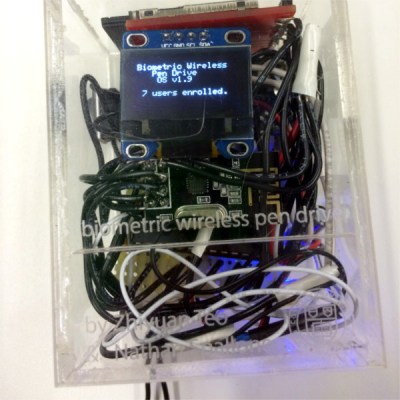 Their solution can be used by up to 20 different people who each get a slice of an SD card in the storage unit There are two physical pieces, a base station and the wireless storage unit itself. The base station connects to the host PC over USB and contains an Arduino for serial pass-through and an nRF24L01+ module for communicating with the storage side. The storage drive’s components are crammed inside a clear plastic box. This not only looks cool, it negates the need for cutting out ports to mount the fingerprint sensor and the OLED. The sensor reads the user’s credentials through the box, and the authentication status is displayed on an OLED. Files are transferred to and from the SD card over a second nRF24L01+ through the requisite PIC32.