Win $40,000 For Squirting Plastic Out Of A Nozzle

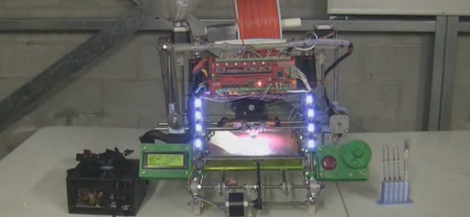
3D printers such as the RepRap and Makerbot turn spools of plastic filament into just about any object imaginable. There’s a problem though: this filament costs about $40 a kilogram, and raw plastic pellets cost about 1/10th of that. Obviously, there’s a lot of room for improvement. The folks at Inventables are throwing $40,000 at the problem in a contest to build a machine that takes plastic pellets and turns it into usable plastic filament.

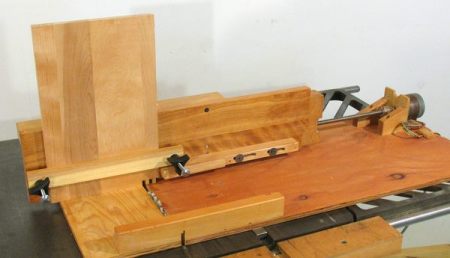
The object is simple: build a device that takes ABS or PLA pellets and turns them into a 1.75mm filament. The machine has to cost less than $250, be able to add colorant to the plastic, and be usable in a 3D printer. The winner gets $40,000, a laser cutter, a 3D printer, and a CNC milling machine courtesy of Inventables. Sign up on the official contest website and don’t be shy about sending your progress into the Hackaday tip line

If you’d like to get started, here’s a great page that goes over the basics of plastic extrusion, and a few attempts (1, 2) from [Adrian Bowyer] and [Forrest Higgs] that show exactly how hard this is. There’s also the Filabot that had a successful Kickstarter, but there’s apparently been no (or very limited) progress in the four months since the Kickstarter. I’ve even given this idea a go, but am currently stuck at manufacturing a proper auger. To put this in perspective, this is the moonshot of the current crop of 3D printers; a simple device to lower the barrier of entry to 3D printing is desperately needed, and we’ve got to give props to the Inventables crew for putting this contest together.

3D Printing With Nylon For A More Useful Objects

[taulman] over on Instructables has been working on his own version of a 3D printer. Unlike the usual PLA or ABS filament all the RepRaps and Makerbots use, this printer uses nylon to make parts with very interesting properties.

Most extrusion printers are designed to print with ABS (a very hard plastic that melts around 220-230° C) or PLA (a somewhat softer plastic that melts at about 180° C). [taulman] is using Nylon 6, a very slippery and bendable plastic that melts around 320° C (about 600 degrees Fahrenheit). He’s doing this with a hot end of his own design and a ‘spiky’ extruder bolt that allows high-temperature thermoplastics to be extruded into any shape imaginable.

For the longest time, the 3D printer community has been using low-temperature thermoplastics such as PLA and ABS. There are obvious benefits to these materials: it’s pretty easy to source a spool of filament, and the low melting point of these plastics makes building a printer easier and safer. Now that [taulman] has the high-temperature plastic nut cracked, he’s moving on to easily-machiniable Delrin and transparent Polycarbonate. Very cool, and hopefully in a year’s time we’ll have a choice of what material to run in our printers.

After the break, there are a few videos [taulman] put up showing his printer at work and the properties of his 3D printed objects. It looks like [taulman] can print objects that are impossible on any other 3D printer we’ve seen; the flexible iPhone case probably couldn’t be made on any other DIY machine.

Continue reading “3D Printing With Nylon For A More Useful Objects”

Hackaday Links: May 21, 2012

Turning anything into a touch sensor

Makey Makey is a small board with a USB plug and bunch of contact points for alligator clips. Plug the Makey into your computer and attach just about anything to the contacts, and you can make anything into a video game controller, a keyboard, a piano, or pretty much anything you can imagine. If [Sprite_tm] copied it, you know it has to be cool.

RepRaps will finally cost a million dollars

The Pentagon is throwing money at 3D printers. It’s “only” $60 Million the DoD is putting into 3d printer research, but hopefully our most brilliant researchers will help refine some of the ‘unsolved problems’ – like metal and circuit printing – the 3D printer community is facing.

Getting started with FPGAs

[Tim] found a neat little $40 FPGA board aimed right at the hobby hacker. The good news: It’s compatible with Arduino shields, and it’s very cheap. The bad news: it only has 1280 logic cells, so you probably won’t be emulating CPUs on this thing. If anyone has a teardown / project with this board, send it in.

Improving a Bluetooth dongle with a bit of wire

Unsurprisingly, the extremely cheap Bluetooth dongle [Mike] bought on eBay didn’t have great reception or range. No problem, because you can just replace the internal antenna with a piece of wire cut to length. Now bluetooth devices are recognized instantly, and there are no Bluetooth ‘dead spots’ around [Mike]’s computer.

Come to France, make stuff

The Toulouse Hackerspace is having a little shindig this coming weekend (May 25-27) featuring a conference, workshop, concerts and performances. If you’re in the area, drop on by,

Designing A Self-replicating Milling Machine

For his senior design project at Swarthmore College, [Julian] decided to build a metalworking equivalent to the RepRap. [Julian]’s final project is a self-replicating milling machine, and hopefully giving some serious metalworking power to all the makers with CNC routers and RepRaps out there.

At first glance, [Julian]’s mill doesn’t look like something you would find in a machine shop. The machine is built around a tetrahedral machine tool frame, giving the machine an amazing amount of stiffness with the added bonus of a degree of self-alignment. The spindle and motor are off-the-shelf units, but the entire bed assembly is made by [Julian] himself.

Right now, [Julian] still considers his project a very early prototype; there’s still a bit of chatter issues he’s working out, and the cost of the finished machine – about $1200, not including many hours of fine tuning – means it isn’t as competitive as other options. Still, [Julian] made a mill from scratch, and that’s nothing to scoff at.

And So The Deluge Of Resin-based 3D Printers Begins

It looks like 2012 is shaping up to be the year of the resin-based 3D printer. The latest comes from [Michael Joyce] and is called the B9Creator.  Like other resin printers, [Michael] used a DLP projector to cure the print one layer at a time. The layer height is on the order of 100 microns – crazy for a kit-based printer.

There is a  Kickstarter for the B9Creator where kits are available for $2400 USD. Everything is included in this kit, including the DLP projector and a kilogram of resin. $2400 is much more expensive than even the fanciest melted-plastic 3D printer such as a Makerbot or RepRap, but that’s the price you pay for high-quality prints.

Of course this project comes a month after an earlier, similar, and shadier project called the Veloso 3D printer. The B9Creator promises to be open source once all the Kickstarter machines are shipped out, and [Michael] is very open about his designs and his resin formula – an admirable quality in a maker.

You can check out a load of videos of the B9Creater we found after the break.

Continue reading “And So The Deluge Of Resin-based 3D Printers Begins”

Using Arduino Shields With The Raspberry Pi

Since the Arduino was launched years ago, many ‘shields’ or add-on boards providing additional functionality have been released. There are hundreds of different shields, from video capture shields to touch screen shields. Now that the Raspberry Pi is out in the wild, it was only a matter of time before a RasPi to Arduino shield bridge was created.

[Omer] calls his bridge ‘Ponte’ and it allows Arduino shields to be used with the incredible  horsepower of an embedded Linux system. While [Omer] originally expected to write the RasPi to Arduino software converter himself, but found WiringPi halfway through the build. Of course this build comes just a day after we saw a tutorial on controlling the GPIO pins on the RasPi, and we expect to see similar GPIO-hacking builds in the future.

Right now, the Ponte only supports Arduino Uno-sized shield, so the possibility of an all-in-one RepRap controller using the RAMPS motor driver is impossible for now. We expect that to change very quickly as more people get their RasPis delivered.

Automated Bed Leveling With Our 3D Printer

Anyone with a RepRap or other 3D printer knows how much of a pain leveling the bed is. To get a good quality print, the bed – the surface the printer prints on – must be exactingly level, and may the engineering gods help you if your surface has the slightest bump in it. [Atntias] is developing a solution to this problem: an auto leveling platform that shouldn’t require any parts at all if you already have a metal bed.

The idea is incredibly simple: Just ground your metal bed, and apply a small voltage to the tip of your hot end. [Atntias]’ code (available on GitHub) probes the surface of the bed and shoots out a 3D mesh of your current bed profile. This can be used as a GCode offset, so the bottom of your print is always directly on the top of the bed.

Although the utility of leveling a bed down to the micron level is of questionable utility for 3D printers, it’s vitally important if you want to mill a PCB on your printer. [Atntias] says his idea is currently being implemented into the Marlin firmware, so it looks like another firmware update is in our future.

Thanks go to [technodream] for sending this one in. Check out the video after the break to see the bed leveling process in action.

Continue reading “Automated Bed Leveling With Our 3D Printer”