led-light-wall

Hackerspace Light Wall Plays Video At 30 Fps

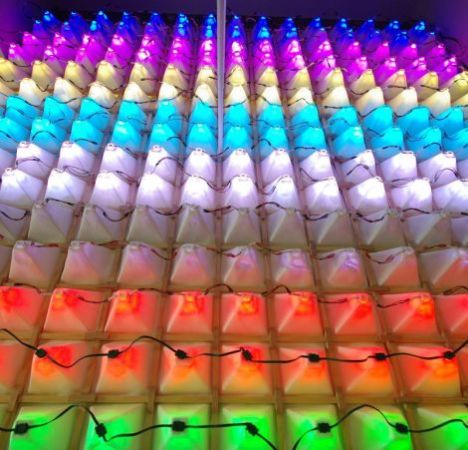
The folks at The Quad Cities Collaboration and Hackerspace (QC Co-Lab) were trying to find something to build for their first big project, and had to look no further than the wall for inspiration. The north end of their facility is home to a huge 15×17 glass block wall that happens to face a well-traveled roadway.

They decided that turning the wall into a huge LED display would be a great way to attract attention from passers-by, so they picked up some GE Color Effects lights and got down to business. Once they found out that the technical college next door was putting on an open house, the race was on to get the light display assembled as quickly as possible to maximize their exposure.

The team mounted the 255 LEDs in vacuum-formed reflective cones, which were attached to wooden frames before being installed behind the glass wall. An Arduino drives the entire display at a smooth 30 frames per second, a task they say tests the very limits of the board’s capabilities.

They finished the job in time for the open house, and as you can see in the video below, the display looks great.

Nice job QC-Co-Lab!

Continue reading “Hackerspace Light Wall Plays Video At 30 Fps”
A Very Detailed Reflow Oven Build

smd-solder-reflow-oven

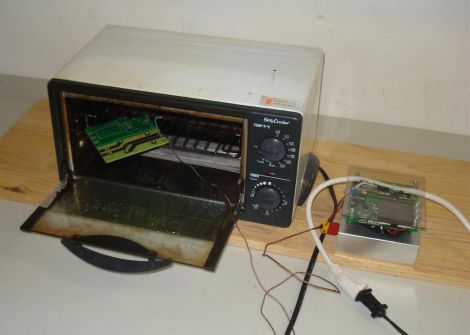
If you do a lot of SMD soldering, a reflow oven is the fastest and most efficient way to get all those tiny components attached to your PCB. [Frank Zhao] saw the reflow ovens we featured here over the last few weeks and figured he might as well show off his rig as well. We’re certainly glad he did, because his very thorough writeup is a great stepping stone for anyone looking to construct a reflow oven of their own.

Like many others, he started off with a used toaster oven, modifying it to be controlled directly via the power cable rather than the oven’s dials. He built a small PCB to regulate the oven, which features an ATmega32u4 and thermocouple to keep the temperature in check. Control of the heating element is done using a solid state relay, for which he built his own heatsink.

He studied the reflow profile of the solder he would be using, programming the microcontroller to regulate the heating/cooling process without requiring any user input, aside from turning the oven on.

Check out the video below to see a brief overview of his system, and be sure to swing by his writeup to take a look at all the build details. There are a handful of additional videos along with plenty of pictures there, walking through each step of the process.

Continue reading “A Very Detailed Reflow Oven Build”

Making Pure Caffeine At Home

If you’ve ever thought about extracting caffeine from coffee beans, [Ben] is the guy for you. The last time we ran into him, he had already produced a few aerogel monoliths with a few chemicals, pipe fittings, and some CO2. We’re guessing he needed another use for his supercritical drying chamber, so after looking over a few patents, he decided to make pure caffeine in his garage.

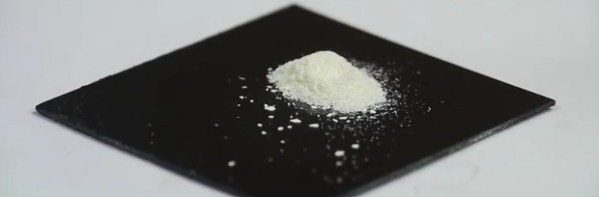
The extraction began with green coffee beans inside the drying chamber. Liquid CO2 is pumped in and heated to the supercritical point. After a few hours, the caffeine will have been extracted from the beans and can be drained from the chamber. Right now, the process results in an inky goo that contains caffeine. [Ben] refined this a little further with Methylene Chloride, a process he’ll document in a future video.

Of course it goes without saying that this build is a little bit on the dangerous side. We’re confident in [Ben]’s abilities to know what he’s doing, but we’re not going to endorse this for every joker on the Internet. Also, two spoonfuls of caffeine will kill you, so try not to screw around with that either.

Continue reading “Making Pure Caffeine At Home”

Sound Reactive Kanye Glasses!

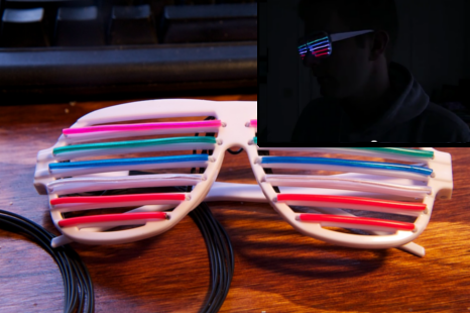
[Ch00f] has decided to ring in the new year with some el wire Kanye glasses. Technically the term for the glasses is either “shutter shades” or “slatted sunglasses”, invented around the 80s by [Alain Mikli] and originally given the nickname “Venetian Sunglasses”. Kanye West evidently got his own retro redesign by the original creator and the rest is history. That is enough Wikipedia for now. [Ch00f] has augmented the original design with six multicolor tracks of EL wire mounted to the shutters of the glasses. The EL wire is fed back through several discrete wires around the wearers ear and to two control boxes. As the video shows, the glasses function as a crude V/U meter based on the audio received by the driver circuit.

Instead of the typical microcontroller [Ch00f] (who has some kind of deep seated issues agaist the Arduino) decided to go full blown analog with the entire design. The audio signal is fed through various Op Amp circuits first amplifying the weak microphone signal then filtering with a low pass filter to focus on the bass frequencies. The filtered bass is then sent to an envelope detector to turn the audio wave into a DC voltage signal. Keeping with the Op Amp design [Ch00f] then uses a resistor ladder and six comparator circuits (with TRIACs on their outputs) to tune the trigger voltage levels of the EL bars. The TRIACs get to deal with the 100 or so volts for the EL strips so that [Ch00f] doesn’t have to party with six EL power supplies in his pocket. For those of you counting at home, that is a total of 13 Op Amps.

The results are fantastic, check the video below to see the glasses in action. Reportedly the circuit does freak out and lock all of the TRIACs in an on state, but a covert flip of the power switch fixes the issue for now. [Ch00f] admits that the project was rather rushed due to the impending new year’s eve party, but now that that is all over with we just need to get [Ch00f] to roll out a stereo version. If you need more [ch00f] we have covered a few of his projects before such as his Icebreaker POV toy hack and a ghetto accelerometer using a reflection sensor.

Thanks for the tips [Daniel] and [Sanchoooo], also via [reddit]. Happy new year!

Continue reading “Sound Reactive Kanye Glasses!”

Best Of Hackaday – 2011 Edition

2011 was an interesting year here at Hackaday. We have about 24% more viewers now than we did last year. We started producing our own video content and we have shown some pretty interesting projects in our daily posts. In this post, we are gathering together the best of the best.

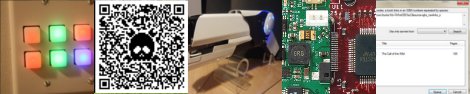
Our #1 post for the year with 175,000 views is about a 1 megawatt laser pulse pistol. Not only does this build work but it also looks cool. It’s definitely one to take a look at.

Coming in with 157,000 views is a post about how to insert your logo into a QR code. This one was done by our own [Brian Benchoff] and was a runaway success from the first week that we posted it.

In third place with 151,000 views is a post that could help you if you are trying to pick a development board to learn a new processor with. This post breaks down the various development boards available at the time of its writing into three different categories organized by price.

In fourth place with 114,000 views is one about an unique lock composed of color changing buttons. Your pass code is a series of colors instead of digits in an ordinary code lock. This build fits behind a standard wall plate so that it can be mounted cleanly using off-the-shelf hardware from the hardware store.

Wrapping things up at fifth place is a post describing how you can download books from Google using an utility called Google Book Downloader. We have no idea of the legality of this one. The original link is down but it seems that it is still available elsewhere on the internet.

Disco Icosahedron Rings In The New Year

While city engineers were setting up the multicolored ball of lights in Times Square this year, [Phil] at adafruit was busy designing the X2 Time Ball, a disco icosahedron perfect for celebrating the new year.

The ball is made of 20 acrylic triangles zip-tied together into an icosahedron. On each face, six RGB pixels light up via commands from an Arduino. The entire project is able to be controlled remotely thanks to the help of a pair of XBees. [Phil] whipped up a Processing sketch to control the LED ball any way we could possibly imagine.

Although it may be a little late to build an LED disco ball for this year’s New Year’s Eve party, that doesn’t mean we couldn’t use it the other 364 days of the year. It’s perfect for parties, weddings, and our weekly lightswitch raves. Check out the action video of the Time Ball after the break.

Continue reading “Disco Icosahedron Rings In The New Year”

Using Mains Wiring As An Antenna

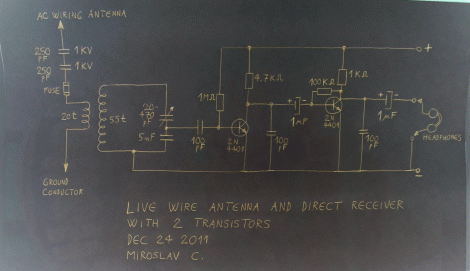
Make sure to brush up on your safety protocol if you undertake this project. The penalty for messing up when using live wiring as a radio receiver antenna is rather severe. But after reading about it in some old books [Miroslav] decided to give this technique a try.

We love the old-school chalk board he used to map out his test circuit. With safety in mind, he uses two high voltage capacitors in series. If these should somehow fail, there is also a fuse which would blow, disconnecting the apparatus from mains. But just to be sure, he isolated the circuit using a two coils. These step down the voltage, but would also burn out if hit with a voltage spike.

You can see the results he gets using the setup as an AM radio receiver in the video after the break. He tested against a meter long antenna and found that his setup far outperforms it. Actually, he found that a six foot extension cord which is not plugged into the wall will also outperform the 1m antenna. Something to keep in mind the next time the ball game isn’t coming in as clear as you would like.

Continue reading “Using Mains Wiring As An Antenna”