Another Take On The 6502 Computer

another-take-on-the-6502-computer

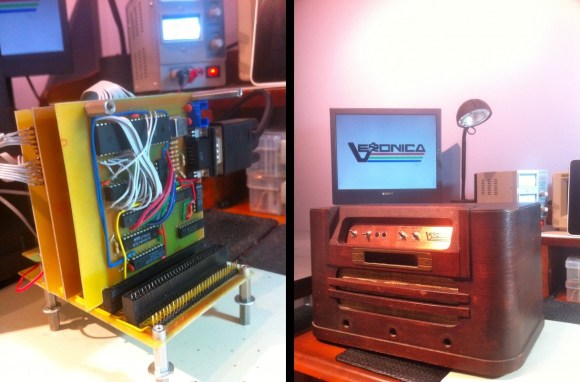
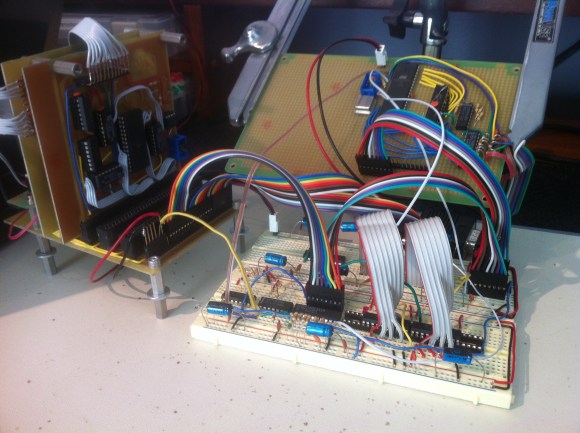
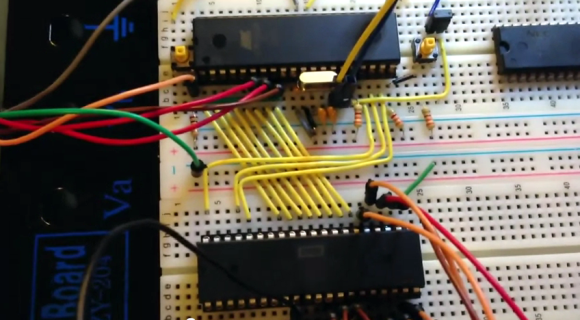
[Mark] is just starting off on his own 6502 computer odyssey. He was inspired by some of the other projects we’ve seen around here, like [Quinn Dunki’s] Veronica Project, but with a spin that leverages modern processors to alleviate some of the messy work. As you can see above, there’s an Atmel chip perched above the 65C02 processor. This chip not only feeds the processor data (through all those slightly diagonal yellow wires) but also provides the clock signal and operates the reset and bus enable lines.

This is more of a hello world post for [Mark]. The chip is simply running NOP commands right now. But it shows that the basic idea works, and the video after the break lets us see another time-saving aspect of the circuit. He’s using a character LCD to display memory location and data values. The plan is to get a blog going, which he’s hesitant to do as it takes valuable hacking time away from the project. We disagree. The write-up (although incredibly fun for us to read) ends up being a reference manual for him once the project starts to get really hairy.

Continue reading “Another Take On The 6502 Computer”

Veronica VGA Board Finalized

veronica-vga-board-finalized

The latest update in the Veronica 6502 computer project is this finalized VGA board which now has a home in the machine’s backplane.

We’ve been glued to the updates [Quinn Dunki] has been posting about the project for many months now. Getting the GPU working proved to take quite a bit of time, but we learned a ton just by following along. The video output had humble beginnings way back in March. That breadboarded circuit got complicated very quickly and that was before it was even interfaced with the CPU. As you can see from the image above, etching and populating the GPU board really cleans up the build. We’re sure it’s robust enough to move around at this point. We wonder if she’s planning on showing it off at a Maker Faire or another geeky gathering?

It really has become clear how wise [Quinn] was to design a backplane board early on. It plays right into the modular concept. She was even smart enough to include that SIL pin header on the near side of the board which was used heavily while prototyping this video module.

Interfacing A GPU With A CPU

interfacing-a-gpu-with-a-cpu

[Quinn Dunki] pulled together many months worth of work by interfacing her GPU with the CPU. This is one of the major points in her Veronica project which aims to build a computer from the ground up.

We’ve seen quite a number of posts from her regarding the AVR-powered GPU. So far the development of that component has been happening separately from the 6502 centered CPU. But putting them together is anything but trivial. The timing issues that were so important to consider when developing the GPU get even hairier when it comes writing to the VRAM from an external component. Her first thought was to share a portion of the external RAM between the CPU and GPU as a way to push rendering commands from one to the other. This proved troublesome both in timing and in the number of pins available on the AVR chip. She ended up using something of a virtual register on the AVR chip that can receive commands from the CPU asynchronously. Timing dictates that these commands be written only during vertical blanking so this virtual register also acts as a status register to let the CPU know when it can send the next command.

Her post is packed with the theory behind the design, timing tests on the oscilloscope, and a rather intimidating schematic. But the most important part is the video showing her success in the end.

Macro Assembly For AVR Chips

avr-macro-assembly

Here’s an interesting tip that can help improve your ability to write assembly code. In an effort to remove the complexity of assembly code for an AVR project [Quinn Dunki] figured out how to use macros when writing AVR code with the GNU toolchain. Anyone using AVR-GCC should keep this in mind if they ever want or need to pound out a project in assembly language.

If you look at the code snippet above you’ll see two commands that are obviously not assembly; PulseVRAMWrite and DisableVRAMWrite. These are macros that direct the assembler to roll in a hunk of code. But avr-as, the assembler used with this toolchain, lacks the ability to handle macros. That’s too bad because we agree with [Quinn] that these macros make the code easier to read and greatly reduce the probability of error from a typo since the code in the macro will be used repeatedly.

The answer is to alter the makefile to use GNU M4. We hadn’t heard of it, but sure enough it’s already installed on our Linux Mint system (“man m4” for more info). It’s a robust macro processor that swaps out all of her macros based on a separate file which defines them. The result is an assembly file that will play nicely with avr-as.

Her implementation is to help in development of the GPU for her Veronica computer project.

Discrete 6502 Processor Sucked Into Linux By A BeagleBone

Often when we see projects using embedded Linux we think of them as not being hardware hacks. But this is a horse of an entirely different color. [Matt Porter] is leveraging a little known feature to directly access a 6502 processor from inside a Linux environment. In other words, this hack lets you write code for a 6502 processor, then load and execute it all from the same Linux shell.

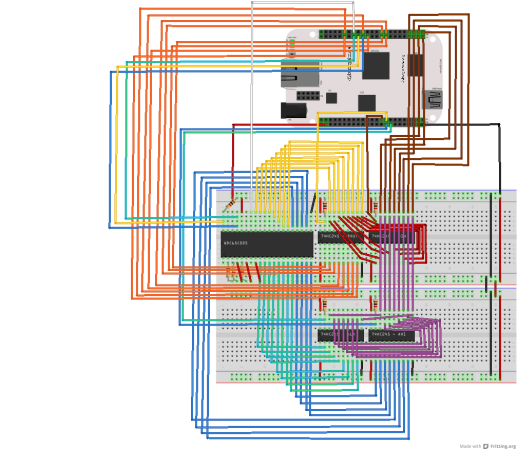
The project leverages the best parts of the BeagleBone, which is an ARM development board running embedded Linux. It’s got a lot of GPIO pins that are easy to get via the boards pin sockets. And the design of the processor makes it fast enough to work well as a host for the 6502 chip. Which brings us back to how this is done. The Linux kernel has support for Remote Processors and that’s the route [Matt] traveled. With everything wired up and a fair amount of kernel tweaking he’s able to map the chip to the /dev/bvuart directory. If you want all the details the best resource is this set of slides (PDF) from his talk at Embedded Linux Conference – Europe.

This is one way to get out of all that hardware work [Quinn Dunki] has been doing to build her own computer around a 6502 chip.

[Thanks Andrew via Dangerous Prototypes]

Arduino WiFi Shield Available, Costs $85 USD

Over on the Arduino blog, the release of the official Arduino WiFi shield was just announced. On the spec page for this WiFi shield. we can see this new board isn’t a slouch; it’s powered by a 32-bit ATMega 32UC3 microcontroller, has provisions for WEP and WPA2 encryption, and supports both TCP and UDP with the Arduino WiFi library. It also costs €69/$85/£55 from the Arduino store.

Now that the announcement of the Arduino WiFi shield is over with, we’ll take this opportunity to go through a few other WiFi adapters for the Arduino that don’t cost an arm and a leg.

The WiFly shield – available from Sparkfun – is a WiFi adapter with the same form factor as the ever popular XBee modules. Of course, it’s possible to make your own breakout board; the WiFly only needs a TX, RX, power and ground connection to connect your Arduino project to the Internet.

We’ve seen a few projects use the WiShield from async labs. It’s a WiFi module packaged in the familiar Arduino shield form factor, and costs $55 USD.

For the hardcore hackers out there, you could always get a bare Microchip WiFi module and get it to work with an AVR as [Quinn Dunki] attempted to. In all fairness, [Quinn] was trying to de-Arduinofy the WiFi library; if you’re cool with Arduino code swimming around in your project, this method will probably work.

There’s also the very, very cool Electric Imp. Basically, it’s an SD card with a built-in WiFi module. After configuring the Imp by holding it up to patterns flashing on your smartphone screen, this device serves as a transparent bridge to the magical ‘cloud’ we’ve been hearing about. The Electric Imp was supposed to have been released in late July/early August, and we’ll put a post up when this cool device actually launches.

Of course we’re neglecting the simplest solution to getting WiFi running on an Arduino project: just use a wireless router. Really, all you need is a pair of TX and RX pins and a copy of OpenWRT. Easy, and you probably have the necessary hardware lying around.

We’re missing a few methods of Arduinofying a WiFi connection (or WiFying an Arduino…), but we’ll let our readers finish what we started in the comments.
Fortifying Veronica’s VGA Output

[Quinn Dunki] just moved to a new work space and had to pack up her homebrew computer project — called Veronica — in the process. She just unboxed it again and decided now was a good time to fortify the VGA display hardware. It wasn’t in the greatest of shape, since everything for the initial video tests had been built on a breadboard. The transition to protoboard ended up turning out just swell.

One of the thing’s that we like best about [Quinn’s] hacks is that she documents her failures (or perhaps we should just call them hiccups?) just as much as she does her successes. This is not a small thing. We understand, because our own screw-ups don’t usually get photographed due to our raging need to just make the frakking thing work.

Once she had moved all the components to the new board the circuit was amazingly organized. Since she’s doing high-speed switching with the VGA signals it was important to keep the lines as short and straight as possible, hence the SRAM stack seen above. But when it was first fired up she had a jumble of only-somewhat-organized color stripes. It turns out that she had forgotten to change the color register in the AVR code, the color lines were hooked up in the wrong order, and the switch mode supply was injecting noise into the system. But thanks to her documentation of these issues we’ll know what to do when we find ourselves in a similar situation.