Hackaday Links May 13th 2012

Amazing ass… for a robot

Yep, Japan still has the creepy robotics market cornered. Case in point is this robotic posterior. Don’t worry, they’ve included a dissection so you can see how the insides work too. [via Gizmodo]

Time-lapse camera module results

As promised, [Quinn Dunki] sent in a link to the photo album from her time lapse camera module. In case you missed it, she built it in a Tic Tac container and stuck it to the side of a racecar.

Kinect controlled killbot

Didn’t we learn anything from RoboCop? We could totally see this Kinect controlled robot (which happens to weigh five tons) going out of control and liquefying an unsuspecting movie extra standing near it. [via Dvice]

Laser popping domino balloons

apparently [Scott] has set a world record by using a laser to pop a line of 100 red balloons. We enjoy seeing the size of the 1W laser that does the popping… it can’t be long now before we get a hold of handheld laser pistols. [via Gizmodo]

Laser balloon targeting

If that last one was a bit of a let down, you might enjoy this automatic targeting system more. The blue triangle shaped icon is setting a target, the amber triangles have already been targeted. Once all the balloons are identified a laser quickly zaps each in order. Quite impressive, although no details have been provided. [Thanks everyone who sent in a link to this]

http://gizmodo.com/5909007/we-hope-lasers-popping-hundreds-of-balloons-is-the-new-dominos-fad

8-bit Logic Chip Computer Build

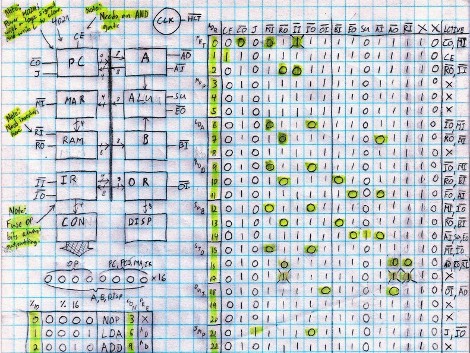
[Kyle] has been hard at working building an 8-bit computer from the ground up. He’s using a set of logic IC’s for the various components, and some NVRAM chips to store the control words. What you see above is the roadmap for his instruction set. He’s just started writing them to the chips, making the job easier by building an Arduino-based programmer.

We’ve enjoyed watching [Quinn Dunki’s] progress with her Z80  6502-based PC build which started on a breadboard in much the same way but has come a long way since those humble beginnings. Recently we also looked in on a 4-bit computer that is using discrete components. But [Kyle’s] take on the challenge falls somewhere in between the two.

The gist of his design can be found in one of his earlier post. He’s got a ring counter which starts by clearing the address register. It then loads the NVRAM address of the next instruction which is then executed on the subsequent count. It seems the build still has some way to go so make sure to keep your eye out for updates.

[via Reddit]

Veronica Gets VRAM And Its Own Boot Logo

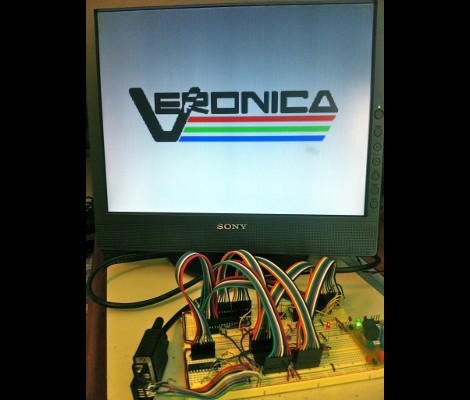
[Quinn Dunki] just reported in on the latest iteration in her computer project which is called Veronica. This time she added RAM to increase the VGA performance of her build. Like just about every other part of the project, [Quinn] knew what she wanted to do, but had to overcome a lot of issues along the way.

The goal is to implement a 256×240 display with 8-bit color depth. [Quinn] says this is on par with game console technology from the 1980’s. The problem is that the 10MHz AVR controller can’t really keep up with the scan rate of this size of display. The answer is to add RAM which stores all of the color data, the microcontroller will simply advance the address pointer on the memory chips to match the sync rate of the VGA output.

After hooking up her hardware design she gets a screen full of uninitialized pixel data. But moving from there to the final product seen above was quite frustrating. It turns out that noise on the breadboard was most of the problem, further compounded by entire breadboard row which wasn’t contacting the wires to make the temporary connections. A bit of jockeying for position and by Jove, she’s got a boot screen.

That breadboard sure has become crowded since her first VGA experiments.

808 Camera Hack Produces A Time-lapse Tic Tac Box

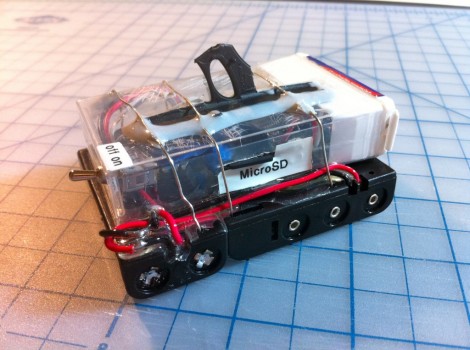
It’s not really conceived as a spy cam, but it could be. [Quinn Dunki] built this tiny time-lapse camera project with racing in mind. She’s involved in a group that endurance races clunkers, and part of the fun is sharing the experience of riding around in the old beaters. The module seen above takes a picture every four seconds and will last 24 hours before needing new batteries or an SD card change. We wonder if that’s longer than some of the ‘racecars’ make it?

She picked up an 808 camera, which looks like the key fob you use to unlock your car doors. They’re so cheap you can include them in projects and not really care if you don’t get them back. Inside it’s got a small lithium battery, the circuit board with a processor, microSD card slot, and of course the SSD used to capture the images. To control the device she used a tiny relay with an ATtiny13 used for the timing. We think the battery selection is a bit overboard, but maybe the next version will be a little more conservative.

There was one folly along the way. She wanted to attach this to the body of the car with a handful of magnets. But they don’t play nicely with the magnetic relays so that was out. The solution was to add that lanyard ring to the case which will allow the camera to be zip tied to the vehicle. So far there are no time-lapse movies available, but keep your eyes on our links posts and we’ll try to include one when it pops up.

ATmega324 Acts As A GPU For Homebrew Computer

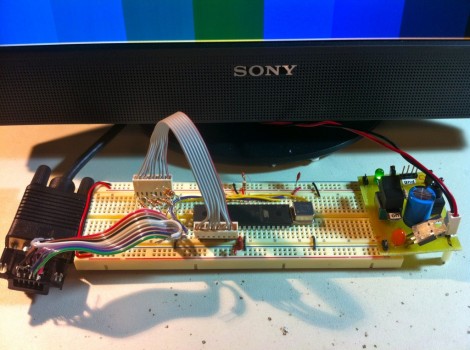
[Quinn Dunki’s] homebrew computer project is moving up another evolutionary rung. She needs a more versatile user interface and this starts with the data output. Up to this point a set of 7-segment digits has served as a way to display register values. But her current work is aimed at adding VGA output to the system.

She starts off her write up by justifying the protocol choice. Although composite video would be easier to get up and running (we see it in a lot of AVR projects) [Quinn] doesn’t have a screen that will display composite video. But there’s also a lot of info out there about VGA signal generation. She delved into the specifics and even found a great AVR-based example over at Lucid Science.

The version seen above uses the 40-pin ATmega324. It’s a lot bigger than necessary for the example she put together, but in the future she plans to add video memory and will be glad to have all of those extra I/O pins. When it comes to video sync, timing is everything. She wrote the code to drive the display using assembly. In this way, she was able to look up the cycles used for each command to ensure that the loop is running with near perfect timing.

8-bit Computer Project Lands In A Philco Radio Case

We’ve enjoyed seeing the development progress of Veronica, [Quinn Dunki’s] 8-bit computer project. It started out on a breadboard, then moved to edge-connected PCBs, and now [Quinn] has given Veronica a body of her own.

The donor is a Philco Model 42-327T and was produced in 1942. It was chosen because it is non-functional and missing several pieces. We wonder about the collector’s value of the piece but since [Quinn] snagged it from eBay there can’t be in huge demand right now. The teardown images are priceless. There seems to be no reasoning behind component placement for the beast. It looks more like a junk drawer packed full of relic components than something that actually worked once upon a time.

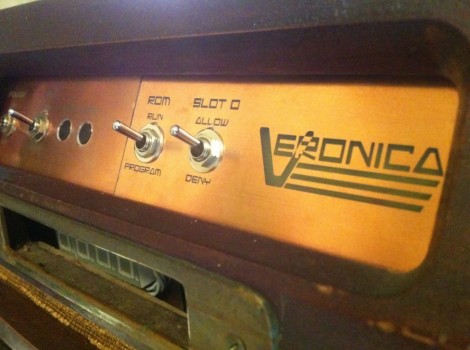
But we digress. After gutting the retro wooden case [Quinn] set out to fabricate her own face plate. Since she’s comfortable working with copper clad, she whipped up a negative design and etched the dashboard seen above. It mounts in the original dial opening, and hosts all of the controls she needs to work with the 8-bit computer. Just below is where the present buttons used to be located. You can just see the hexout display for reading data from the registers mounted in that void.

Etching PCBs With Vinegar

When we hear about etching PCBs at home we assume that either Ferric Chloride or Cupric Chloride were used to eat away unmasked copper from the boards. But [Quinn Dunki] just wrote up her PCB etching guide and she doesn’t use either of those. Instead, she combines vinegar, hydrogen peroxide, and salt. It’s easier to find vinegar than muriatic acid (Cupric Chloride is made using this, peroxide, and adding the copper) so this is something to keep in mind if you’re in a pinch (or a Macgyver situation).

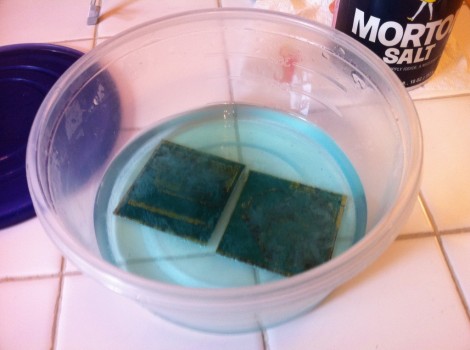
The rest of the process is what we’re used to. She’s using photoresistant boards which can be masked with a sheet of transparency instead of using the toner-transfer method. Once they take a bath in the developer solution she puts them in a shallow dish of vinegar and hydrogen peroxide along with a teaspoon of salt. She wipes the surface with a foam brush every minute or so, and inspects them every ten minutes to see if they’re done.

She does discuss disposal. Seems that she throws the solution in the garbage after each use. The liquid will contain copper salts which are bad for wildlife. We’ve heard that you should neutralize the acid and make a block of concrete using the liquid, then throw it in the garbage. Does anyone have a well-researched, ethical, and environmentally friendly way of getting rid of this stuff?