Epson Projector LED Mod

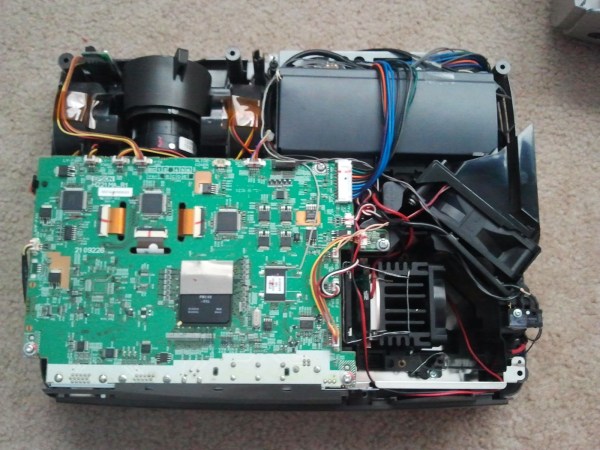
Projector bulbs can be incredibly expensive to replace. Sometimes it’s more cost efficient to just buy a whole new projector instead of a new bulb. [Shawn] recently found a nice deal on an ‘as is’ Epson EMP-S4 on eBay and decided to take a chance. He assumed it probably worked with the exception of the missing lamp the seller mentioned. His suspicions were correct, and one custom LED mod later, his projector was up and rolling.

Without a stock lamp installed, the projector would give an error message and shut itself off. So, the first step was to wire up a little bypass. Once that was taken care of, [Shawn] installed a 30W 2000 lumen LED and custom fit an old Pentium CPU heatsink to keep the LEDs temperature down. He also wired up the heatsink fan in parallel with the stock exhaust fan for good measure.  Optical lenses help focus the light, and some custom wiring makes the LED turn on and off just like the stock lamp would.

In the end, his first experiment was a success, but [Shawn] wants to try an 8000 lumen 100W LED to make it about as bright as the stock lamp was. Check out a little video walkthrough after the break.

[Thanks Shawn]

Continue reading “Epson Projector LED Mod”

Playing MAME Games On A RGB Laser Projector

MAME Laser Projector

Vector based displays were used for arcade games in the ’70s and ’80s. A typical CRT uses raster graphics, which are displayed by deflecting a beam in a grid pattern onto a phosphor. A vector display deflects the beam in lines rather than a full grid, drawing only the needed vectors. Perhaps the best known vector game is the original Asteroids.

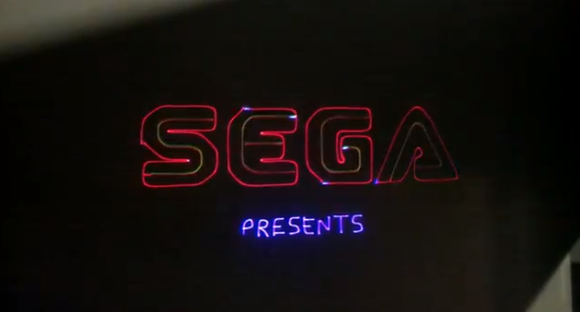
[Jeremy] built up a RGB laser projector, and wanted to run some classic arcade titles on it. He started off by using the XMAME emulator, but had to modify it to communicate with the laser and reduce flicker on the display.

To control the laser, a modified version of OpenLase was used. This had to be enhanced to support RGB color. The modified sources for both the MAME emulator and OpenLase are available on Github.

[Jeremy]’s friend, [Steve], even got a vector based game that he wrote working on the system. “World War vi” is a shoot-em-up battle about the vi and emacs text editors.

The results of the build are shown in a series of videos after the break.

Continue reading “Playing MAME Games On A RGB Laser Projector”

Never Pay More Than $10 For A Projector Mount

[Lou] needed to mount his projector to finish up his home theater. But he was rather put off by the cost of commercial solutions. He ended up building his own projector mount for about ten bucks. The technique reuses some scrap metal and sources connectors from the hardware store. If your projector will be mounted flat to the ceiling we think this will work just as well for you as it did for him.

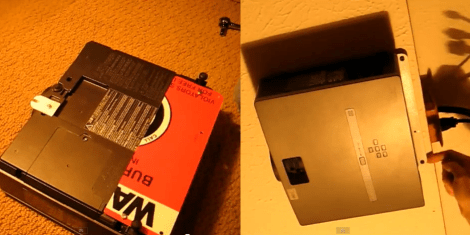
To the left we get a good look at the two parts which make up the mounting bracket. [Lou] is reusing a metal warning sign. One large piece is attached to the back portion of the projector and hangs over the end about a half-inch. On the front there is a tab with a slot in it made out the same sign. The slot accepts the head of a three-inch drywall screw. There are two holes in the rear piece which also receive screws. Once the projector is in place the screws can be adjusted to achieve the proper projection angle. [Lou] does a full walk through of the project in the video after the break.

This goes perfectly with the $50 projection screen that he built.

Continue reading “Never Pay More Than $10 For A Projector Mount”

16×8 Pixel Laser Projector

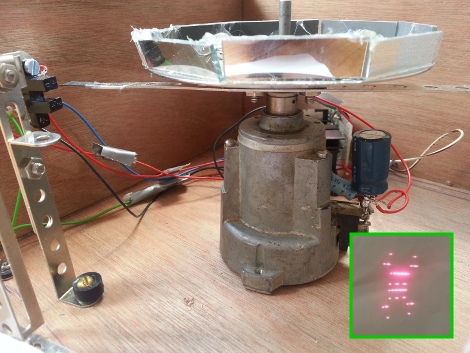
[Michiel] gave us a little shout-out by drawing the Hackaday logo with his recently completed 16×8 pixel laser projector. It uses a spinning set of mirrors mounted at slightly different angles to redirect the path of the red laser diode.

The projector is driven by an Arduino. To give it more than just a hard-coded existence [Michiel] included an Xbee module. This lets him connect to it with a computer in order to stream messages. One of the demo videos linked in his project log shows the web interface he coded which will push a message typed in the submission form out to the projector where it is scrolled like a marquee.

This type of spinning display is one of a few common methods for making laser projectors. In the image above you can see the optical sensor which is used to sync the diode with the spinning mirrors, each of which is responsible for a different row of pixels. He lists off several things that he learned when working on the project. We think the most important is the timing issues which go into something like this.

Keeping An Old 8mm Projector Alive With High-power LEDs

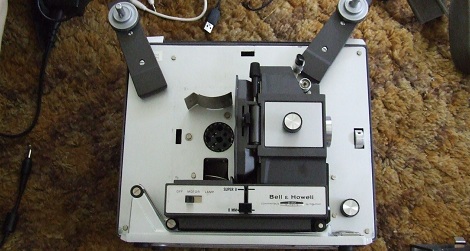
There’s a certain mystique about old home movies and 8mm film; whether it’s footage from a family gathering from 40 years ago or a stop-motion animation you made when you were 12, there’s an immediacy for film that the VHS tapes from your family’s first camcorder can’t match. [Teslas Moustache] has been getting into 8mm cameras and projectors, so when he came across a 8mm/super 8 projector that needed a bulb, he knew he had a worthwhile project on his hands.

To replace the burnt-out and very expensive to replace incandescent bulb, [Teslas] sourced a very bright star LED from Jameco. This 1 Watt LED puts out more than enough light to project a frame of film onto a screen and fortunately doesn’t get as hot as the stock bulb.

To power the LED, [Teslas] used a cell phone charger powered from the 120 VAC incandescent socket to supply the requisite 5 Volts at 1 Amp (Ohm’s Law works on coffee) power for the LED. Right now, there’s still the matter of fabricating a nice enclosure to mount the LED and charger in the bulb socket, but once [Teslas] figures that out, he’ll have a very nice 8mm projector on his hands.

3D Printer With Insane Accuracy Uses A DLP Projector

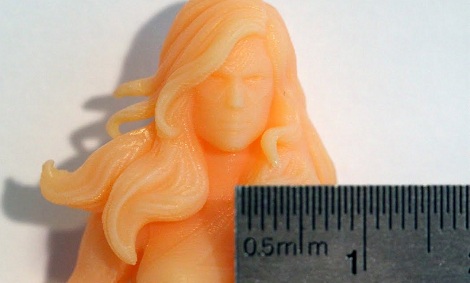
After years of work, [Junior Veloso] is finally getting his 3D printer project out to the public. Unlike the Makerbots and repraps we usually see, [Junior]’s printer uses light-curing resin and a DLP projector to build objects with incredibly fine detail.

One highlight of [Junior]’s project is the development of low-cost resins. Normally, light curing resins are extremely expensive, but [Junior] is actively trying to get the price of resin down to $150 USD per kilogram. A quick back-of-the-wolfram calculation tells us you should be able to print about 7-800 cubic centimeters with a kilogram of resin. It’s much more expensive than plastic filament used in other 3D printers, but that’s the price you pay for quality.

There’s a very popular Indiegogo campaign that is trying to raise money to mass produce the resin and some components of this kit. We’re not impressed with the rewards for this campaign – $59 for a .PDF description of the printer without any dimensions, $159 for a BOM, dimensions and the formula to make your own resin, and $400 for the closed-source software [Junior] devleoped – but hopefully this Indiegogo gets cheap resin out onto the market. There’s a short FAQ about this printer, so we’ll leave our readers to tactfully discuss the merits of this printer in the comments below.

You can check out the process of printing a remarkably detailed alien skull in the video after the break.

Continue reading “3D Printer With Insane Accuracy Uses A DLP Projector”

Baby’s First Star Light Projector And A Foil Slip Ring

For a newborn, everything is magical; a lack of object permanence means everything is new, wonderful, and novel. What then, could be better than a projected star field circling an infant’s room, gently sending them to sleep?

[Pete] was inspired by this earlier starlight projector that projects a rotating star field onto the walls and ceiling of a nursery. Instead of a rather loud servo, [Pete] used a quiet 12 Volt gear motor that spins the star field at 5 RPM. Like the previous build, a LED was used but [Pete] found a color-changing RGB LED that automatically shifts colors.

The shaft of [Pete]’s gear motor is tiny, and unlike the servo, there’s constant rotation. This meant a slip ring was needed to pass electricity into the spinning sphere. A piece of copper foil and a pair of improvised brushes served just fine. While [Pete]’s project, like its predecessor, doesn’t seem to have any recognized constellations drilled into the sphere, the foil slip ring opens up the possibility for a small microcontroller being fitted inside the globe with blinking lights.

Check out the video of [Pete]’s build in action after the break.
Continue reading “Baby’s First Star Light Projector And A Foil Slip Ring”