Shutter Trigger Remote With Some Nice Design Considerations

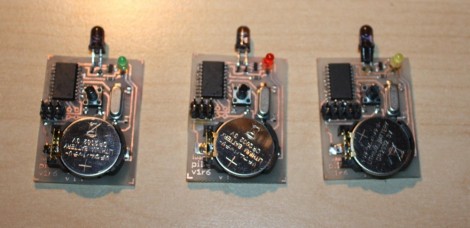
Here are the guts of [Lukasz’s] infrared camera remote control. He based it off of an existing design, but looked for places where improvements could be made. He felt the ATtiny2313 was a bit wasteful in this case. But further investigation led him to see why it was chosen. If you were to drop down to an ATtiny13 the ability to connect a crystal oscillator is lost (that chip only offers a 1-pin clock signal input) and the internal RC oscillator isn’t quite up to his standards for reliable IR communications.

Instead of driving the IR LED directly from an AVR pin he used a transistor in hopes that it will allow the maximum current to flow through the diode when in use. We’re not sure if it’s necessary, but we can see how it makes sense. Power is received from an unregulated 3 volt coin cell, so maybe as that voltage drops over time this will come into play.

Speaking of that coin cell, battery life is a concern here. [Lukasz] is using the sleep functions of the AVR after three seconds of use. This should keep the cell alive for quite a long time. But his 0 volt measurement is an anomaly with the multimeter he’s using. To get a precise measurement for tiny current flow you need extra equipment, like [Dave Jones’] uCurrent adapter.

The schematic for this Canon camera compatible project is only provided in Eagle format so we’ve embedded an image of it after the break for your convenience. You should have no problem making this work with a Nikon if you swap out some of the code from the TV-B-Gone shutter release we saw on Thursday.

Continue reading “Shutter Trigger Remote With Some Nice Design Considerations”
Camping Light Retrofitted As A Solar Recharging Station

With grand plans of tenting out for several days at a music festival [Josh] needed a way recharge his portable devices. In the past he’s lugged around a 12V battery with him, but this year he wanted to make things easier. He ended retrofitting a camping light to do the job with the help of the summer sun.

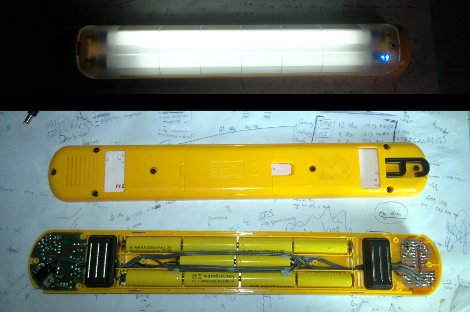
The first step of the project was to source some rechargeable batteries. He toyed with the idea of Li-Ion cells but ended up going with NiMH because the charging is more forgiving and he got them at a great price. Because of the lower operating voltage (1.2V versus Alkaline’s 1.5V) he needed to squeeze two more into the lamp housing. Here you can see that he just managed to get them to fit in the wire-run area down the middle of the case.

Next comes the recharging circuit. He based his design around an ATmega44, using a voltage divider and the ADC to detect when the batteries are topped off. During the day this is connected to an external solar panel and it’s ready to charge his phone when he gets back at night.

The Folly Of Adding An Auxiliary Audio Input To A Hyundai Sonata

Why auxiliary audio inputs haven’t been standard on automotive head units for decades is beyond us. But you can bet that if you’re looking at a low-priced sedan you’ll need to buy an entire upgrade package just to get an audio jack on the dash. [Jon W’s] Hyundai Sonata didn’t have that bells-and-whistles upgrade so he decided to pop his stereo out and add his own aux port.

A big portion of this hack is just getting the head unit out of the dash. This is made difficult on purpose as an anti-theft feature, but [Jon’s] judicious use of a butter knife seemed to do the trick. He lost some small bits along the way which were recovered with a Shish Kebab skewer with double-stick tape on the end.

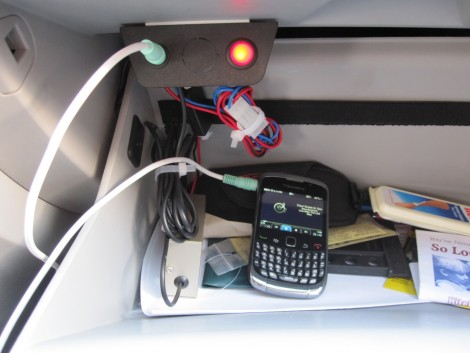
With the head unit out, he opened the case and plied his professional Electrical Engineering skills to adding the input. Well, he meant to, but it turns out there’s no magic bullet here. The setup inside the unit offered no easy way to solder up an input that would work. Having done all of the disassembly he wasn’t going to let it go to waste. [Jon] grabbed a nice FM transmitter setup. He wired it up inside the dash and mounted the interface parts in the glove box as seen here.

It’s nice to know we’re not the only ones who sometimes fail at achieving our seemingly simple hacking goals. At least [Jon] was able to rally and end up with the functionality he was looking for.

Look, It’s A Helicopter! It’s A Plane! It’s A Rolling Robot!

The helicopter-plane-ball-bot sounds like a creation [Homer Simpson] would come up with, but it’s a fairly accurate description of what this machine can do. It was developed by researches at Japan’s ministry of defense. The single propeller lets it operate much like a helicopter. But when it needs to get somewhere quick, the body repositions itself with the propeller at the front, while those black panels function as wings. Finally, the spherical body lets it travel along surfaces, vertical or horizontal. It can even roll along the ground.

After the break you can see a flight demo video from the 2011 Digital Contents Expo. It makes us wonder about the control interface. Which part of this is the front side, and how does it know which direction the operator intends to steer it? Perhaps there is feedback on the cardinal orientation of the control unit? We don’t have the answers to these queries, but we think there’s something very Sci-Fi about it. It brings to mind the Dog Pod aerostatic defensive grid from Neal Stephenson’s novel The Diamond Age.

Continue reading “Look, It’s A Helicopter! It’s A Plane! It’s A Rolling Robot!”

DIY Binary Alarm Clock Small Enough To Fit In Your Pocket

portable-binary-clock

[linux-dude] always wanted to have a binary clock, but he didn’t want to pay someone else to make it for him. Additionally, he was looking for a compact alarm clock he could take on the road, rather than relying on the one in his hotel room.

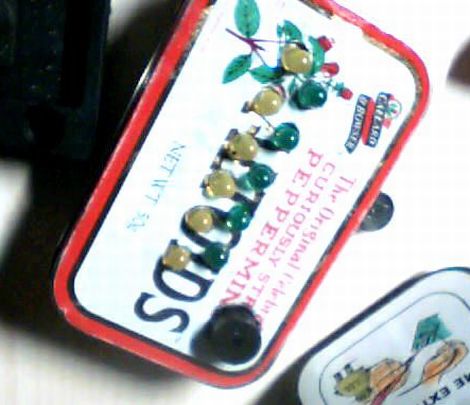
Inspired by other binary clock projects he has seen over the years, he set off to build his own, which he wanted to fit inside an Altoids tin. His binary clock uses an Arduino Duemilanove (which fits perfectly in the tin) to keep time and control the indicator LEDs. The LEDs are arranged in two rows as you would expect, representing hours and minutes. A small piezo speaker serves as the alarm buzzer, which should be sufficient to wake up most people, though something bigger might be required for heavy sleepers.

We didn’t see any sort of battery pack or power plug mentioned, so we’re not quite sure how [linux-dude] keeps his clock juiced up. Additionally, the lack of an real time clock is something we’re puzzled by. While the Arduino does have a clock function that can be used, an RTC might serve him better – then again if he’s gone for just a day or two at a time, a small amount of drift may not be an issue.

beer-security

Beer Security System Keeps Freeloaders Out Of Your Stash

The crew at the Milwaukee Hackerspace are pretty serious about their beer. They used to have a fridge filled with cans, available to all at the hackerspace, but they decided to beef things up and create a secured beer dispensing system.

Like many others we have seen, their kegerator is built into an old refrigerator, complete with a tap built into the door. To ensure that interlopers are kept from their precious brew, they have secured the refrigerator using an Arduino and RFID tags to grant access. They use the same RFID key fobs members carry to gain access to the space for tracking beer consumption, unlocking the tap whenever a valid tag is swiped past the sensor.

They are still in the midst of tweaking and revising the system, but it looks good so far. It’s a great way to keep uninvited guests from their beer stash, while giving them a way to track consumption at the same time. We’re looking forward to seeing more details and code once things are completely wrapped up.

[via BuildLounge]

Second Run At Taser Gloves Uses Bug Zapper Parts

[Jair2k4] ditched the Altoids tins and found a new voltage source for this latest rendition of his taser gloves. Regular readers will remember his first iteration which used wrist-mounted enclosures containing the flash circuitry from disposable cameras to shock the wits out of someone with the laying on of hands. This one is a complete rework but it follows the same concepts.

The new shock circuitry is from a bug zapper in the shape of a fly swatter. We’ve seen these handheld devices before and dismissed them as a gimmick, but [Jair2k4] got his hands on a couple of them and found out they can put out a spark of up to 2300 volts. He set to work by getting rid of the tennis-racket-style grid at the top of the handle. He soldered on some contacts which reach to the tip of his middle-finger and thumb on some rubberized work gloves. The original handle was kept as it’s a nice battery holder and works well strapped to his forearm.

Does it work? You bet – even singing his arm hair and leaving welts on his skin. See for yourself after the break. And yes, this goes on the list of hacks you should recreate!

Continue reading “Second Run At Taser Gloves Uses Bug Zapper Parts”