DIY RFID Shielded Wallet Keeps Data Thieves At Bay

diy_rf_shielded_wallet

[Serge] was in search of a new wallet, but he was concerned about ne’er do wells with RFID readers stealing his data. He could have gone out to the store and plunked down $20-$30 for a shielded walled, but where’s the fun in that? Instead, he decided to make his own.

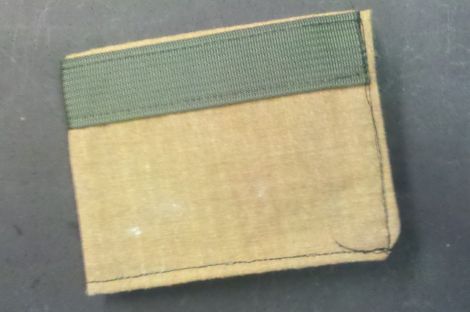
Using Kevlar-Nomex fabric, he laid out the general structure for his wallet. This ultra-strong fabric has a breaking strength of 500lbs, but blocking RF isn’t exactly its forte. To provide some electromagnetic shielding, [Serge] added a nice uniform layer of silver epoxy to the Kevlar, which carries an added bonus of strengthening the material. He fired up the sewing machine, adding a nylon strip to the exterior of the wallet for reinforcement, then he worked on forming the bill pouch and card holders.

The final result is a plain yet incredibly rugged wallet that’s sure to keep his various RFID-enabled cards safe. We really dig how unassuming the wallet is – no flash, all function. Nice job, we’ll take one!

Laser Cut Clock Reminds Us Of A Spirograph

[Brian] from Louisville’s LVL1 hackerspace sent in this laser cut gear clock that’s almost unlike any other clock we’ve seen before. [Brian] also put up a wonderful Instructable for his build.

Since LVL1 got a better laser cutter a lot of neat projects have been piling up. [Brian] based his clock around two cheap stepper motors driven by a freeduino. A chronodot was used to keep accurate time. Making the gears, though, presented a few problems. While prototyping the gear clock face, it was apparent that the numbers should be oriented along a line coming from the center of the gear. The prototype also used 100 teeth and that didn’t translate well into a clock design. [Brian] designed the minute gear with 60 teeth, and the hour gear with 144 teeth so that each tooth would equal 5 minutes.

[Brian]’s clock is functionally similar to this $2500 gem, and certainly much less expensive even after the cost of the laser cutter is taken into account. Of course, the Spirograph clock keeps track of minutes so it may be worth upwards of $5k.

Modifying DD-WRT’s Protected GUI

hacking_the_ddwrt_gui

[Craig] is always keeping busy by deconstructing and poking around in various firmware images. This time around he has taken on the task of modifying the DD-WRT package, a popular replacement firmware for SOHO routers.

While the firmware is released under the GPL, [Craig] cites that it’s pretty difficult to build from source. Instead, he says that the typical course of action is to extract files from the firmware image, alter them, then reconstruct the image. This works for most things, but the DD-WRT GUI files are protected in order to prevent modification.

Since the phrase “you are not allowed to do that” doesn’t exist in his vocabulary, [Craig] set out to see if he could make his way around the protections and change the GUI code. It took quite a bit of digging around using IDA Pro and readelf, but he was eventually able to extract, tweak, then reinsert individual pages back into the firmware image.

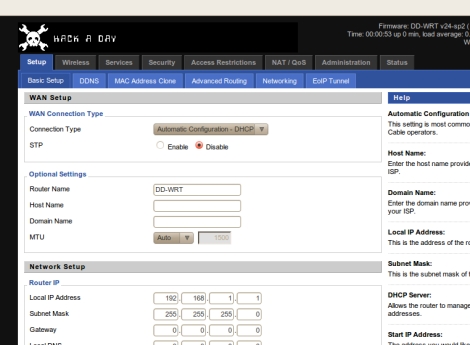
The process is pretty time consuming, so he put together a tool called webdecomp that automates the extraction and rebuilding of DD-WRT’s web page file. If you’re interested in rocking a custom Hackaday-branded router interface like the one shown above, be sure to swing by his site and grab a copy of webdecomp.

Video: Eagle CAD Layout

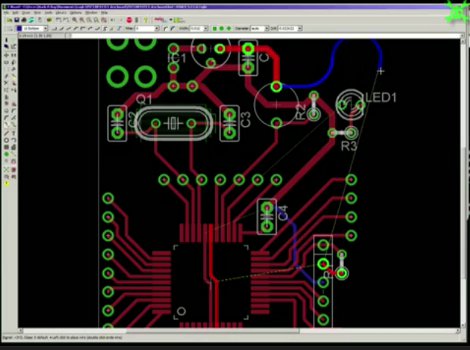
This week’s video is the last in a series of videos where we show how to use Eagle CAD. Today we will look a the Layout portion of the program and will create a circuit board from the schematic that we created previously. We start by creating a layout file and then moving all of the parts to appropriate places on the circuit board. After that, [Jack] shows how to route the traces. Along the way, he talks about the tools that he is using and various ways to use them. The end result is a prototyping board for the PIC18F44J11.

Like the others, this video is fairly long at 29 minutes, so make sure to have some time dedicated towards watching it if you do.

In next week’s video, we will be showing this board as it arrived to us from a manufacturer and will do a tutorial on how to solder.

If you have missed our previous videos, you can find them here:

Schematic part I
Schematic and Custom part creation
CAM Processor

We have also created many supplemental videos explaining how to use many of the tools in the tool palettes. You can find them on our Youtube channel:

Check out the video after the break!
Continue reading “Video: Eagle CAD Layout”

Build Cheap Panning Camera Mounts For Time Lapse Photography

diy_ikea_panning_camera_mount

Panning time lapse photographs always look pretty cool, but there’s that whole “making a panning time lapse” rig that gets in the way of all the fun. [Getawaymoments] put together a tutorial quite a while ago showing how to use Ikea egg timers as cheap and dispensable panning units, and has updated his instructions with a pair of refreshed designs.

He stumbled upon two new egg timers at Ikea, the Stam and Ordning, which sell for $1.99 and $5.99 respectively. The Stam is a small plastic model that can be fitted with a set screw, to which most cameras can be mounted. A small bushing can also be installed in the timer’s plastic base, allowing it to be mounted on any standard tripod.

The Ordning is a beefier unit capable of withstanding more abuse than its plastic brethren, hence the larger price tag. A few minutes on the drill press makes room for a metal bushing, allowing the Ordning to be installed on any tripod as well.

The hack isn’t high tech, but we’re impressed with the results he was able to get with these simple kitchen timers. For the cost and time required to build them, they are sure to give most other panning rigs a run for the money.

Continue reading to see a short instructional video demonstrating how to build one of your own.

[via Make]

Continue reading “Build Cheap Panning Camera Mounts For Time Lapse Photography”

Air Wick Odor Detect Teardown

air_wick_odor_detect_teardown

[Hunter’s] wife came home from her latest extreme couponing session with a handful of free Air Wick Odor Detect air fresheners, and since they had so many of the things sitting around, he was compelled to take one apart to see what makes them tick.

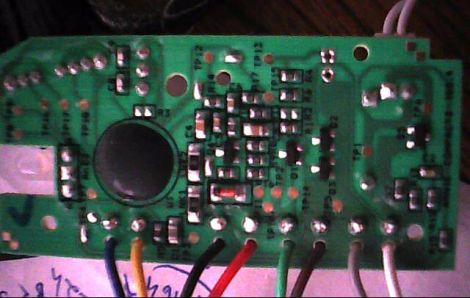
The casing was secured with melted snap tabs which had to be cut, making disassembly a one-way street. Once opened, he found a trio of white label AA cells and an ARNIE COMPACT3 ISS.4 controller board, complete with an epoxy-sealed microcontroller. A similarly branded sensor board was attached to the controller, and he spotted a solenoid with a built-in nozzle for spraying air freshener as well.

The sensor board piqued his curiosity the most, and after some research he’s pretty sure that the Air Wick uses an Applied Sensor VOC air quality module to get the job done. The tiny sensor uses a special substrate containing electrodes, which measure the resistance of the sensing layer while it is heated to upwards of 400° C.  A change in resistance lets the air freshener know that it’s time to handle the odoriferous emanations floating about.

Thanks to [Hunter] for taking the time to tear the Air Wick down and letting us know what’s inside!

A Solar-Powered Automatic Chicken Coop

Although we’ve featured many chicken-related hacks here, this chicken coop features a solar-powered door to save one from having to open up the coop in the morning.  As [chrisatronics] puts it “keeping chickens has one major drawback: You have to get up with them in the early morning and open the door at the coop. Everyday. Including Sundays and holidays.” This would help explain why so many people seem to be hacking their coops.

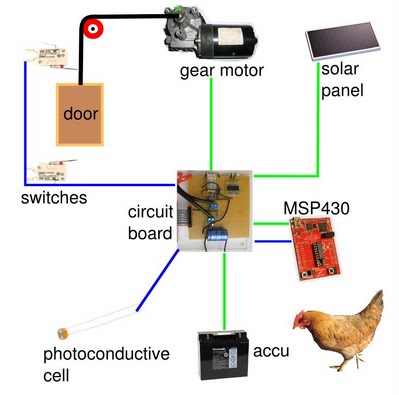
Solar power may be an interesting idea in itself, but when coupled with the fact that a chicken coop isn’t necessarily near a power supply, this becomes a very expedient solution. Controlling the setup is a MSP430 microcontroller (programming featured here for Linux) with a salvaged windshield wiper gearmotor. [Chrisatronics] did a great job writing this hack up, so if you want to try this yourself, make sure to check out the article.

Also, don’t forget to check out the video after the break for the ‘coop in action! Continue reading “A Solar-Powered Automatic Chicken Coop”