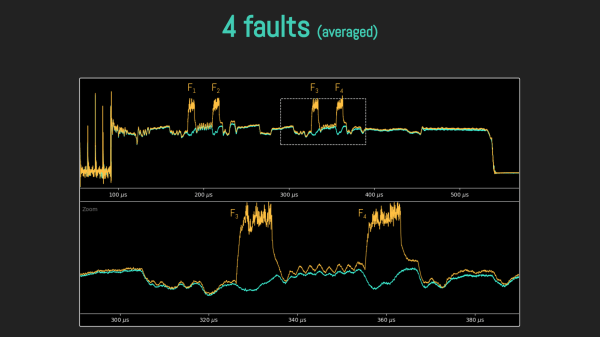
A slide from the presentation, showing the power trace of the chip, while it's being pulsed with the laser at various stages of execution

Defeating A Cryptoprocessor With Laser Beams

Cryptographic coprocessors are nice, for the most part. These are small chips you connect over I2C or One-Wire, with a whole bunch of cryptographic features implemented. They can hash data, securely store an encryption key and do internal encryption/decryption with it, sign data or validate signatures, and generate decent random numbers – all things that you might not want to do in firmware on your MCU, with the range of attacks you’d have to defend it against. Theoretically, this is great, but that moves the attack to the cryptographic coprocessor.

In this BlackHat presentation (slides), [Olivier Heriveaux] talks about how his team was tasked with investigating the security of the Coldcard cryptocurrency wallet. This wallet stores your private keys inside of an ATECC608A chip, in a secure area only unlocked once you enter your PIN. The team had already encountered the ATECC608A’s predecessor, the ATECC508A, in a different scenario, and that one gave up its secrets eventually. This time, could they break into the vault and leave with a bag full of Bitcoins?

Lacking a vault door to drill, they used a powerful laser, delidding the IC and pulsing different areas of it with the beam. How do you know when exactly to pulse? For that, they took power consumption traces of the chip, which, given enough tries and some signal averaging, let them make educated guesses on how the chip’s firmware went through the unlock command processing stages. We won’t spoil the video for you, but if you’re interested in power analysis and laser glitching, it’s well worth 30 minutes of your time.

You might think it’s good that we have these chips to work with – however, they’re not that hobbyist-friendly, as proper documentation is scarce for security-through-obscurity reasons. Another downside is that, inevitably, we’ll encounter them being used to thwart repair and reverse-engineering. However, if you wanted to explore what a cryptographic coprocessor brings you, you can get an ESP32 module with the ATECC608A inside, we’ve seen this chip put into an IoT-enabled wearable ECG project, and even a Nokia-shell LoRa mesh phone!

Continue reading “Defeating A Cryptoprocessor With Laser Beams”

Portable ESP32 RGB Lasershow Has All The Trimmings

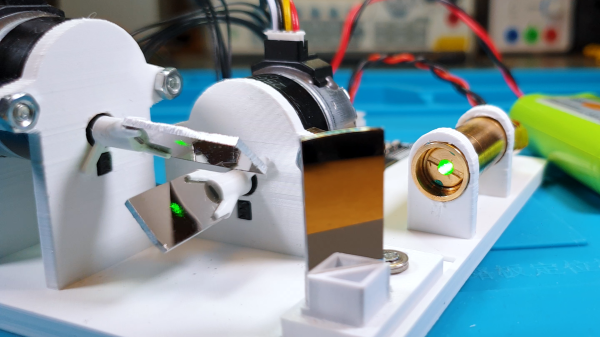
Perhaps there was a time when fancy laser effects were beyond those without the largest of bank accounts, but today they can be created surprisingly easily. [Corebb] shows us how with a neat unit using an off the shelf RGB laser module and mirror module, driven by a ESP32 with software designed to make it as easy as possible to use.

The video below the break is in Chinese so you’ll have to turn on the subtitles if you’re an Anglophone, and it takes us through the whole process. It’s mounted in an SLA 3D printed enclosure which neatly holds all the parts. The ESP32 module drives a couple of DACs which in turn drive the galvanometer motors through a pair of amplifiers.

Then the software allows all sorts of custom displays for your creative expression, including uploading quick sketches over WiFi. Beyond pretty patterns we see it mounted on a bicycle for a head-up display of speed and navigation info. Even if it does fall off and break at one point we can see that could be an extremely useful accessory.

All the code can be found in a GitHub repository should you wish to try for yourself. Meanwhile we’ve covered a lot of laser projector projects here in the past, including most recently this one using stepper motors in place of galvanometers.

Continue reading “Portable ESP32 RGB Lasershow Has All The Trimmings”

Laser Projector Relies On Steppers Rather Than Galvanometers

Laser light shows have always been real crowd-pleasers. There’s just something about the frenetic movement of a single point of intensely bright light making fluid animations that really captures the imagination. Large-scale laser shows require a lot of gear, of course, but that doesn’t mean you can’t get in on the fun yourself using something like this homebrew X-Y laser projector.

This is actually [Stanley]’s second pass at a stepper-based DIY projector; we featured his previous build back in 2016. This time around, he wanted to move beyond the “module mix-and-match” style of construction, so rather than use an Arduino and stepper shield, he rolled his own controller PCB to hold an ESP32 and a pair of STSPIN220 stepper drivers. The business end of the new version saw improvements, too — given that he was seeing unwanted softening of corners and curving of straight lines in the first projector’s images, he opted for smaller steppers holding smaller mirrors this time around. There’s also a new 3D printed chassis to hold everything, simplifying the build and keeping the two mirrors in better alignment.

The video below has the build details and some nice footage of the projector in action — it’s hard to go wrong with lasers and smoke. The performance seems pretty good, so the improvements seem to have paid off. And for those of you tapping out your “Should have used galvos” comments below, relax; [Stanley] says he’s thinking about ways to make his own galvanometers for the next version.

Continue reading “Laser Projector Relies On Steppers Rather Than Galvanometers”

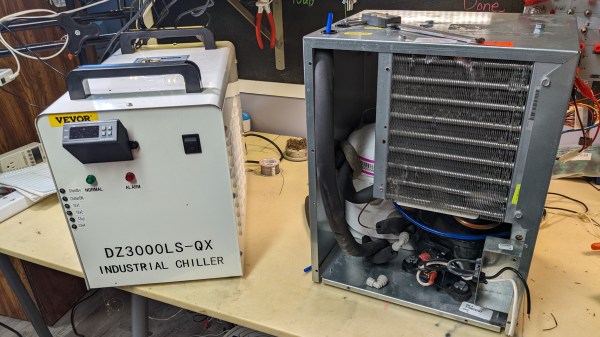
Two chillers side-by-side - the fake chiller on the left and the water fountain chiller (lid-less) on the right

Gutting And Upgrading Laser “Chiller” With No Chill

Getting a cheap CO2 laser cutter is great for your workshop needs, and while you might get a weaker-than-declared laser tube, it’s still going to cut whatever you need to be cut. That might not be the case for the cooling equipment you’re getting alongside it, however, as [RealTimeKodi] shows in a post-project blogpost. They bought a CX3000 “chiller” and found out it had no chiller components (Nitter), only equipped with a radiator, a fan, and a pump.

Having your laser tube water be somewhat close to ambient temperature is something you can already achieve with an aquarium pump and a bucket of water — and it isn’t worth paying $100 for. Left with the sunk cost and an unfulfilled need for a proper chiller, [RealTimeKodi] started looking for paths to take – first one was using TEC elements. The upgrade process was fun, but the result was subpar, as the elements gobbled power with hardly any useful output to show for it.

[RealTimeKodi] didn’t give up, and eventually found an old water fountain chiller with chiller-like components inside, sold for $200. They could’ve used the water fountain as-is, but a few design issues and thirst for adventure got in the way, indisputably forcing them to stuff the fountain’s guts into the CX3000’s case.

Buying a laser cutter can sometimes feel like buying a 3D printer a decade ago — you get a K40, learn to use it, add the missing safety features, mod in autofocus, upgrade the control board, expand the work surface… That said, our experience shows that you don’t need any of those if A4-sized 3 mm wood cutting suit you, but a proper chiller is still worth its weight in gold-plated acrylic.

Continue reading “Gutting And Upgrading Laser “Chiller” With No Chill”

Fiber Laser Your Way To Flexible PCB Success!

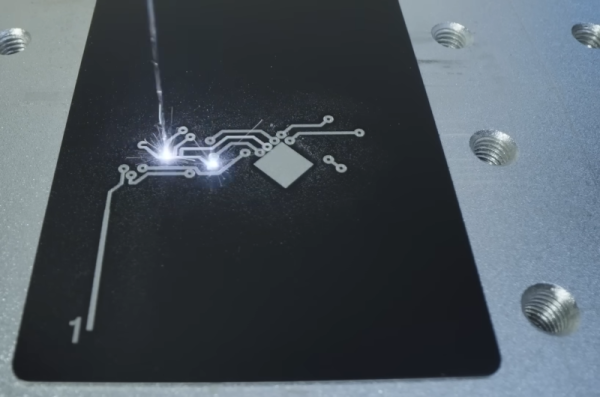
It’s not often we feel that something we’re featuring is a genuinely new and groundbreaking technique, but a team from the University of Maryland’s Small Artifacts Lab may have done just that with their foldable and flexible PCBs created using a fiber laser engraver.

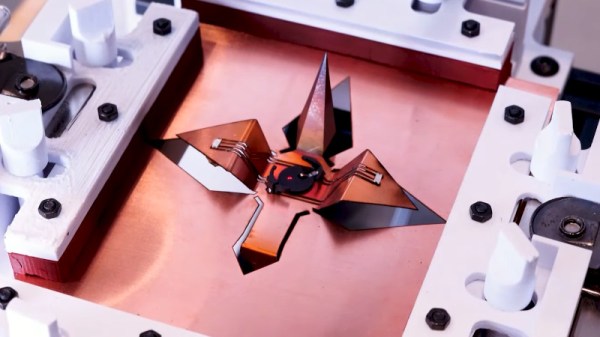
Laser engraving a PCB is nothing new, but they’ve taken a custom PCB material made using Kapton tape and copper foil, and fine-tuned the engraver to not only selectively remove copper, but also to create in-place folds in the Kapton substrate. They have even used the laser to melt solder paste and solder components, though we’re not so convinced about the quality as seen in the video below the break. This means that they can not only create 3-dimensional PCB sculptures but also useful structures such as their example of an all-PCB micro switch. To make things easy they’ve even created a custom CAD package for designing in this medium.

Perhaps best of all, there appears to be nothing here that couldn’t be also performed outside the lab by anyone with enough Kapton and copper, and a fiber laser. We’re looking forward to where this technique will go. If you’re interested, you can read their paper here.

Continue reading “Fiber Laser Your Way To Flexible PCB Success!”

Laser Engraving, Up Close

You know you aren’t supposed to watch your laser while it is cutting or engraving. But [Alex] hosted Wired in his studio and showed them how lasers engrave metal with a fiber laser. You can see the video below.

If you haven’t used a fiber laser, you might be surprised that while a 60 W model can burn metal, it does absolutely nothing to [Alex’s] hand. We wouldn’t try that, by the way, with the common diode lasers you see in most hacker’s labs these days. The video isn’t terribly technical, but it is interesting to see different metals succumb to the powerful laser. There are a few tips about marking different metals in different ways and how to deal with thermal expansion and other effects.

Fiber lasers aren’t as common as diode engravers in private shops, but we assume it is just a matter of time before they get cheaper. Not to mention their widespread use commercially means surplus units might become available, too.

If you are interested in lasers, [Alex’s] YouTube channel has quite a few interesting videos to check out. If you need more power, how’s 200 kW? Then again, even 20 W will get you something useful.

Continue reading “Laser Engraving, Up Close”

$60 Laser Makes The Cut With New Controller

If you are reading the Lightburn forums, you probably already have a laser cutter of some kind.  But, if you are like most of us, you can always be tempted into another “deal.” [Dkj4linux] has a post where he bought a $79 laser engraver  (now selling for between $59 and $65, we noticed). Like most of these cheap engravers, the machine takes a proprietary controller with Windows-only software. No surprise that [Dkj4linux] would want to use…um… Linux. The answer? Rip the board out and replace it with an old spare.

The machine looks well constructed, as you can see in the video below. For that price, you get a 3-watt laser head (that is likely way less than that in terms of optical power), and a build area of 220x290mm. The controller was in a small metal enclosure, and it was easy to simply unplug the two axis and the laser control cable.

Continue reading “$60 Laser Makes The Cut With New Controller”