[Stefan] of CNC Kitchen has an informative video describing his experiences with trying to cleanly laser-mark 3D printed plastics using different methods, and it also happens to be a fantastic tour of all the different laser options available to hobbyists and workshops these days.
Laser marking is a fast and effective way to put things like product names, serial numbers, and other information on plastics. [Stefan] wondered whether laser options would be capable of creating clean and professional marks on 3D-printed items, and approached things with his usual attention to detail.
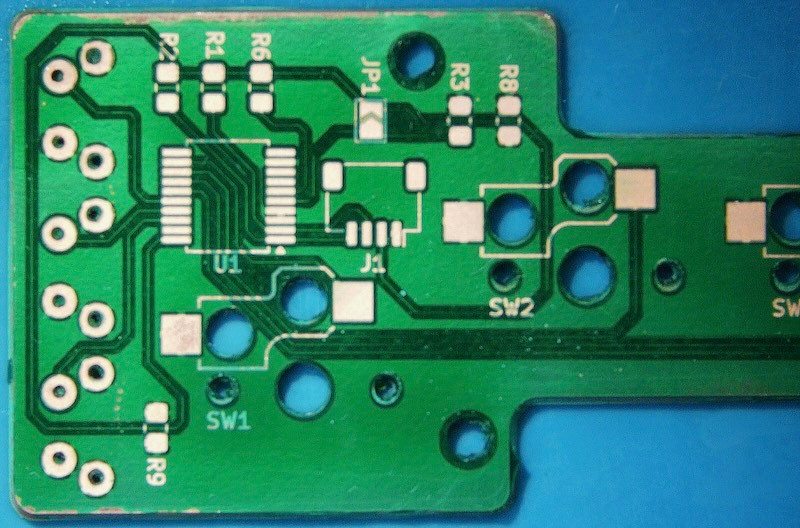
Creating PCBs at home is quite easy these days (vias not withstanding), but even the best DIY methods usually can’t match the resolution offered by commercial PCB production lines. Large traces are easy enough to carve out of copper-backed FR1 or FR4 with even a mill, what if you need something more like 100 µm sized traces with similar clearance? This is what [Giangix] has been experimenting with, using both a fiber laser and chemical etching to see what approach gives the best results.
The thin copper clad boards are put on the 20 Watt fiber laser and held in place with the vacuum table that [Giangix] previously made, using the power of suction to make sure the board doesn’t move. The used laser specifies a minimum line width of 0.01 mm, so that’s clearly fine enough to engrave away the chemical resist layer that is sprayed on top of the copper layer.
After some experimentation, it was found that increasing the trace clearance between the 0.1 mm traces to a hair above 0.1 mm was necessary for the subsequent chemical etching step to work the best, as otherwise some copper was still likely to remain. The chemical etching bath mixture consists of hydrochloric acid and hydrogen peroxide, in a ratio of 2 mL water to 2 mL 30% HCl and 2 drops of 35% H2O2. This is agitated for 90 s to get a pretty good result.
Although the final resistance measurements on the traces is a bit higher than theoretical, comments suggest that maybe some of the copper got removed along with the removal of the resist layer. Perhaps the most interesting question here is whether directly ablating the copper using the fiber laser would give even better results and bypass the etching chemicals.
The development of cheaper, more powerful lasers has always been a cause for excitement among hackers, and fiber lasers are no exception. One of the newer tools they’ve enabled is the laser welder, which can be used to weld, cut through metal, or clean off surfaces. Or, as [Cranktown City] demonstrated, you can use one to build a metal 3D printer.
The printer’s built around a 2000-Watt fiber laser welder from Skyfire, and the motion system came from a defunct secondhand 3D printer built by an out-of-business insole printing company. The frame was reinforced with steel, the welding gun was mounted in place of the hotend, and the trigger was replaced with a CNC-controlled switch. It didn’t originally use any specific shielding gas, since the welder was supposed to perform adequately with just compressed air if high weld quality wasn’t essential.
The first few tests were promising, but did reveal quite a few problems. Heat buildup was an early issue which threatened to warp the build plate, and which eventually welded the build plate to the Z-axis gantry. Adding a strong cooling fan and putting a gap between the build plate and the gantry solved this. The wire also kept getting stuck to the build surface, which [Cranktown City] solved by pausing the wire feed and pulling it away from the part when a layer finished. Simply using compressed air led to a weak deposit that cracked easily, and while a nitrogen stream improved the print somewhat, argon shielding gas gave the best results. For his final print, [Cranktown City] made a vase. The layers were a bit crude, but better than most welder-based metal printers, and the system shows some real promise.
An accessible 3D printer for metals has been the holy grail of amateur printer builders since at least the beginning of the RepRap project, but as tends to be the case with holy grails, it’s proven stubbornly elusive. If you have the resources to build it, though, it’s possible to replicate the professional approach with a selective laser melting (SLM) printer, such as the one [Travis Mitchell] built (this is a playlist of nine videos, but if you want to see the final results, the last video is embedded below).
Most of the playlist shows the process of physically constructing the machine, with only the last two videos getting into testing. The heart of the printer is a 500 Watt fiber laser and a galvo scan head, which account for most of the cost of the final machine. The print chamber has to be purged of oxygen with shielding gas, so [Travis] minimized the volume to reduce the amount of argon needed. The scan head therefore isn’t located in the chamber, but shines down into it through a window in the chamber’s roof. A set of repurposed industrial servo motors raises and lowers the two pistons which form the build plate and powder dispenser, and another servo drives the recoater blade which smooths on another layer of metal powder after each layer.
As with any 3D printer, getting good first-layer adhesion proved troublesome, since too much power caused the powder to melt and clump together, and too little could result in incomplete fusion. Making sure the laser was in focus improved things significantly, though heat management and consequent warping remained a challenge. The recoater blade was originally made out of printed plastic, with a silicone cord along the edge. Scraping along hot fused metal in the early tests damaged it, so [Travis] replaced it with a stainless steel blade, which gave much more consistent performance. The final results looked extremely promising, though [Travis] notes that there is still room for redesign and improvement.
The project starts with identifying a method to convert the board’s Gerber files to a PNG, which is ultimately used to create a vector file for use with the laser. The first stencil, made with the CO2 laser, was cut out of masking tape. This worked fine for larger cutouts and is certainly a cheap option if you don’t have too many small components. A slightly better approach with the CO2 laser was using vinyl sheet release paper, which seemed to hold together better than the tape.
Laser-cut masking tape works, but not for long.
A vinyl cutter was also used as an experiment, but it didn’t perform as well as the CO2 laser, as expected, since the cutter uses a knife rather than light, leading to some tearing issues.
The final method utilized a fiber laser and an empty drink can to create a metal stencil. First, the can had to be cut open, heated, and flattened. The fiber laser was able to cut clean footprints in the aluminum, creating a stencil that would hold up to more use than the paper variations.
The finale of this exploration into laser stencil making was using the fiber laser to solder the board together. The stencil was used to spread paste on the pads, parts were placed on the board, and then the fiber laser heated the solder paste to solder them to the board. The board looked a bit toasty afterwards, but we imagine the process could be fine-tuned to reduce the collateral damage a bit.
Once you’ve got your stencil ready to go, you can combine it with a 3D printed jig to hold the PCB while you apply the solder paste.
Fiber lasers aren’t nearly as common as their diode and CO2 cousins, but if you’re lucky enough to have one in your garage or local makerspace, this technique for depositing thin films of metals in [Breaking Taps] video, embedded below, might be worth checking out.
It’s a very simple hack: a metal shim or foil is sandwiched between two pieces of glass, and the laser is focused on the metal. Etching the foil blasts off enough metal to deposit a thin film of it onto the glass. From electron microscopy, [Breaking Taps] reveals that what’s happening is that microscopic molten metal droplets are splashing up to the ̶m̶e̶t̶a̶l̶ glass, rather than this being any kind of plasma process like sputtering. He found this technique worked best with silver of all the materials tested, and there were a few. While copper worked, it was not terribly conductive — he suggests electroplating a thicker layer onto the (probably rather oxidized) copper before trying to solder, but demonstrates soldering to it regardless, which seems to work.
This might be a neat way to make artistic glass-substrate PCBs. More testing will be needed to see if this would be worth the effort over just gluing copper foil to glass, as has been done before. [Breaking Taps] suspects, and we agree, that his process would work better under an inert atmosphere, and we’d like to see it tried.
One thing to note is that, regardless of atmosphere, alloys are a bit iffy with this technique, as the ‘blast little drops off’ process can cause them to demix on the glass surface. He also reasons that ‘printing’ a large area of metal onto the glass, and then etching it off would be a more reliable technique than trying to deposit complex patterns directly to the glass in one go. Either way, though, it’s worth a try if you have a fiber laser.
While low-cost professional PCB fabrication has largely supplanted making circuit boards at home, there’s still something to be said for being able to go from design to prototype in an afternoon. Luckily we aren’t limited to the old toner transfer trick for DIY boards these days, as CNC routers and powerful lasers can be used to etch boards quickly and accurately.
But there’s still a problem — those methods leave you with a board that has exposed traces. That might work in a pinch for a one-off, but such boards are prone to shorts, and frankly just don’t look very good. Which is why [Mikey Sklar] has been experimenting with applying both a soldermask and silkscreen to his homemade boards.
The process he describes starts after the board has already been etched. First he rolls on the soldermask, and then sandwiches the board between layers of transparency film and clear acrylic before curing it under a UV light. After two coats of the soldermask, the board goes into a fiber laser and the silkscreen and mask layers are loaded into the software and the machine is set to a relatively low power (here, 40%). The trick is that the mask layer is set to run four times versus the single run of the silkscreen, which ensures that the copper is fully exposed.
Since the board doesn’t need to be moved between operations, you don’t have to worry about the registration being off. The end result really does look quite nice, with the silkscreen especially popping visually a lot more than we would have assumed.
We’ve previously covered how [Mikey] uses his CNC router and fiber laser to cut out and etch the boards, so this latest installment brings the whole thing full circle. The equipment you’ll need to follow along at home isn’t cheap, but we can’t argue with the final results.