IceSL Is A Cool Slicer

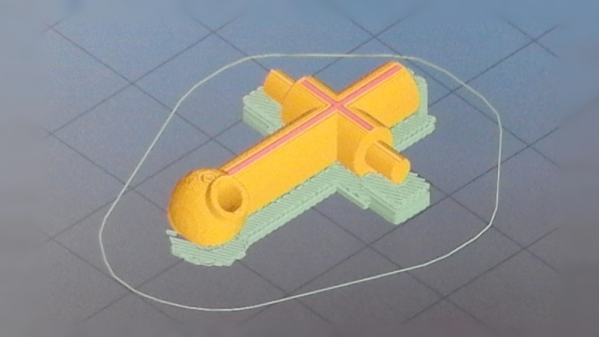
The mechanical and electronic parts of a 3D printer are critical for success, but so is the slicing software. Slic3r and Cura are arguably the most popular, and how they command your printer has a lot to do with the results you can get. There are lots of other slicers out there both free and paid, but it is hard to really dig into each one of them to see if they are really better than whatever you are using today. If you are interested in the performance of IceSL — a free slicer for Windows and Linux — [DIY3DTECH] has a video review that can help you decide if you want to try it. You can see the video below.

IceSL has several modules and can actually do OpenSCAD-like modeling in Lua so you could — in theory — do everything in this one tool. The review, though, focuses only on the slicing aspect. In addition to the desktop client versions, you can use some features online (although on our Linux machine it didn’t work with the latest Chrome beta even with no add ons; Firefox worked great, though).

Continue reading “IceSL Is A Cool Slicer”

Heat-Set Insert Jig Grants Threads To 3D Prints

FDM 3D prints might be coming home this holiday as seasonal ornaments, but with a few tweaks, they may even stand up to the tests of the real world as functional prototypes. Heat-Set inserts are one such tweak that we can drop into a print, and [Kurt] spares no expense at laying down a guide to get us comfortable with these parts. Here, he’s created a drill press adapter and modified his soldering iron to form an insert jig to start melting these parts into his next project.

Heat-set inserts grant us proper screw threads in any thermoplastic. Simply heat them up, stake them into your part, let cool, and: voila–a screw thread that’s firmly embedded into our part. We can load these inserts with clumsy hand tools, but why fumble and bumble with a hot soldering iron when we can adapt our drill press to do most of the tricky fixturing for us? That’s exactly what [Kurt] did here. With a 3D-printed adaptor, he’s letting his drill press (turned off!) hold the soldering iron so that he can use the lever to slowly stake the part into the 3D print. Finally, for no additional charge, [Kurt] turned down his soldering tip to mate cleanly into the insert for a cleaner removal.

We’ve seen adapters like this one before, but it’s never too often to get a reminder of the structural bonus that these parts can add to our 3D prints.

What Would Sherlock Print, If Sherlock Printed In SLA Resin?

Resin printing — or more appropriately, stereolithography apparatus printing — is a costly but cool 3D printing process. [Evan] from [Model3D] wondered if it was possible to produce a proper magnifying glass using SLA printing and — well — take a gander at the result.

A quick modeling session in Fusion 360 with the help of his friend, [SPANNERHANDS 3D Printing] and it was off to the printer. Unfortunately, [Evan] learned a little late that his export settings could have been set to a higher poly count — the resultant print looked a little rough — but the lens would have needed to be sanded anyway. Lucky coincidence! After an eight hour print on his Peopoly Moai using clear SLA resin, [Evan] set to work sanding.

Continue reading “What Would Sherlock Print, If Sherlock Printed In SLA Resin?”

Printed Parts Make DIY Electric Longboard Possible

Appalled by expensive electric longboards, [Conor Patrick] still wanted one, and wanted it now. So — naturally — he converted an existing board into a sprightly electric version at a fraction of the cost.

[Patrick] is using a capable 380KV Propdrive motor, capable of pushing him up to 30mp/h! A waterproof 120A speed controller and 6000mAh, 22.2V LiPo battery slim enough to fit under the board give the motor the needed juice. He ended up buying the cheapest RF receiver and remote combo to control the board, but it fit the all-important “want electric long board now” criterion.

Continue reading “Printed Parts Make DIY Electric Longboard Possible”

Google’s Inception Sees This Turtle As A Gun; Image Recognition Camouflage

The good people at MIT’s Computer Science and Artificial Intelligence Laboratory [CSAIL] have found a way of tricking Google’s InceptionV3 image classifier into seeing a rifle where there actually is a turtle. This is achieved by presenting the classifier with what is called ‘adversary examples’.

Adversary examples are a proven concept for 2D stills. In 2014 [Goodfellow], [Shlens] and [Szegedy] added imperceptible noise to the image of a panda that from then on was classified as gibbon. This method relies on the image being undisturbed and can be overcome by zooming, blurring or rotating the image.

The applicability for real world shenanigans has been seriously limited but this changes everything. This weaponized turtle is a color 3D print that is reliably misclassified by the algorithm from any point of view. To achieve this, some knowledge about the classifier is required to generate misleading input. The image transformations, such as rotation, scaling and skewing but also color corrections and even print errors are added to the input and the result is then optimized to reliably mislead the algorithm. The whole process is documented in [CSAIL]’s paper on the method.

What this amounts to is camouflage from machine vision. Assuming that the method also works the other way around, the possibility of disguising guns (or anything else) as turtles has serious implications for automated security systems.

As this turtle targets the Inception algorithm, it should be able to fool the DIY image recognition talkbox that Hackaday’s own [Steven Dufresne] built.

Thanks to [Adam] for the tip.

Creating Modular Storage Out Of Used Filament Spools

[Alec Richter] had a good idea on how he could convert the leftover filament spindles from his 3D printer into multi-compartment storage. An empty spindle is fitted with several trays that rotate out from the circle for easy access. With multiple spools rotating on a central axle, you can really see how a bunch of parts could be organized in a column, though not being able to see through the sides probably limits its use somewhat — most of the modular component storage we’ve seen has clear trays.

He has designed drawer bases with removable compartment trays, along with alignment jigs to help you get the drawer installed perfectly the first time. You can download the designs (14 files!) but you need to sign up for an account first. Also, [Alex]s designs fit very specific spindles so be sure of your measurements, etc.

Hackaday is awash in posts about modular storage, like this computer tower turned storage shelf and this technique for using peanut butter jars for storage.

[mucho apreciado for the tip, George!]

Add Intuitiveness To OpenSCAD With Encoders

The first time I saw 3D modeling and 3D printing used practically was at a hack day event. We printed simple plastic struts to hold a couple of spring-loaded wires apart. Nothing revolutionary as far as parts go but it was the moment I realized the value of a printer.

Since then, I have used OpenSCAD because that is what I saw the first time but the intuitiveness of other programs led me to develop the OpenVectorKB which allowed the ubiquitous vectors in OpenSCAD to be changed at will while keeping the parametric qualities of the program, and even leveraging them.

All three values in a vector, X, Y, and Z, are modified by twisting encoder knobs. The device acts as a keyboard to

  1. select the relevant value
  2. replace it with an updated value
  3. refresh the display
  4. move the cursor back to the starting point

There is no software to install and it runs off a Teensy-LC so reprogramming it for other programs is possible in any program where rotary encoders may be useful. Additional modes include a mouse, arrow keys, Audacity editing controls, and VLC time searching.

Here’s an article in favor of OpenSCAD and here’s one against it. This article does a good job of explaining OpenSCAD.

Continue reading “Add Intuitiveness To OpenSCAD With Encoders”