Metal 3D Printing With Your Printer

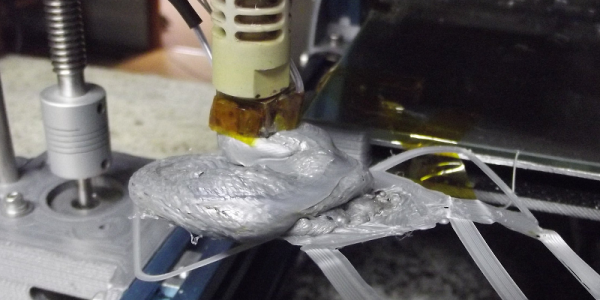
Over in Italy, [Robotfactory] has a new setup called CopperFace that they claim allows you to essentially electroplate 3D printed objects with a metal coating using copper, nickel, silver, or gold.

We’ve talked about electroplating on plastic before, but that technique required mixing graphite and acetone. The CopperFace kit uses a conductive graphite spray and claims it deposits about 1 micron of plating on the object every two minutes.

We couldn’t help but wonder if the graphite spray is just the normal stuff used for lubricant. While the CopperFace’s electroplating tech seems pretty standard (copper sulfate and copper/phosphorus electrodes), we also wondered if some of the simpler copper acetate process we’ve covered before might be workable.

Continue reading “Metal 3D Printing With Your Printer”

MIT’s Glass 3D Printer

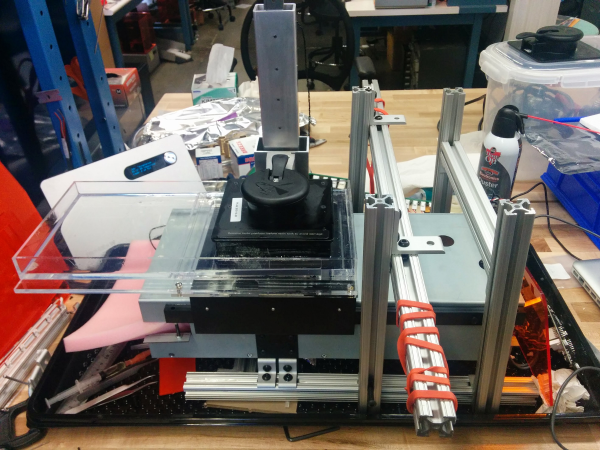
How hot does your 3D printer’s hot end get? Most low cost printers heat up to 240°C (464°F) at the most because they contain PEEK which starts to get soft if you go much higher. Even a metal hot end with active cooling usually won’t go much higher than 400°C (752°F). Pretty hot, right? [MIT’s] new G3DP printer goes to 1900°F (over 1000°C) and prints optically clear glass.

By changing design and print parameters, G3DP can limit or control light transmission, reflection and refraction. The printer uses a dual heated chamber. The upper chamber acts as a 1900°F kiln while the lower chamber serves to anneal the structures. The print head is an alumina-zircon-silica nozzle.

Continue reading “MIT’s Glass 3D Printer”

Hello RAMPS, Meet ESP8266

The proliferation of  DIY 3D printers has been helped in large measure by the awesome open-source RepRap project. A major part of this project is the RAMPS board – a single control board / shield to which all of the other parts of the printer can be easily hooked up. A USB connection to a computer is the usual link of choice, unless the RAMPS board has the SD-Card option to allow the 3D printer to operate untethered. [Chetan Patil] from CreatorBot built a breakout board to help attach either the ESP8266 WiFi or the HC-05 Bluetooth module to the Aux-1 header on the RAMPS board. This lets him stream G-code to the printer and allow remote control and monitoring.

While the cheap ESP8266 modules are the current flavor of the season with Hackers, getting them to work can be quite a hair tearing exercise. So [Chetan] did some hacking to figure out the tool chain for developing on the ESP module and found that LUA API from NodeMcu would be a good start. The breakout board is nothing more than a few headers for the ESP8266, the HC-05 and the Aux-1 connections, with a few resistors, a switch to set boot loader mode and a 3.3V regulator. If you’re new to the ESP8266, use this quick, handy, guide by [Peter Jennings] to get started with the NodeMCU and Lualoader. [Chetan]’s code for flashing on the ESP8266, along with the Eagle board design files are available via his Github repo. Just flash the code to the ESP8266 and you’re ready to go.

One gotcha to be aware of is to plug in the ESP module after the printer has booted up. Otherwise the initial communication from the ESP module causes the printer to lock up. We are sure this is something that can be taken care of with an improved breakout board design. Maybe use a digital signal from the Arduino Mega on the RAMPS board to keep the ESP module disabled for a while during start up, perhaps? The video after the break gives a short overview of the hack.

Continue reading “Hello RAMPS, Meet ESP8266”

Giant Stepper Motor Gets You Up To Speed On Theory

Few hackers have trouble understanding basic electric motors. We’ve all taken apart something that has a permanent magnet DC motor in it and hooked up its two leads to a battery to make it spin. Reverse the polarity, reverse the spin; remove the power, stop the spin. Stepper motors (and their close cousins, brushless DC motors) are a little tougher to grok, though, especially for the beginner. But with a giant 3D printed stepper motor, [Proto G] has made getting your head around electronically commutated motors a little easier.

While we’ve seen 3D printed stepper motors before, the size and simple layout of this one really lends to understanding the theory. With a 3D-printed frame, coils wound on nails, and rare-earth magnets glued to a rotor, this is an approachable build that lays the internals of a stepper motor out for all to see and understand. You can easily watch how the rotor lines up as the various coils are energized in a circular pattern, although it might be more revealing to include bi-color LEDs to indicate which coils are energized and what the polarity is. Those would be especially helpful demonstrating the concept of half-stepping. We’d also like to see more detail on the controller electronics, although admittedly all the video-worthy action is in the motor itself.

Continue reading “Giant Stepper Motor Gets You Up To Speed On Theory”

Drivers For 3D Printers And Why We Need Them

Manufacturers of 3D printers have a lot to do before they catch up with makers of the cheapest 2D, paper-based printers. If you’ve ever taken an inkjet apart, you’ll most likely find some sort of closed-loop control on at least one of the axes. The 2D printer will tell you when you’re out of ink, when a 3D printer will go merrily along, printing in air without filament. File formats? Everything is Gcode on a 3D printer, and there are dozens, if not hundreds of page description languages for 2D printers.

The solution to some of these problems are drivers – software for a 3D printer that slowly consumes the slicing of an object, printer settings, and placing an object on the bed. It’s coming, and the people who are responsible for making your 2D printer work with your computer are busy at work messing up the toolchain for your 3D printer.

The latest version of CUPS (C Unix Printing System) adds support for 3D printers. This addition is based on meetings, white papers, and discussions in the Printer Working Group (PWG). There has already been a lot of talk about what is wrong with the current state of 3D printer toolchains, what can be improved, and what should be completely ignored. Let’s take a look at what all of this has accomplished.

Continue reading “Drivers For 3D Printers And Why We Need Them”

Color By Number 3D Printing Style

Remember paint-by-number kits? Your canvas has outlines with numbered regions that you paint with correspondingly numbered paints. When you are done, you’ve recreated the Mona Lisa. [KurtH3] uses a similar technique to coax multicolor prints from his 3D printer.

The technique isn’t general purpose, but it still is an interesting way to add some color to your usually monochrome prints. The idea is simple: You find a paint-by-number layout (apparently, you can find them with a Google search). Use your favorite method to get the outline into a CAD program. [KurtH3] doesn’t really get into the details about this, but some CAD programs will directly import images. Others will require you to trace in Inkscape (or a similar program) and convert to a vector format like DXF that the 3D CAD program can import.

Here’s the trick: instead of extruding the 2D image as one piece, you extrude the numeric regions to slightly different heights. Say you wanted to print a red, white, and blue flag to a thickness of about 5mm and you use 0.2mm layers. You could extrude the white part to 5mm, for example. Then the red parts could be extruded to 5.2mm (one layer higher) and the blue parts to 5.4mm. You could extend the idea to do multiple layers, although that will increase the surface roughness.

[KurtH3] pauses the print at the end of the layers to change filament, but we would probably edit the sliced G-Code to put pauses in the right places (for example, Repetier Host lets you put @pause in your file). You could also use software to split the G-Code as we’ve previously covered.  The resulting print, using our example, would be white from the bottom up but would have thin red and blue layers over the top in the right places. The few hundred microns difference from the white surface to the other colors means you won’t get a perfectly smooth surface, but a few hundred microns shouldn’t be too noticeable.

Continue reading “Color By Number 3D Printing Style”

Hacking An SD Slot For WiFi

Back in the 1990’s moving files via a floppy disk was known as “sneaker net.” While floppies are a thing of the past, SD Cards are the modern equivalent and they still lend themselves to sneaker net operations.

But why? WiFi is everywhere now. Wouldn’t it be great if you could hack those devices with SD slots to use WiFi? Apparently 3D printer [extrud3d] thought the same thing and found a way to reconfigure a Toshiba FlashAir card to put his 3D printer on the network.

The card is aimed at consumers, so by default it creates a hotspot and waits for a connection, a rudimentary web app allows you to move files back and forth over the network to the SD card which is then read by the host device. However, [extrud3d] shows how to modify a file on the SD card’s file system to allow the device to hook up to an existing wireless network and also provides a Python script to make the file transfer easier.

Although this hack is for a 3D printer, it ought to work with most devices that have a full sized SD slot (or can be adapted to take a full sized card). Since the hack is nothing more than changing a text file, it is a lot easier than some other SD hacks we’ve covered. Over on hackaday.io, [Chris Jones] has recently done some hacking on the FlashAir and has a list of its shell commands if you want to go beyond the text file hacks.

Continue reading “Hacking An SD Slot For WiFi”