3D printed turtle shell

Take That Mario! 3D Printed Red Tortoise Shell Armor!

Between all the media coverage of using 3D printers for human prosthetics, some individuals are making a difference for animals too by using 3D printing. And here’s one we really didn’t expect;  a replacement shell for a tortoise!

We’ve all seen the heartwarming articles about pups getting wheels, or dogs getting replacement sprung feet — but is there any love for [Cleopatra] the Tortoise? Canyon Critters Rescue is an animal rescue based out of Golden, Colorado. The founder [Novelli] had recently took in little [Cleopatra] who had a painful and dangerous bone disease where her shell peaks and gets worn out — and without a shell to protect her, could easily become infected. This is typically caused by poor nutrition, so the rescue fixed her diet, but the damage to her shell was already done.

At a public education program for the rescue, [Novelli] made an offhand comment about how cool it would be to 3D print a replacement shell for her to protect the weak spots. Lucky enough for [Cleopatra], someone from the Colorado Technical University was there and wanted to help.

First they 3D scanned [Cleopatra’s] shell, and then created a 3D model of it optimized for 3D printing. They printed miniature test models on a MakerBot, and once satisfied printed the entire thing in 4 pieces. It fits over top of original shell, protecting the weak areas.

It was an incredible learning experience for all involved, and [Novelli] was extremely grateful for the help he received from the community:

I am grateful to all these people volunteering their time and energy to help me. At the rescue I don’t have the resources or funds to do something of this scale.

As for [Cleopatra], she’s living a happy tortoise life once again — and since she’s only in her teens, she has nearly a century of life to look forward to with thanks to 3D printing.

3D Printed Mechanical keyboard

3D Printed Mechanical Keyboard

Tired of buying boring keyboards with almost no customization available? We’ve seen lots of keyboard hacks before, but if you want to take it a step further — why not make it from scratch and have it 3D printed?

Reddit user [Wildpanic] has just finished his first attempt at a 3D printed keyboard and he’s even shared the files to make it over at Thingiverse. The frame is entirely 3D printed, but he’s chosen to use pre-manufactured key switches, which is probably for the best. They are the Cherry MX Green variety, which have these little clips in the side which make them super easy to install — especially on a 3D printed frame.

He’s wired them all using 20ga copper wire (which might be a bit overkill) to a Teensy 2.0 microcontroller. The diodes he chosen to use are 1N4148 which he was able to get fairly inexpensively. Total cost is just a bit over $50. Not bad!

Oh and in case you’re wondering, he’s chosen the style of keyboard that makes use of 4 keys for the space bar — as made popular by the planck style custom keyboards — you know, for people who love symmetry.

For more awesome keyboard hacks, check out this roundup [Adam Fabio] put together in a Hacklet last year!

[via reddit]

A Recycled Robot Arm For All!

It’s mind boggling how much e-waste we throw out. Perfectly good components, mass produced for pennies. And at the end of their life, going straight to a landfill or some poor country to be melted down. Don’t you wish you could help?

Stepper motors are a dime a dozen when it comes to e-waste, and there’s tons of cool projects you can do with a stepper motor — [Madivak] is just starting on a robot arm design over at Hackaday.io that makes use of recycled components.

It’s fairly early in development, but that means it’s a great time to start following it on the project site. The robotic arm is being designed for his final year project in his undergrad degree. Besides the steppers, he’s using his school’s Utilimaker 3D printer to manufacture all of the other mechanical components with control coming from DRV8825 stepper drivers and the Freescale Freedom KL25Z dev kit. Check out the clips after the break to see current state of the build.

Continue reading “A Recycled Robot Arm For All!”

3D Printed Desklamp Follows Tesla For Cordlessness

If not for [Nikola Tesla], we’d be pretty behind when it comes to electricity. So to pay homage to one of the greatest inventors, [David Choi] decided to make his very own wireless Tesla Desk Lamp!

As expected, [David’s] a big fan of [Nikola], and has always been inspired by his life and experiments — in particular he loves wireless power. Ever since he saw a Tesla Coil light up a bulb from a distance he was smitten. He even named his cat Tesla.

The funny thing is, [David] actually failed physics in high school, but a few years later decided to pursue it as a career while attending Wesleyan University. It didn’t stop when he graduated, he also studied electronic design in his spare time — which is where he learned about resonance.

Wanting to apply what he had learned he has created a very unique wireless desk lamp. Don’t let the pictures fool you; it’s actually 3D printed! It uses one of those retro “vintage” light bulbs, which has it’s power transmitted to it wirelessly by a 6.5MHz signal. It was relatively easy to get the wireless part right, because once he had calculated the number of coils he needed, all he had to do was 3D model the track for the copper to go in.

Continue reading “3D Printed Desklamp Follows Tesla For Cordlessness”

Wrapping Up The Last Midwest RepRap Festival

The Midwest RepRap Festival is over – forever. This was the last one. Apparently enough people complained that Goshen, Indiana wasn’t in the midwest. The number of Dairy Queens I passed contradicts this, but whatever. Next year, there’s going to be a different con in Goshen. Same content, different name. If you have a suggestion, you know where to put it.

I promised the world’s largest 3D printed trash can, and I gave you the world’s largest 3D printed trash can. This gigantic orange vase was printed on the PartDaddy, SeeMeCNC’s 18-foot tall delta printer a few months ago at the NYC Maker Faire. I have been using this as a trash can in my basement since then, making me one of the only people who have their trash can on Wikipedia.

DSC_0019
A failed print on Saturday morning

Speaking of the PartDaddy, this is what a fail looks like. The first PartDaddy print was a Groot, a 13-hour long print job. It was left running overnight, but it ran out of PLA pellets sometime around 4 in the morning. If you’re wondering what the black band is around the Groot’s face is, here’s the breakdown:

The PartDaddy sucks PLA pellets up from a trash can (that’s not 3D printed), and dispenses it into a hopper above the print head. This hopper was 3D printed on the PartDaddy, and there is still a little bit of colarant dust in there. When the PLA pellets run out, that dust is embedded in the extrusion. When you realize that masterbatch is only about 5% of the finished plastic, it doesn’t take much black dust to discolor a print.

Yes, this is a print fail that could have been fixed by having an all-night bash. A few other people left their printers running overnight including [The Great Fredini] and his Scan-A-Rama. This was a Rostock Max that had something wonky happen with the Bowden. There was filament everywhere.

How about some Star Wars droids? An R2 from the Droid Builder’s Club was there, but there was also the beginnings of a completely 3D printed Roger. While we’re on the subject of plastic robots that will fall apart at a moment’s notice, there was a K’NEX 3D printer. Yes, it’s made almost entirely out of K’NEX, and it did work at one time. Those orange parts sitting next to it? Those came out of the K’NEX printer.  If you’re looking for the definitive RepStrap, there ‘ya go.


NEW FILAMENTS

For the last few months, metal filaments – PLA with tiny particles of copper, brass, bronze, iron, or aluminum have been available. MRRF was the first place where you could see them all together. A few things of note: these filaments are heavy – the printed objects actually feel like they’re made out of metal. They’re actually metal, too: the iron-based filaments had a tiny bit of red corrosion, and the Lincoln death mask above was treated with acetic acid. These filaments are also expensive, around $100 for 1kg. Still, if you want to print something that will be around in 100 years, this is what you should get.

The most beautiful printer ever

MRRF should have had a contest for the best looking 3D printer at the show. A beautiful delta from Detroit Rock City would have won:

DSC_0076

DSC_0075That white hexagon in the center is a ceramic PCB that I’m told cost an ungodly amount of money. Underneath the ceramic build plate, there’s a few Peltiers between the bed and the large copper heat sink. The heat sink is connected to the three risers by heat pipes, making the entire printer one gigantic heat sink. Why would anyone make such an amazing art deco printer? For this.

Because you can use Peltiers to heat and cool a bed, a little bit of GCode at the end of a print will cool the bed to below room temperature. If you do your design right, this means the print will just fall over when it’s done. When the print bed is cooling, you can actually hear the bond between the bed and print cracking. It’s beautiful, it’s cool, and I’m told this printer will make its way to hackaday.io soon.


There you go, the best and coolest from the last Midwest RepRap Festival ever. There will never be another one. It only needs a better name, and [John] at SeeMeCNC is great at coming up with names. Just ask what VIP is a backronym of.

I told you there would be a T-shirt cannon. That’s 300 PSI shop air.

Before Film There Were Zoetropes. Now We Have 3D Printed Zoetropes!

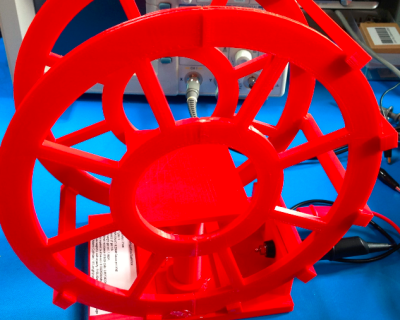
Reddit user [eyelandarts] has produced a rather unique 3D printing project. A 3D printed Zoetrope.

You see, a zoetrope was a device that created an animation effect that pre-dates film technology. It would create the illusion of motion much like a flip book does, but with a spinning cylindrical wall with slots cut into it. As the cylinder spins, you catch a glimpse of the animation through the slots. But, it’s just a 2-dimensional animation — what if you replaced it with an ever changing 3D model?

It’s actually been done before. A long time ago in fact. In 1887, [Etienne-Jules Marey] created a large zoetrope to animate plaster models of a bird in flight. Fast forward to today, and [eyelandarts] has 3D printed something similar — but ditched the cylindrical wall. Instead, a strobe light is used to see the animation!

The end result is quite awesome if we do say so our-selves. For another fun take on Zoetropes — how about a digital one made out of tiny LCD screens?

Siezure-warning… there’s a very flash-tastic demo gif embedded after the break if you’re brave enough to view such a thing.

Continue reading “Before Film There Were Zoetropes. Now We Have 3D Printed Zoetropes!”

MRRF: Hot Ends, Extruders, Extremely Posh Brits, And Stoic Swedes

As far as locations for the Midwest RepRap Festival go, it’s not exactly ideal. This is a feature, not a bug, and it means only the cool people come out to the event. There were a few people travelling thousands of miles across an ocean, just to show off some cool things they built.

Two Colors, One Nozzle

[Sanjay] and [Josh] from E3D came all the way from merry olde England to show off a few of their wares. The star of their show was the Cyclops extruder, a dual-extrusion hot end that’s two input, one output. Yes, two colors can come out of one nozzle.

cyclops

If you see a printer advertised as being dual extrusion, what you’re going to get is two extruders and two hot ends. This is the kludgy way to do things – the elegant solution is to make two colors come out of one nozzle.

The guys from E3D were showing off a few prints from their Cyclops nozzle that does just that, including a black and red poison dart frog, and a blue and white octopus. The prints looked amazing, and exactly what you would expect from a two-color print.

Rumor has it the development of the Cyclops involved extruding two colors, freezing the nozzle, and putting it in the mill just to see how the colors mixed. I didn’t see those pictures, but there’s a lot of work that went into this hot end.

The Power of Two Extruders

[Martin] of bondtech.se came to MRRF all the way from Sweden. He was there showing off his new extruder.

The extruder uses a normal stepper motor, but instead of the usual knurled or threaded feed wheel and bearing to push filament though, he’s using two counter-rotating feed wheels attached to a planetary gear system. That’s a lot of torque that doesn’t distort or strip the filament. When you consider all the weird filaments that are coming out – ninjaflex, and even 3D printable machinable wax filament, this is extremely interesting.

Even if your filament isn’t exactly 1.75 or 3mm in diameter, this setup will still reliably push plastic; there is a bolt that will move one of the feed wheels in and out 0.4mm.

[Martin] had a pair of his extruders hooked up to a strain gauge, and it’s strong enough to lift your printer off the table without stripping the filament. Here’s a video of that demo from the bondtech page.