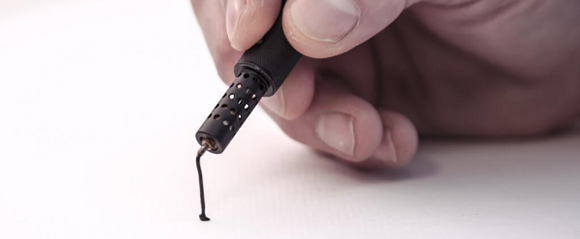
3DMonstr Printer: 8 Cubic Feet Of Build Volume

3D Monster

So you’re looking at 3D printers, but the build volumes for the current offerings just aren’t where you’d like them to be. [Ben Reylblat] had the same problem and came up with the 3DMonstr, an enormous printer that has (in its biggest configuration) a two foot cubed build volume, four extruders, and the mechanical design to make everything work.

Most of the ginormous 3D printers we’ve seen are basically upgraded versions of the common table-top sided models. This huge Ultimaker copy uses the same rods as its smaller cousin, and LeBigRap also uses woefully undersized parts. The 3DMonstr isn’t a copy of smaller machines, and instead uses very big motors for each axis, ball screws, and a proper welded frame. It’s highly doubtful anyone will call this printer a wobblebot.

The 3DMonstr comes in three sizes: 12 inches cubed, 18 inches cubed, and 24 inches cubed, with options for two to four extruders.  We caught up with the 3D Monstr team at the NYC Maker Faire, and from first impressions we have to say this printer is freakin’ huge and impeccably designed.

3D Printering: Making A Thing In AutoCAD, Part II

printering

It’s time once again for another part in 3D Printering’s series of Making A Thing. Last week was a short tutorial on the beginnings of making a thing in AutoCAD. This is an extremely complex software package, and in a desire to make things short and sweet, I broke this AutoCAD tutorial into two parts.

Since we already covered the 2D design portion of AutoCAD, part II of this tutorial is going to turn our 2D part into a three-dimensional object. Check out the rest of the tutorial below.

Continue reading “3D Printering: Making A Thing In AutoCAD, Part II”

Trainable Robotic Arm

customer_projects_arm-learning

When [Robert] realized Adafruit is now selling analog feedback servos, he decided he just had to make a programmable robot arm that could be trained like the commercially available Baxter robot.

The neat thing with the analog feedback servos is it takes all the complexity out of training a robot. All you have to do is put the robot in teach mode, physically move the robot’s joints to the positions you want, and save your program! Depending on your application, it certainly beats trying to work out the fun kinematics equations…

Anyway, the full guide available on Adrafuit’s learning system provides instructions on how to build your own arm from scratch (well, with a 3D printer) or how to replace the servos in a pre-made toy robotic arm you might already have sitting around. It’s very thorough and includes all the code you need for your Arduino too.

Stick around after the break to see how the robot works!

Continue reading “Trainable Robotic Arm”

From CT Scans To 3D Prints

[the_digital_dentist] had a CT Scan done back in 2007 for treatment using orthodontics. Some how, he managed to get a copy of the CT Scan data from the lab, and has been playing around with it lately.

Since he has a 3D printer, the obvious end goal was to print his face using some of the data extracted from the CT Scan. This required a lot of manipulation to get it to the finished model you see above. He used an open source software called DeVIDE to process the data and export the STL. Not much information on this is given on his site, but in our research we managed to find another video documenting the process in DeVIDE on extracting the STL model from DICOM CT scan data.

5eachUnfortunately, the STL is far from being ready to print after being extracted; there is a lot of extraneous data that needs to be cleaned up. He used mesh editing software to help blow away the unnecessary details. We don’t know for sure what software [the_digital_dentist] used, but MeshLab is a good one.

After that, it was just a matter of printing the STL file. But the really cool thing about using data from CT scans is the amount of detail it captures… Stick around after the break to see an animated GIF demonstrating this.

Anyone want to print a copy of their own skull? It’d look great with a plating of Adamantanium…

3D Printering: Making A Thing With AutoCAD, Part I

printering

Octopodes and useless plastic baubles begone. It’s time yet again for another installment of learning how to make a thing with 3D design tools. This week, we’re making something with AutoCAD. It’s an amazing piece of software that costs $4000 per seat. Hilariously expensive for any home tinkerer, but if you go to a university with an engineering program, there’s a computer lab with machines running AutoCAD somewhere on campus.

Last week we took a look at making something with OpenSCAD. AutoCAD is much, much different. Where OpenSCAD is sorta, kinda like programming, AutoCAD is just a digital version of t-squares, triangles, straight edges, and people getting uppity when you don’t call their drawing device a ‘lead holder’.

I’ve broken this tutorial down into two parts: right now you’re reading the tutorial on drawing 2D objects in AutoCAD. This weekend I’ll publish the transformation of 2D objects into a 3D printable part. Read on for how to create a 2D object in AutoCAD.

Continue reading “3D Printering: Making A Thing With AutoCAD, Part I”

Custom Rostock 3D Printer Makes Use Of IKEA Components

After discovering 3D printers, [Turi] had to make one. This past summer he did, and it looks fantastic.

He chose the Rostock design not only because it can print big parts quickly, but also because of its mesmerizing operation. 3D printers are generally fun to watch for the first few minutes, but Rostocks tend to have an even more robotic appeal in the motion of its end effector (robotics lingo for tool head).

The cool part of this build is [Turi’s] choice of enclosure. He had an IKEA cabinet collecting dust in his basement, so he decided to make use of its drawers for the main structure of the Rostock. A bit of wood work and some matte black spray paint later, and he has one great looking enclosure! The rest of the build was pretty standard, making use of 3D printed parts, a RAMPS 1.4 control board mounted on an Arduino Mega, and a computer power supply. He did make his own control arms using carbon fiber arrows, though!

To see it up close and in action, check out the quick video after the break.

Continue reading “Custom Rostock 3D Printer Makes Use Of IKEA Components”

3D Printed, Solderless Circuits

3d printed board

If you’re looking for yet another alternative to etching your own PCBs, then check out this new Instructable on 3D printing test circuits!

[Mikey] decided to try out this method when he needed a small board prototype. He designed the perfboard to have a standard thickness—only 1/16th thick (~1.6mm)—with thin, recessed channels on one side and through holes on the other. [Mikey’s] circuit board allows you to stuff your components in, hold them down with a piece of tape, and then fill the channels with some kind of conductive material. In this example he’s used a highly conductive paint.

This 3D printed option probably won’t suit all your circuit-building needs, but it could provide an excellent shortcut for your next hack! As always, there’s a video after the break.

Continue reading “3D Printed, Solderless Circuits”