Testing 3D Printed Cutting Blades Is Scary Work

[Ivan Miranda] comes from a land where the shops close on Sundays. Thus, when he found himself in need of a cutting blade, he realised he would have to build his own, or simply wait. He elected to do the former, and we get to enjoy the journey. (Video, embedded below.)

His first attempt was to cut a wooden plank with a 3D-printed cutting blade fitted to a mitre saw. After setting up the mitre saw to cut while he was at a safe distance, [Ivan] elected to test the blade. Alas, it simply melted, and the wood was barely scratched, so [Ivan] went back to the drawing board.

His second attempt was to CNC mill an aluminium blade, which was a full 6 mm thick. The saw needed some modifications to the saw to fit properly, but it was able to cut wood without major drama!

Returning to the 3D-printed concept, [Ivan] suspected reducing the surface speed of the cutting disc could reduce friction-induced heating. This would allow the 3D-printed blade to cut wood without melting, in theory. To achieve this, he built his own basic drop saw using a steel frame and a brushless motor. With a little water spray, and careful control of speed and pressure, the blade was able to slowly chew through a plank of wood. Afterwards, the teeth were almost completely worn down.

The fact is, 3D-printed blades are usually going to be too soft to do any real useful work. However, it’s fun to watch, and that’s good enough for us. If you want something more useful though, consider building your own knives.

Continue reading “Testing 3D Printed Cutting Blades Is Scary Work”

spinning thread extruder

Spinning Threads Put The Bite On Filament In This Novel Extruder Design

When it comes to innovation in FDM 3D printing, there doesn’t seem to be much room left to move the needle. Pretty much everything about filament printing has been reduced to practice, with more or less every assembly available off the shelf. Even the business end — the extruder — is so optimized that there’s not much room left for innovation.

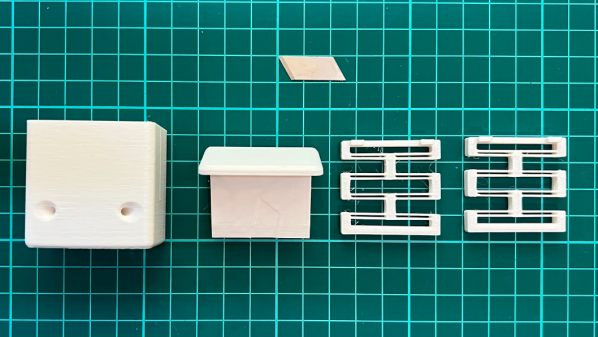
Or is there? The way [David Leitner] sees it, there is, which is why he built this rolling-screw extruder (if you can get to the Thingiverse link, [David] cross-posted on reddit, too). Standard extruders work on the pinch-roller principle, where the relatively soft filament is fed past a spring-loaded gear attached to a stepper motor. The stepper rotates the gear, which either advances the filament into or retracts it from the hot end. [David]’s design instead uses a trio of threaded rods mounted between two rings. The rods are at an angle relative to the central axis of the rings, forming a passage that’s just the right size for the filament to fit in. When the rings spin, the threads on the rods engage with the filament, gripping it around its whole circumference and advancing or retracting it depending on which way it’s spinning. The video below shows it working; we have to admit it’s pretty mesmerizing to watch.

[David] himself admits there’s not much advantage to it, perhaps other than a lower tendency to skip since the force is spread over the entire surface of the filament rather than just a small pinch point. Regardless, we like the kind of thinking that leads to something like this, and we’ll bet there are probably unseen benefits to it. And maybe the extruder actually is a place for innovation after all; witness this modular nozzle swapping system.

Continue reading “Spinning Threads Put The Bite On Filament In This Novel Extruder Design”

Turning Old Masks Into 3D Printer Filament

Disposable masks have been a necessity during the COVID-19 pandemic, but for all the good they’ve done, their disposal represents a monumental ecological challenge that has largely been ignored in favor of more immediate concerns. What exactly are we supposed to do with the hundreds of billions of masks that are used once or twice and then thrown away?

If the research being conducted at the University of Bristol’s Design and Manufacturing Futures Lab is any indication, at least some of those masks might get a second chance at life as a 3D printed object. Noting that the ubiquitous blue disposable mask is made up largely of polypropylene and not paper as most of us would assume, the team set out to determine if they could process the masks in such a way that they would end up with a filament that could be run through a standard 3D printer. While there’s still some fine tuning to be done, the results so far are exceptionally impressive; especially as it seems the technique is well within the means of the hobbyist.

From masks to usable filament.

The first step in the process, beyond removing the elastic ear straps and any metal strip that might be in the nose, is to heat a stack of masks between two pieces of non-stick paper with a conventional iron. This causes the masks to melt together, and turn into a solid mass that’s much easier to work with. These congealed masks were then put through a consumer-grade blender to produce the fine polypropylene granules that’re suitable for extrusion.

Mounted vertically, the open source Filastruder takes a hopper-full of polypropylene and extrudes it into a 1.75 mm filament. Or at least, that’s the idea. The team notes that the first test run of filament only had an average diameter of 1.5 mm, so they’re modifying the nozzle and developing a more powerful feed mechanism to get closer to the goal diameter. Even still, by cranking up the extrusion multiplier in the slicing software, the team was able to successfully print objects using the thin polypropylene filament.

This is only-during-a-pandemic recycling, and we’re very excited to see this concept developed further. The team notes that the extrusion temperature of 260 °C (500 °F) is far beyond what’s necessary to kill the COVID-19 virus, though if you planned on attempting this with used masks, we’d imagine they would need to be washed regardless. If the hacker and maker community were able to use their 3D printers to churn out personal protective equipment (PPE) in the early days of the pandemic, it seems only fitting that some of it could now be ground up and printed into something new.

Inconsistent layer heights in a 3D print

An Easy Fix For Inconsistent Layers In Cheap 3D Printers

If there’s one thing you can say about [Stefan] from CNC Kitchen, it’s that he’s methodical when he’s working on an improvement to his 3D printing processes, or when he’s chasing down a problem with a printer. Case in point: this root-cause analysis of extrusion inconsistencies with an entry-level 3D printer.

The printer in question is a Cetus MK3, a printer that found its way onto many benches due to its ridiculously low price and high-quality linear bearings. Unfortunately, there’s still a lot to be desired about the printer, and its tendency for inconsistent layers was chief among [Stefan]’s gripes. Such “blubbiness” can be pinned on any number of problems, but rather than guess, [Stefan] went through a systematic process of elimination to find the root cause. We won’t spoil the ending, but suffice it to say that the problem was subtle, and could probably be the cause of similar problems with other printers. The fix was also easy, and completely mechanical — just a couple of parts to replace. The video below shows the whole diagnosis process, as well as the before and after comparisons. [Stefan] also teases an upcoming treatment on how he converted the Cetus from the stock proprietary control board, which we’re interested in seeing.

If you haven’t checked out any of [Stefan]’s other 3D printing videos, you really should take a look. Whether it’s vibration damping with a concrete paver, salt annealing prints for strength, or using finite element analysis to optimize infills, he’s always got an interesting take on 3D printing.

Continue reading “An Easy Fix For Inconsistent Layers In Cheap 3D Printers”

Several shirts side by side, each with a custom design

3D Print A Custom T-Shirt Design, Step-by-Step

Want to make a t-shirt with a custom design printed on it? It’s possible to use a 3D printer, and Prusa Research have a well-documented blog post and video detailing two different ways to use 3D printing to create colorful t-shirt designs. One method uses a thin 3D print as an iron-on, the other prints directly onto the fabric. It turns out that a very thin PLA print makes a dandy iron-on that can survive a few washes before peeling, but printing flexible filament directly onto the fabric — while more complicated — yields a much more permanent result. Not sure how to turn a graphic into a 3D printable model in the first place? No problem, they cover that as well.

Making an iron-on is fairly straightforward, and the method can be adapted to just about any printer type. One simply secures a sheet of baking paper (better known as parchment paper in North America) to the print bed with some binder clips, then applies glue stick so that the print can adhere. A one- or two-layer thick 3D print will stick to the sheet, which can then be laid print-side down onto a t-shirt and transferred to the fabric by ironing it at maximum temperature. PLA seems to work best for iron-ons, as it preserves details better. The results look good, and the method is fairly simple.

Direct printing to the fabric with flexible filament can yield much better (and more permanent) results, but the process is more involved and requires 3D printing a raised bed adapter for a Prusa printer, and fiddling quite a few print settings. But the results speak for themselves: printed designs look sharp and won’t come loose even after multiple washings. So be certain to have a few old shirts around for practice, because mistakes can’t be undone.

That 3D printers can be used to embed designs directly onto fabric is something many have known for years, but it’s always nice to see a process not just demonstrated as a concept, but documented as a step-by-step workflow. A video demonstration of everything, from turning a graphic into a 3D model to printing on a t-shirt with both methods is all in the short video embedded below, so give it a watch.

Continue reading “3D Print A Custom T-Shirt Design, Step-by-Step”

3D Printing Toothpaste In The Name Of Science

While we don’t often see them in the hobbyist community, 3D printers that can extrude gels and viscous liquids have existed commercially for years, and are increasingly used for biological research. [Ahron Wayne] has recently been working with such a printer as part of a project to develop a printed wound dressing made of honey and blood clotting proteins, but for practice purposes, wanted to find a cheaper and more common material that had similar extrusion properties.

The material he settled on ended up being common toothpaste. In the video below you can see him loading up the cartridge of a CELLINK INKREDIBLE+ bioprinter with the minty goop, which is then extruded through a thin blunt-tip needle by compressed air. After printing out various shapes and words using the material, often times directly onto the bristles of a toothbrush, he’s come up with a list of tips for printing similarly viscous substances.

First and foremost, go slow. [Ahron] says the material needs a moment to contract after being extruded if it’s going to have any hope of supporting the next layer of the print. Thick layer heights are a necessity, as is avoiding sharp curves in your design. He also notes that overhangs must be avoided, and though it probably goes without saying, clarifies that an object printed from toothpaste will never be able to support anything more than its own weight.

In addition to the handful of legitimate DIY bioprinters that have graced these pages over the years, we’ve seen the occasional chocolate 3D printer that operated on a similar principle to produce bespoke treats, so the lessons learned by [Ahron] aren’t completely lost on the hacker and maker crowd. Who knows? Perhaps you’ll one day find yourself consulting this video when trying to get a modified 3D printer to lay down some soldering paste.

Continue reading “3D Printing Toothpaste In The Name Of Science”

G10 Is The 3D Print Surface You Crave

Print surfaces have been a major part of 3D printer development and experimentation since the beginning. [Makers Muse] has been experimenting with G10, a cheap high-pressure fiberglass laminate, and found that it’s an excellent candidate for most of your FDM printing needs. (Video embedded after the break.)

You’re probably more familiar with the fire-resistant version of G10, FR-4, the fiberglass substrate used for most PCBs. It’s also known by the brand name Garolite. [Makers Muse] tested with PLA, PETG (on his headphone build), ABS, ASA, PET, PCTG, and nylon. All the materials displayed excellent bed adhesion when heated to the appropriate temperature, and would often self-release the part as it cooled down. For TPU, the bed was left unheated to prevent it from sticking too well. 0.5 mm, 1.5 mm, and 3 mm G10 sheet thicknesses were tested, and [Makers Muse] found 1.5 mm to be the perfect balance between rigidity, and flexibility for removing particularly sticky prints.

G10 has been used in some commercial 3D printers, but there is very little information regarding its use beyond high-temperature materials like nylon. It leaves an excellent surface finish on the bottom of parts, as long as you take care not to scratch the bed. Compared to glass, its lower weight is advantageous for printers where the bed moves for the Y-axis. Another major advantage is the low cost, especially compared to some of the more exotic bed materials.

The results certainly look very promising, and we are keen to get our hands on some G10 for our own printers. If you have trouble finding it for sale, check out your local knife-making suppliers, who sell it as handle materials.

Continue reading “G10 Is The 3D Print Surface You Crave”