IR Translator Makes Truly Universal Remote

Universal remotes are a handy tool to have around if you have many devices that would all otherwise have their own remote controls. Merging them all into a single device leads to less clutter and less frustration, but they are often not truly “universal” as some of them may not support every infrared device that has ever been built. If you’re in a situation like that it’s possible to build a truly universal remote instead, provided you have a microcontroller and a few infrared LEDs on hand.

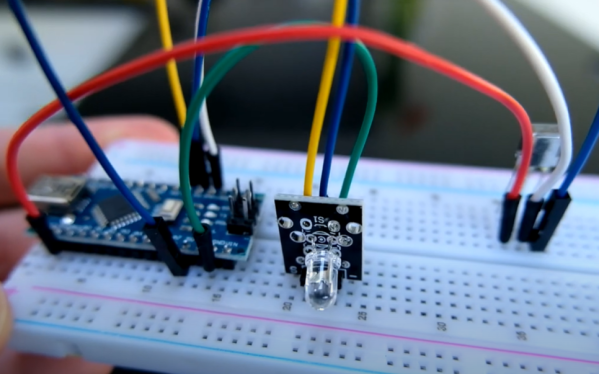
This was the situation that [Matt] found himself in when his Amazon Fire TV equipment control feature didn’t support his model of speakers. To get around this he programmed an Arduino to essentially translate the IR codes from the remote and output a compatible set of codes to the speakers.This requires both an IR photodiode and an IR LED but little else other than the codes for the remote and the equipment in question. With that all set up and programmed into the Aruino, [Matt]’s remote is one step closer to being truly “universal”.

While [Matt] was able to make use of existing codes in the Arduino library, it is also possible to capture the codes required manually by pointing a remote at a photodiode and programming a microcontroller to capture the codes that you need. [Matt] used a Raspberry Pi to do this when debugging this project, but we’ve also seen this method used with a similar build which uses an ESP8266 to control an air conditioner via its infrared remote control capabilities.

Continue reading “IR Translator Makes Truly Universal Remote”

Making Light Of Superconductors

Once upon a time, making a superconductor required extremely cold temperatures. Scientists understood why superconducting materials could move electrons without loss, but the super cold temperatures were a problem. Then in 1986, a high-temperature superconductor was found. High temperature, of course, is a relative term. The new material works when cooled to a frosty temperature, just not a few degrees off of absolute zero like a conventional superconductor. Since then, the race has been on to find a room-temperature superconductor that doesn’t require other exotic conditions, such as extreme pressure. Department of Energy scientists may have found a different path to get there: X-ray light.

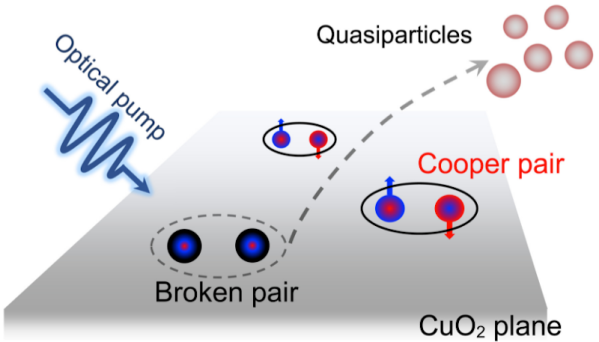
The problem is that scientists don’t fully understand why these high-temperature superconductors work. To study the material, YBCO, scientists chill a sample to it superconducting state and then use a magnetic field to disrupt the superconductivity to study the material’s normal state. The new research has shown that a pulse of light can also disrupt the superconductivty, although the resulting state is unstable.

The research shows that charge density waves, which can serve as markers for superconductivity, occur when the samples are exposed to a magnetic field or to high-energy light pulses. While this is a far cry from creating room temperature superconductors, further study of the mechanism that allows light and magnetic fields to cause similar changes in the material could lead to a better understanding of the physics and maybe — one day — room-temperature superconductors.

Want to make your own YBCO? Go for it! Of course, you can already get room-temperature superconductors if you can stand the pressure.

Turning The PS4 Into A Useful Linux Machine

When the PlayStation 3 first launched, one of its most lauded features was its ability to officially run full Linux distributions. This was of course famously and permanently borked by Sony with a software update after a few years, presumably since the console was priced too low to make a profit and Sony didn’t want to indirectly fund server farms made out of relatively inexpensive hardware. Of course a decision like this to keep Linux off a computer system is only going to embolden Linux users to put it on those same systems, and in that same vein this project turns a more modern Playstation 4 into a Kubernetes cluster with the help of the infamous OS.

The Playstation 4’s hardware is a little dated by modern desktop standards but it is still quite capable as a general-purpose computer provided you know the unofficial, unsupported methods of installing Psxitarch Linux on one. This is a distribution based on Arch and built specifically for the PS4, but to get it to run the docker images that [Zhekun Hu] wanted to use some tinkering with the kernel needed to be done. With some help from the Gentoo community a custom kernel was eventually compiled, and after spending some time in what [Zhekun Hu] describes as “Linux Kernel Options Hell” eventually a working configuration was found.

The current cluster is composed of two PS4s running this custom software and runs a number of services including Nginx, Calico, Prometheus, and Grafana. For those with unused PlayStation 4s laying around this might be an option to put them back to work, but it should also be a cautionary tale about the hassles of configuring a Linux kernel from scratch. It can still be done on almost any machine, though, as we saw recently using a 386 and a floppy disk.

Resin-Printed Gears Versus PLA: Which Is Tougher?

When it comes to making gearboxes, 3D printing has the benefit that it lets you whip up whatever strange gears you might need without a whole lot of hunting around at obscure gear suppliers. This is particularly good for those outside the limited radius served by McMaster Carr. When it came to 3D printed gears though, [Michael Rechtin] wondered whether PLA or resin-printed gears performed better, and decided to investigate.

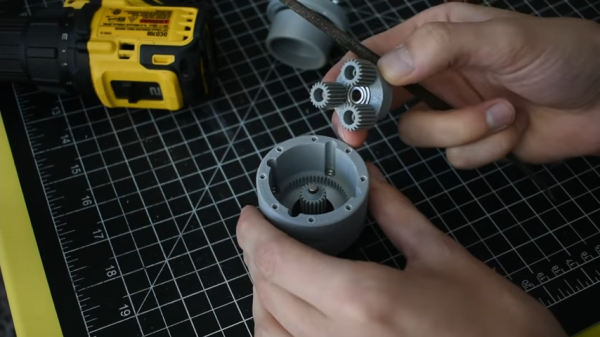
The subject of the test is a 3D-printed compound planetary gearbox, designed for a NEMA-17 motor with an 80:1 reduction. The FDM printer was a Creality CR10S, while the Creality LD02-H was on resin duty.

The assembled gearboxes were tested by using a 100 mm arm to press against a 20 kg load cell so that their performance could be measured accurately. By multiplying the force applied to the load cell by the  length of the arm, the torque output from the gearbox can be calculated. A rig was set up with each gearbox pushing on the load cell in turn, with a closed-loop controller ensuring the gearbox is loaded up to the stall torque of the stepper motor before letting the other motor take over.

Continue reading “Resin-Printed Gears Versus PLA: Which Is Tougher?”

the rotary piston

There’s A Wrinkle In This 3D Printed Wankel

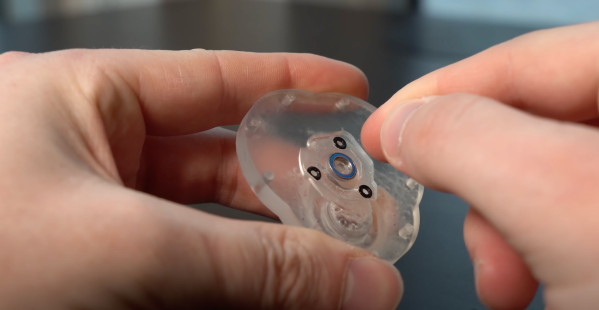
Rotary engines such as the Wankel have strange shapes that can be difficult to machine (as evidenced by the specialized production machines and patents in the 70s), which means it lends itself well to be 3D printed. The downside is that the tolerances, like most engines, are pretty tight, and it is difficult for a printer to match them. Not to be dissuaded, [3DprintedLife] designed and built a 3D printed liquid piston rotary engine. The liquid piston engine is not a Wankel and is more akin to an inside-out Wankel. The seals are on the housing, not the rotor itself, and there are three “chambers” instead of two.

The first of many iterations didn’t run. There was too much friction, but there were some positive signs as pressure was trapped in a chamber and released as it turned. The iterations continued, impressively not using any o-rings to seal, but instead sanding each part down using a 1-2-3 block as a flat reference, within 25 microns of the design. Despite his care and attention to detail, it still couldn’t self-sustain. He theorizes that it could be due to the resin being softer than other materials he has used in the past. Not to be left empty-handed, he built a dynamo to test his new engine out. It was a load cell and an encoder to measure speed and force. His encoder had trouble keeping up, so he ordered some optical limit switches.

This engine is a follow-on to an earlier 3D printed air-powered Wankel rotary engine, and we’re looking forward to part two of the liquid piston series. Video after the break.

Continue reading “There’s A Wrinkle In This 3D Printed Wankel”

Sergiy Nesterenko giving his Remoticon 2021 talk

Remoticon 2021 // Sergiy Nesterenko Keeps Hardware Running Through Lightning And Cosmic Rays

Getting to space is hard enough. You have to go up a few hundred miles, then go sideways really fast to enter orbit. But getting something into space is one thing: keeping a delicate instrument working as it travels there is quite another. In his talk at Remoticon 2021, [Sergiy Nesterenko], former Radiation Effects Engineer at SpaceX, walks us through all the things that can destroy your sensitive electronics on the way up.

The trouble already starts way before liftoff. Due to an accident of geography, several launch sites are located in areas prone to severe thunderstorms: not the ideal location to put a 300-foot long metal tube upright and leave it standing for a day. Other hazards near the launch pad include wayward wildlife and salty spray from the ocean.

Those dangers are gone once you’re in space, but then suddenly heat becomes a problem: if your spacecraft is sitting in full sunlight, it will quickly heat up to 135 °C, while the parts in the shade cool off to -150 °C. A simple solution is to spin your craft along its axis to ensure an even heat load on all sides, similar to the way you rotate sausages on your barbecue.

But one of the most challenging problems facing electronics in space is radiation. [Sergiy] explains in detail the various types of radiation that a spacecraft might encounter: charged particles in the Van Allen belts, cosmic rays once you get away from Low Earth orbit, and a variety of ionized junk ejected from the Sun every now and then. The easiest way to reduce the radiation load on your electronics is simply to stay near Earth and take cover within its magnetic field.

For interplanetary spacecraft there’s no escaping the onslaught, and the only to survive is to make your electronics “rad-hard”. Shielding is generally not an option because of weight constraints, so engineers make use of components that have been tested in radiation chambers to ensure they will not suddenly short-circuit. Adding redundant circuits as well as self-monitoring features like watchdog timers also helps to make flight computers more robust.

[Sergiy]’s talk is full of interesting anecdotes that will delight the inner astronaut in all of us. Ever imagined a bat trying to hitch a ride on a Space Shuttle? As it turns out, one aspiring space bat did just that. And while designing space-qualified electronics is not something most of us do every day, [Sergiy]’s experiences provide plenty of tips for more down-to-earth problems. After all, salt and moisture will eat away cables on your bicycle just as they do on a moon rocket.

Be sure to also check out the links embedded in the talk’s slides for lots of great background information.

Continue reading “Remoticon 2021 // Sergiy Nesterenko Keeps Hardware Running Through Lightning And Cosmic Rays”

CX-6000 Pen Plotter Upgrade

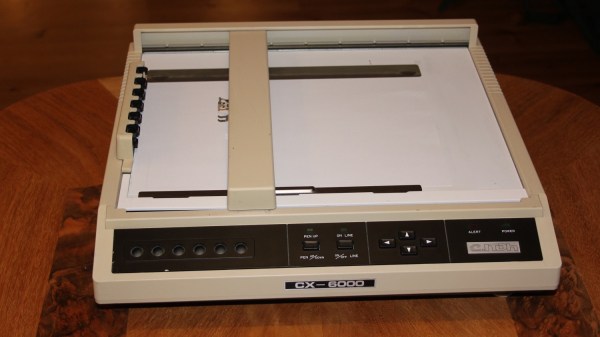
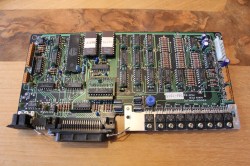
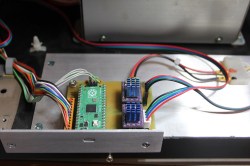
[Terje Io] decided to breathe new life into an old pen plotter — the CX6000 from C. Itoh, a Japanese company that made several printers for Apple in the 1980s. He keeps most of the framework, but the electronics get a major overhaul. The old motors are replaced, the controller and motor drivers are modernized using a Raspberry Pi Pico and stepper motor drivers. After tending to other auxiliary electronics like the control panel and limit switches, it’s time to deal with the firmware.

Rather than reinvent the wheel, [Terje] sensibly built upon existing projects and refactored them for his application. G-Code processing is done by grblHAL, with an added mode to handle HPGL code. He modified the firmware from Motöri the Plotter project to parse HPGL, making his new CX6000+ bilingual.

We covered Motöri way back in 2009, and more recently we wrote about the Teensy Controller using grblHAL, one of the 32-bit big brothers of GRBL. Have you ever restored one of these old plotters? Or is it easier to just build your own these days?