Are you guys tired of redesigned Arduinos yet? Usually we are, but [Ray] just released the SquareWear 2.0, and we have to admit, it’s a pretty slick design.
It’s an update to SquareWear 1.1 which we covered a year ago. That version made use of a 18F14K50 microcontroller, measured a tiny 1.6″ x 1.6″ and could easily be sewn into wearable circuits. But after receiving lots of requests to design a new Arduino based board, [Ray] obliged and made v2.0.
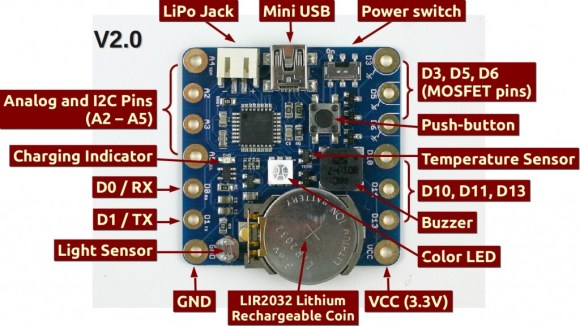
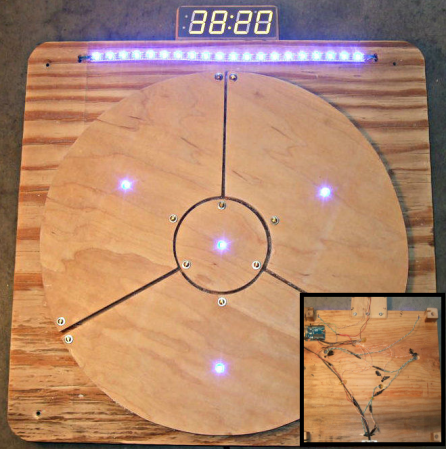
The new SquareWear is slightly bigger, measuring in at 1.7″ x 1.7″, but it packs a much bigger and more functional punch — just check out the image schematic above! The only catch is it doesn’t actually have a USB-to-serial chip on-board, which is why [Ray] was able to get the board so small and inexpensive. Instead it simulates USB in the software using the V-USB library. That method is much slower but still functional. To perform serial communication through the USB port it uses the onboard USBasp bootloader.
The board also features large through-holes to accommodate sew-able pin pads, making it super easy to integrate this into fabric!
For a complete explanation of the SquareWear 2.0, check out the video after the break.
Continue reading “SquareWear 2.0 A Wearable Opensource Arduino”

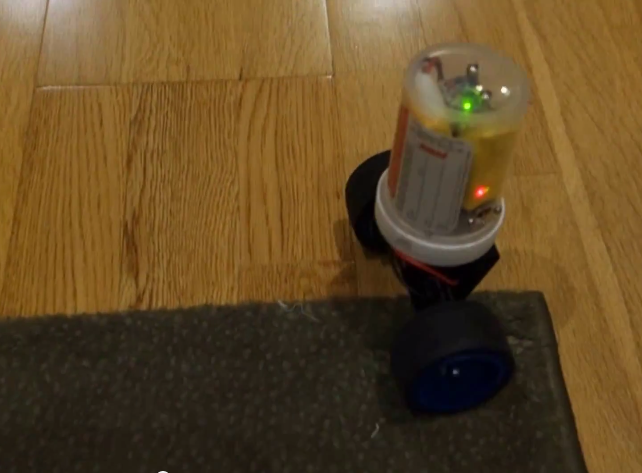 [Trandi] can check ‘build a self-balancing robot’ off of his to-do list. Over a couple of weekends,


