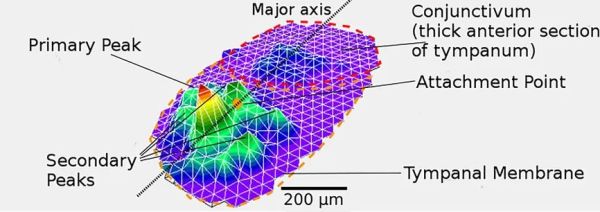
Mapping of the displacement of a tympanum of the lesser wax moth (Achroia grisella). (Credit: Andrew Reid)

3D Printing Bio-Inspired Microphone Designs Based On Moth Ears

If many millions of years of evolution is good for anything, it is to develop microscopic structures that perform astounding tasks, such as the marvelous biology of insects. One of these structures are the ears of the lesser wax moth (Achroia grisella), whose mating behavior involves ultrasonic mating calls. These can attract the bats which hunt them, leading to these moths having evolved directional hearing that can pinpoint not only a potential mate, but also bat calling sound.

What’s most astounding about this is that these moths that only live about a week as an adult can perform auditory feats that we generally require an entire microphone array for, along with a lot of audio processing. The key that enables these moths to perform these feats lies in their eardrum, or tympanum. Rather than the taut, flat surface as with mammals, these feature intricate 3D structures along with pores that seem to perform much of the directional processing, and this is what researchers have been trying to replicate for a while, including a team of researchers at the University of Strathclyde.

To create these artificial tympanums, the researchers used a flexible hydrogel, with a piezoelectric material that converts the acoustic energy into electric signals, connected to electrical traces. The 3D features are printed on this, mixed with methanol that forms droplets inside the curing resin, before being expelled and leaving the desired pores. One limitation is that currently used printers have a limited resolution of about 200 micrometers, which doesn’t cover the full features of the insect’s tympanum.

Assuming this can be made to work, it could be used for everything from cochlear implants to anywhere else that has a great deal of audio processing that needs downsizing.

(Heading image: Mapping of the displacement of a tympanum of the lesser wax moth (Achroia grisella). (Credit: Andrew Reid) )

The Fastest Fourier Transform In The West

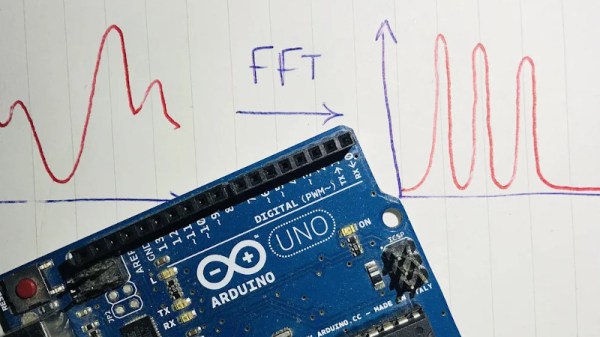
An interesting aspect of time-varying waveforms is that by using a trick called a Fourier Transform (FT), they can be represented as the sum of their underlying frequencies. This mathematical insight is extremely helpful when processing signals digitally, and allows a simpler way to implement frequency-dependent filtration in a digital system. [klafyvel] needed this capability for a project, so started researching the best method that would fit into an Arduino Uno. In an effort to understand exactly what was going on they have significantly improved on the code size, execution time and accuracy of the previous crown-wearer.

A complete real-time Fourier Transform is a resource-heavy operation that needs more than an Arduino Uno can offer, so faster approximations have been developed over the years that exchange absolute precision for speed and size. These are known as Fast Fourier Transforms (FFTs). [klafyvel] set upon diving deep into the mathematics involved, as well as some low-level programming techniques to figure out if the trade-offs offered in the existing solutions had been optimized. The results are impressive.

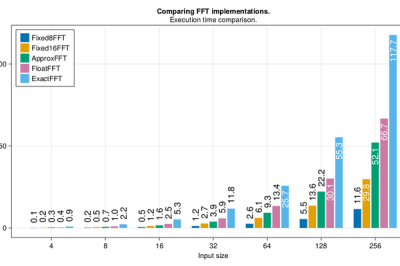
Fastest FFT code benchmarking results in ms
Benchmarking results showing speed of implementation versus the competition (ApproxFFT)

Not content with producing one new award-winning algorithm, what is documented on the blog is a masterclass in really understanding a problem and there are no less than four algorithms to choose from depending on how you rank the importance of execution speed, accuracy, code size or array size.

Along the way, we are treated to some great diversions into how to approximate floats by their exponents (French text), how to control, program and gather data from an Arduino using Julia, how to massively improve the speed of the code by using trigonometric identities and how to deal with overflows when the variables get too large. There is a lot to digest in here, but the explanations are very clear and peppered with code snippets to make it easier and if you have the time to read through, you’re sure to learn a lot!  The code is on GitHub here.

If you’re interested in FFTs, we’ve seen them before around these parts. Fill your boots with this link of tagged projects.

ADSL Router As Effects Pedal

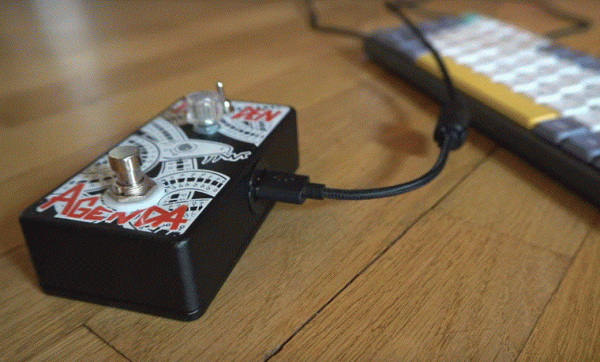
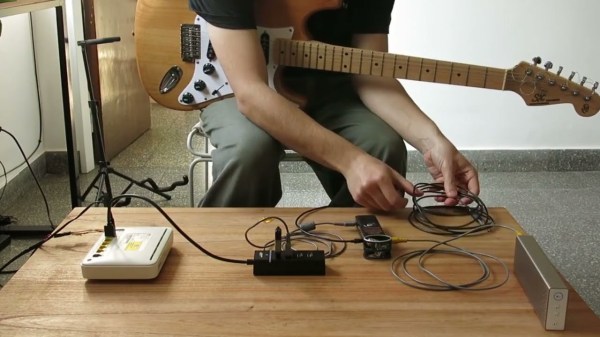
Moore’s law might not be as immutable as we once though thought it was, as chip makers struggle to fit more and more transistors on a given area of silicon. But over the past few decades it’s been surprisingly consistent, with a lot of knock-on effects. As computers get faster, everything else related to them gets faster as well, and the junk drawer tends to fill quickly with various computer peripherals and parts that might be working fine, but just can’t keep up the pace. [Bonsembiante] had an old ADSL router that was well obsolete as a result of these changing times, but instead of tossing it, he turned it into a guitar effects pedal.

The principle behind this build is that the router is essentially a Linux machine, complete with ALSA support. Of course this means flashing a custom firmware which is not the most straightforward task, but once the sound support was added to the device, it was able to interface with a USB sound card. An additional C++ program was created which handles the actual audio received from the guitar and sound card. For this demo, [Bonsembiante] programmed a ring buffer and feeds it back into the output to achieve an echo effect, but presumably any effect or a number of effects could be programmed.

For anyone looking for the source code for the signal processing that the router is now performing, it is listed on a separate GitHub page. If you don’t have this specific model of router laying around in your parts bin, though, there are much more readily-available Linux machines that can get this job done instead.

Continue reading “ADSL Router As Effects Pedal”

Teleconferencing Like It’s 1988: Connecting Vintage Hardware To Zoom

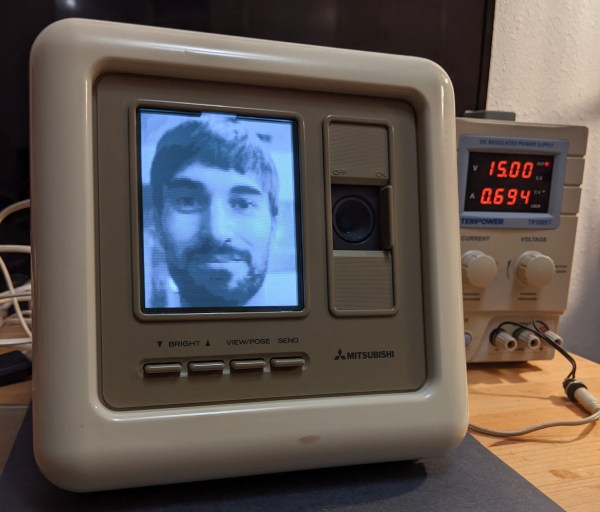
Hang up your car phone and toss that fax machine in the garbage. Even back in the late 80s it was possible to do away with these primitive technologies in favor of video conferencing, even though this technology didn’t catch on en masse until recently. In fact, Mitsubishi released a piece of video conferencing equipment called the VisiTel that can be put to use today, provided you can do a bit of work to get it to play along nicely with modern technology.

[Alex] was lucky enough to have one of these on hand, as soon as it was powered up he was able to get to work deciphering the messaging protocol of the device. To do this he showed the camera certain pictures with known properties and measured the output waveforms coming from the device, which were AM modulated over an RJ9 connection which he had changed to a 3.5 mm headphone jack.

It communicates in a series of pictures instead of sending an actual video signal, so [Alex] had a lot of work to do to properly encode and decode the stream. He goes into incredible detail on his project page about this process and is worth a read for anyone interested in signal processing. Ultimately, [Alex] was able to patch this classic piece of technology into a Zoom call and the picture quality is excellent when viewed through the lens of $399 80s technology.

We have been seeing a lot of other hacks around video conferencing in the past six months as well, such as physical mute buttons and a mirror that improves eye contact through the webcam.

DSP Spreadsheet: Frequency Mixing

Circuit simulation and software workbooks like Matlab and Jupyter are great for being able to build things without a lot of overhead. But these all have some learning curve and often use clever tricks, abstractions, or library calls to obscure what’s really happening. Sometimes it is clearer to build math models in a spreadsheet.

You might think that spreadsheets aren’t built for doing frequency calculation and visualization but you’re wrong. That’s exactly what they’re made for — performing simple but repetative math and helping make sense of the results.

In this installment of the DSP Spreadsheet series, I’m going to talk about two simple yet fundamental things you’ll need to create mathematical models of signals: generating signals and mixing them. Since it is ubiquitous, I’ll use Google Sheets. Most of these examples will work on any spreadsheet, but at least everyone can share a Google Sheets document. Along the way, we’ll see a neat spreadsheet trick I should probably use more often.

Continue reading “DSP Spreadsheet: Frequency Mixing”

Space Technology And Audio Tape To Store Art

[Blaine Murphy] has set out to store an archive of visual art on cassette tape. To do so he encodes images via Slow-Scan Television (SSTV), an analogue technology from the late 50s which encodes images in for radio transmission. If you are thinking ‘space race’ you are spot on, the first images of the far side of the moon reached us via SSTV and were transmitted by the soviet Luna 3 spacecraft.

Yes, this happened

Encoding images with 5os technology is only one part of this ongoing project. Storage and playback are handled by a 90s tape deck and the display unit is a contemporary Android phone. Combining several generations in one build comes with its own set of challenges, such as getting a working audio connection between the phone and the tape deck or repairing old consumer electronics. His project logs on this topic are solid contenders for ‘Fail Of The Week’ posts. For instance, making his own belts for the cassette deck was fascinating but a dead end.

The technological breadth of the project makes it more interesting with every turn. Set some time aside this weekend for an entertaining read.

Just a couple of years back ham radio operators had the opportunity to decode SSTV beamed down from the ISS when they commemorated [Yuri Gagarin’s] birthday. Now if the mechanical part of this project is what caught your interest, you’ll also want to look back on this MIDI sampler which used multiple cassette players.

Hackaday Prize Entry: Vibhear

Hearing impairment, either partial or total, is a serious problem afflicting a large number of people. Almost 5% of the global population has some form of hearing disorder. For those affected by this disability from birth, it further impacts the development of language and speech abilities. In recent years, cochlear implants are increasingly being used to address this problem. These implants consist of two parts – the receiver and electrode array are implanted under the skin near the ear (with the electrode array terminating inside the Cochlea), while the microphone, electronics, transmitter and power source are attached on the outside. Often, the external unit has to be removed – for example, when the person needs to sleep. This is particularly so in the case of young children. The external unit is fairly large compared to their head and causes discomfort during sleep. And parents are worried that the expensive device could get damaged when the child is sleeping. This leads to the alarming situation where the child is asleep and has no audio sensory inputs being received from the surroundings. Not only can they not hear morning alarms, but also cannot react when there is an emergency situation such as a smoke alarm going off.

[Srdjan Pavlovic] came across this problem first hand when he visited his friend and learned about their six-year-old son with hearing loss since birth. The parents said their child will not be disturbed by loud noises at night since the external unit of his cochlear implant is removed each night. [Srdjan] then started work on building the Vibhear – an assistive hearing device to be used when the main hearing aid is removed or not working. It is a low-cost arm-band that provides a vibratory signal in response to high ambient noises.

The main components are a microphone, amplifier, microcontroller and vibration motor powered by a LiPo battery through a boost converter/charger. An RTC module allows setting up daily wake up alarms. It’s currently prototyped around the Arduino, but the next iteration will use a specialized DSP which can be programmed to perform signal processing operations on input sound. This will allow identification of specific sounds such as car horns, barking dogs, smoke alarms or emergency sirens.

[Srdjan] is in the process of choosing components for his next iteration, so if you have any recommendations to help him choose the microcontroller, power supply controller or other parts, do let him know via comments below.