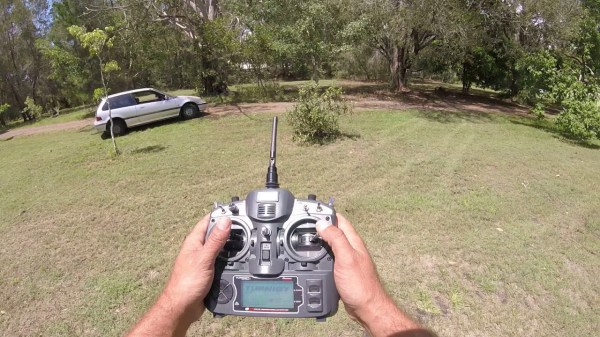
Whether we like it or not, eventually the day will come where we have to admit that we outgrew our childhood toys — unless, of course, we tech them up in the name of science. And in some cases we might get away with simply scaling things up to be more fitting for an adult size. [kenmacken] demonstrates how to do both, by building himself a full-size 1:1 RC car. No, we didn’t forget a digit here, he remodeled an actual Honda Civic into a radio controlled car, and documented every step along the way, hoping to inspire and guide others to follow in his footsteps.
To control the Civic with a standard RC transmitter, [kenmacken] equipped it with a high torque servo, some linear actuators, and an electronic power steering module to handle all the mechanical aspects for acceleration, breaking, gear selection, and steering. At the center of it all is a regular, off-the-shelf Arduino Uno. His write-up features plenty of videos demonstrating each single component, and of course, him controlling the car — which you will also find after the break.
[kenmacken]’s ultimate goal is to eventually remove the radio control to build a fully autonomous self-driving car, and you can see some initial experimenting with GPS waypoint driving at the end of his tutorial. We have seen the same concept in a regular RC car before, and we have also seen it taken further using neural networks. Considering his background in computer vision, it will be interesting to find out which path [kenmacken] will go here in the future.
The Cadillac ELR is a plug-in hybrid car with a bit of class, it has the beating heart of a Chevy Volt in a nice coupé body with some up-market styling and a nice interior. Since it wasn’t on the market for long and some consumers are still wary of cars with electric motors, it also represents something of a sweet spot: according to [Andrew Rossignol] you can pick them up for less outlay than you might imagine. He bought one, and being an inquisitive soul decided to probe its secrets through its OBD-II ports.
OBD-II sniffing is nothing especially new, but his write-up provides an interesting run-down of the methodology used to identify the different proprietary pieces of data that it makes available. His Python script attempted to parse the stream as though it were multi-byte words of different lengths, plotting its results as graphs, It was then a straightforward process of identifying the graphs by eye that contained useful data and rejecting those that were obviously garbage. He was able to pick out the figures in which he was interested, and write an interface for his little Sony VAIO UX to display them on the move.
We’ve covered OBD hacks too numerous to mention over the years, but perhaps you’d like to read our history of the standard.
How often do we find ourselves thankful for advertising? When it comes to Hackaday’s Retrotechtacular column it’s actually quite often since it snapshots a moment in culture and technology. Today’s offering is a shining example, where we get a great look into vehicular utility of the day that is rarely seen in our modern lives.
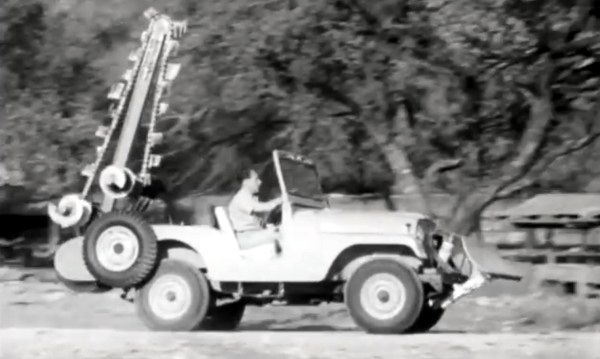
The origin story of the Jeep is of course its prominence in World War II when more than half a million were produced. GIs who drove the vehicles constantly during the war greatly appreciated the reliability and versatility and wanted one for their own when returning home and a market rose up to satisfy that need. The modern equivalent would be the Hummer fad that started in the 1990’s. Humvee, the early ancestor of the Hummer, replaced the Jeep in the US military in the 1980’s and a version called Hummer entered the consumer market in ’92. But that was more of a comfort-meets-icon proposition, where the Jeep of the 1950’s (seen in the commercial below) delivered — even over delivered — on a promise of utility.
In this ad, the case is made for Jeep as farm implement, acting as plow, mower, even post hole digger. As a firefighting implement the announcer boasts that “One man with a Jeep can do the work of 100 men with shovels” by cutting fire breaks into the soil. It’s sold as the workhorse of cemeteries, ranches, county service crews, and anything else their marketing gurus could write into copy. We think the metrics are dubious but certainly the inexpensive build, versatile nature, and need for power equipment across the countryside brought these Jeeps into widespread rural and industrial service in myriad roles.
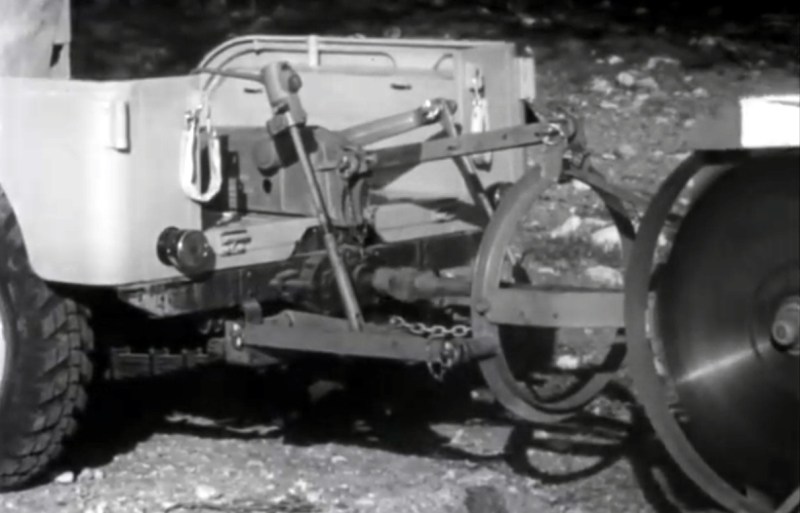
Power take off driving shaft to power circular saw. You can also see the hydraulics that lift and lower the saw.
What makes most of this possible is the existence of a power take-off (PTO). This is a mechanical connection from the engine of the vehicle to external components that can be switched out. Once connected, the speed of the engine can be controlled to adjust the power take-off operation. In conjunction with a hydraulic system that can lift and lower the implement, it becomes a remarkably versatile system. We begin to wonder the American vernacular includes the saying “it’s like the Swiss Army knife of…” rather than calling everything that’s insanely useful a Jeep.
Connect a pump to the PTO and you have a fire-fighting Jeep. Connect a generator and you can drive electric tools like the chainsaw used to cut down a tree in the video and to power an arc welder. There’s a gnarly-looking circular saw blade, and you’re going to spill your coffee when you get to the “Jeep-a-trench”. That’s right, a trenching attachment gives the vehicle’s suspension a rough workout. It boasts the ability to dig down six feet and complete the footings for an ordinary house in just three hours.
Willy’s MB, the company behind the Jeep must have employed a crew of hackers. What a blast it would have been to be in the research and development sessions to come up with 1,001 more uses for the equipment. The company has a bit of Jeep history you can peruse, but we’d really love to hear about the addon equipment ideas that didn’t make the cut. Are there any readers who have some stories along these lines? Let us know in the comments below.
[William Osman] and [Simone Giertz] have graced our pages before, both with weird, wacky and wonderful hacks so it’s no surprise that when they got together they did so to turn Simone’s car into a computer mouse. It’s trickier than you might think.
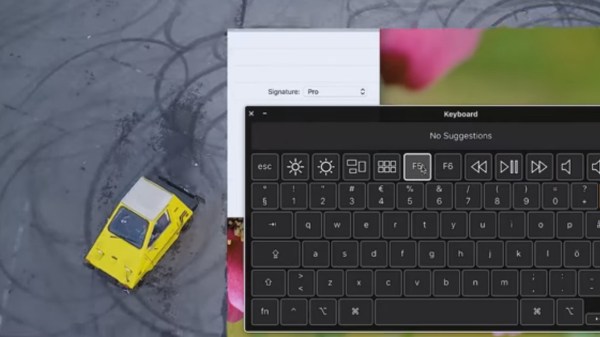
They started by replacing the lens of an optical mouse with a lens normally used for a security camera. Surprisingly, when mounted to the car’s front bumper it worked! But it wasn’t ideal. The problem lies in that to move a mouse cursor sideways you have to move the mouse sideways. However, cars don’t move sideways, they turn by going in an arc. Move your mouse in an arc right now without giving it any sideways motion and see what happens. The mouse cursor on the screen moves vertically up or down the screen, but not left or right. So how to tell if the car is turning? For that, they added a magnetometer. The mouse then gives the distance the car moved and the magnetometer gives the heading, or angle. With some simple trigonometry, they calculate the car’s coordinates.
The mouse click is done using the car’s horn, but details are vague there.
And yes, using the carmouse is as fun as it sounds, though we still don’t recommend texting while driving using this technique. Watch them in the videos below as they write an email and drive a self-portrait of the car.
Running a classic car is often an easier prospect than a more recent model, as the mechanical parts have a tendency towards commonality between models, simplicity, and maintenance using basic tools. However assuming some level of parts availability for your model it is not usually the running gear that causes headaches. Instead, it is the smaller and less durable parts, the little plastic pieces that formed vital components but have not been manufactured for decades. These are the parts for which the advent of accessible 3D printing has been a revelation, suddenly the owner of a wreck need only to have basic CAD skills to deliver the goods.
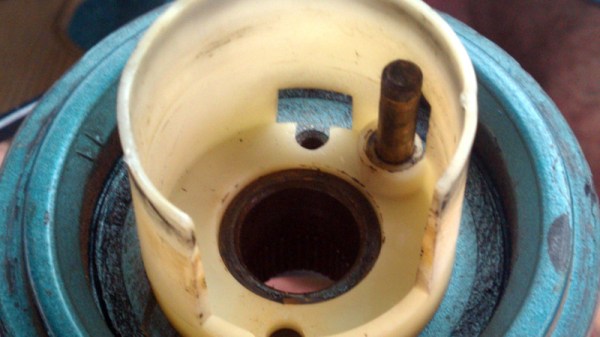
A Chevy Corvair like [Ken’s]. Greg Gjerdingen [CC BY 2.0].[Ken] has a ’63 Chevy Corvair, an attractively-styled motor notable for its rear-engined layout and air-cooled engine. And it seems his car is plagued by the same issue as all other early models, a failure of its turn signal mechanism. The version fitted to later cars is a vastly superior replacement, but required some modification to fit his ’63 model. Even after modifcation, the updated part had a plastic component that was too long for his steering wheel. Would he grind down the later part to fit, or go with a later wheel? No, he turned to Google Sketchup, and 3D printed a replacement of the correct size. He does admit that it’s not perfect as the signals cancel at a slightly different point from where they should, but since he’s been using it for four years it appears to have done the job.
We wish [Ken] every success with his Corvair, and indeed can’t help envying him a little for owning it. Some of us have been known to dabble in older metal, too.
The twenty best projects will receive $100 in Tindie credit, and for the best projects by a Student or Organization, we’ve got two brand-new Prusa i3 MK3 printers. With a printer like that, you’ll be breaking stuff around the house just to have an excuse to make replacement parts.
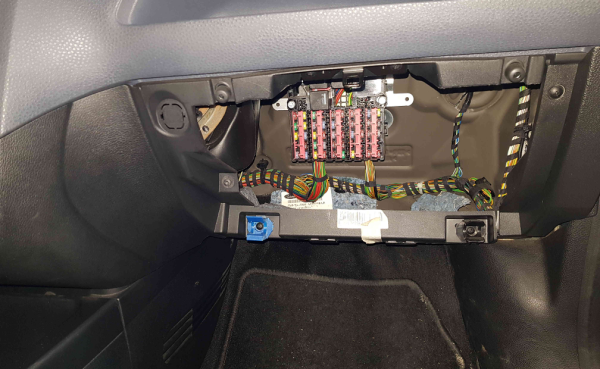
A few years ago, [Brieuc]’s car blew a fuse. He went to replace it, which unfortunately means removing the entire glove box. In his haste to get his baby back on the road, he accidentally broke one of the clips that holds the glove box on the dashboard.
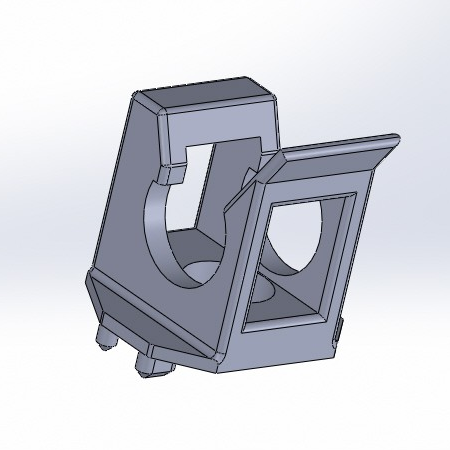
[Brieuc] tried to just glue the thing back together, but it didn’t hold because the part has to flex a little bit for people who need to get into the fuse box. No one seems to offer a replacement for this small but vital hunk of plastic, though he did find someone offering total glove box replacements at highway robbery prices. Since there was still one good clip, he used it to design and print a strong ABS replacement.
This is a great example of the one-off utility of 3D printers. [Brieuc] didn’t need an exact copy, and since he was replacing an injection-molded part with additive manufacturing, he had the freedom to start with a bare-bones design, make adjustments as needed, and iterate until he got it right. It didn’t take long. The layer orientation of the first print made the legs too weak, but that’s a simple fix. The second version has lasted for three years and counting.
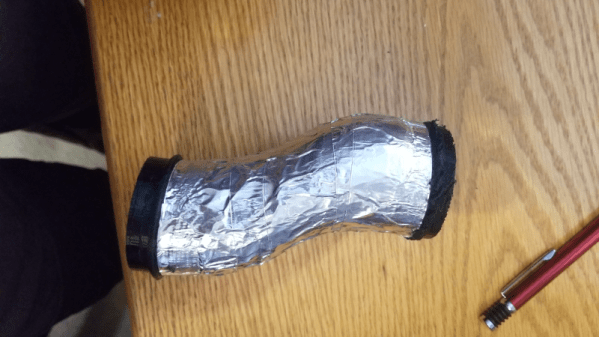
[Sam] is the lucky owner of a 1990 VW Corrado G60. To the uninitiated, that’s the souped-up, go fast version with the fancy supercharger on top. While performing some mods to the air intake (car-speak for “hacks”), there came a need for a custom tube to eliminate the original silencer box. With available options costing up to $400, suddenly 3D printing a replacement seemed like a better answer.
3D printing intake parts for a supercharged vehicle has some unique challenges. The intake must be able to take the boost pressures seen by the engine, in this case up to around 10 psi. There must be no air leaks at all as this risks confusing the sensors that measure how much air is entering the engine. Lastly, the tube must be able to withstand the hot, and often oily environment under the hood.
The first attempt was completed with TPU filament, which unfortunately did not hold pressure. A followup with PLA fared better, but was unable to withstand the heat present in the engine bay. After some experimentation, a successful print was made in PETG which was more robust. In the final design, [Sam] applied a rubber coating and then some aluminum tape, to both help seal any micro-holes in the 3D printed surface as well as help protect against heat.
After over a month of testing, [Sam]’s data logs indicate the tube is performing well and holding boost. It goes to show that with some perseverance and iterative design, 3D printed parts can often save the day.

![A Chevy Corvair (not [Ken]'s one). Greg Gjerdingen [CC BY 2.0].](https://hackaday.com/wp-content/uploads/2018/02/1024px-flickr_-_dvs1mn_-_64_chevrolet_corvair_monza_1.jpg)