Sniffing CAN To Add New Features To A Modern Car

It used to be that there wasn’t a problem on the average car that couldn’t be solved with a nice set of wrenches, a case of beer, and a long weekend. But the modern automobile has more in common with a spaceship than those vintage rides of yesteryear. Bristling with sensors and electronics, we’re at the point that some high-end cars need to go back to the dealer for even minor repairs. It’s a dark time for the neighborhood grease monkey.
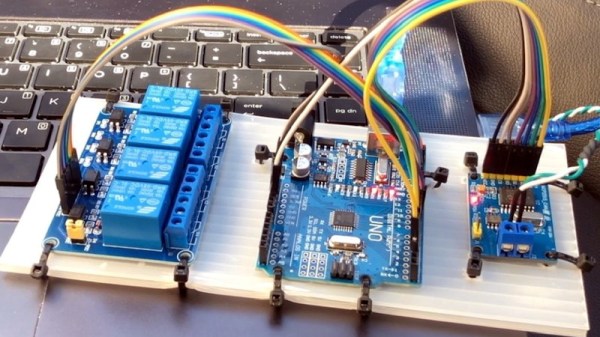
But for those of us who are more likely to spend their free time working with a compiler than a carburetor, a modern car can be an absolute wonderland. That’s what [TJ Bruno] found when he recently started experimenting with the CAN bus on his 2017 Chevy Cruze. Not only was he able to decode how the different switches and buttons on the dashboard communicated with the vehicle’s onboard systems, he was able to hack in a forward-looking camera that’s so well integrated you’d swear it was a factory option.

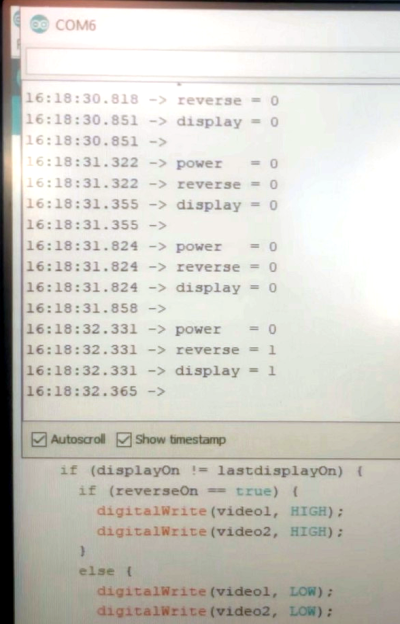
The idea started simple enough: using some relays, [TJ] planned on physically switching the video feed going to the Chevy’s dashboard between the stock rear camera and his aftermarket front camera. That’s all well and good, but the car would still only bring up the video feed when the gear selector was put in reverse; not exactly helpful when he’s trying to inch his way into a tight spot. He needed to find a way to bring up the video display when the car was moving forward.

With a PCAN-USB adapter connected to the car’s OBD-II port, he shifted into and out of reverse a few times and noted which messages got transmitted on the network. It wasn’t long before he isolated the proper message, and when he injected it with his laptop, the dashboard display switched over to the backup camera regardless of what gear the car was in. Building on this success, he eventually figured out how to read the status of all the buttons on the car’s dashboard, and programmed an Arduino to listen for the appropriate signals.

The final piece of the puzzle was combing bringing both of these capabilities, so that went the appropriate button was pressed on the dashboard the Arduino would not only send the signal to turn on the video display, but kick the relays over to switch the camera source. Now [TJ] has a front-facing camera that can be called up without having to kludge together some button or switch that would never match the modern styling of the vehicle’s interior.

A couple years back we saw a similar project to add a backup camera to a Peugeot 207 that was too old to have one from the factory, and more recently we saw how CAN hacking can allow you to fight back when your car’s touch screen interface robs you of simple pleasures like pushing buttons and turning knobs.

Continue reading “Sniffing CAN To Add New Features To A Modern Car”

34C3: Using Your Car As Video Game Controller

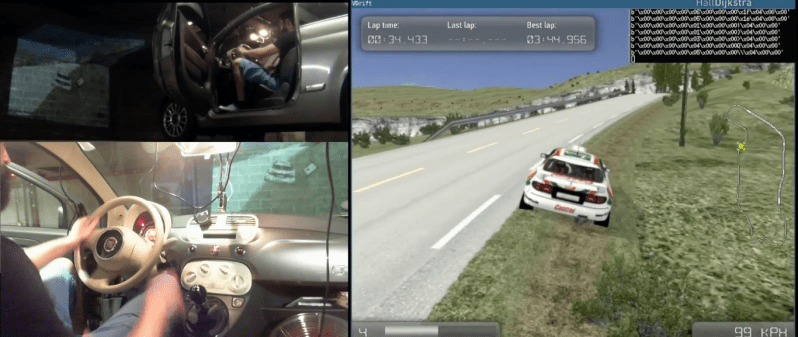
Despite the presence of human drivers, modern cars are controlled by computers. In his talk at the Chaos Communication Congress [Guillaume Heilles] and [P1kachu] demonstrate the potential of taking control of a car’s computer. This of course leads to the natural conclusion of emulate an Xbox controller and using the car to play computer games.

His research was limited by the fact that the only cars they had access to were the daily drivers of different members of [P1kachu]’s family, which meant that all tinkering had to be strictly non-destructive. Despite this, they achieved impressive results and deliver a great introduction into reverse engineering.

[P1kachu] used a RasPi and an OBD-II adapter to access the car’s CAN bus and begins the presentation with a quick overview of the protocol. He then briefly touches on security measures that he ran into, which are optional and their implementation varies widely between manufacturers. His first attempt to access the CAN bus was successfully blocked by a challenge-response algorithm doing its work. His mother’s convertible however provided no such obstacles and gaining access allowed him to map the position of the steering wheel and pedals to a game controller, using the car to play video games.

After this, [Guillaume] steps in and walks us through the teardown of a gadget that plugs into the OBD-II port and claims to do amazing things for your car’s mileage by reprogramming the ECU. The device was not brand specific and after having seen the variations in the ways different manufacturers implement the protocol, [Guillaume] and [P1kachu] doubted that the gadget was capable of even holding the information required to modify every known implementation out there. Listening to the output of the device, along with a quick analysis of the circuit followed by decapping the single chip they found, showed that their doubt was justified. The lecture closes with an extended Q&A that adds more information on car hacking. Those that don’t have access to a car can instead tear down hot glue guns, doppler modules or antique calculators.

Continue reading “34C3: Using Your Car As Video Game Controller”

A Live ECU Simulator For OBD2 Projects

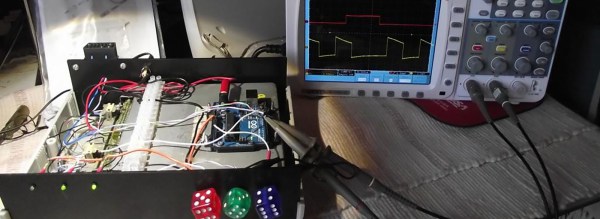
If you are working with OBD2 hardware or software, it’s easy enough to access test data, simply plug into a motor vehicle with an OBD2 socket. If, however, you wish to test OBD2 software under all possible fault conditions likely to be experienced by an engine, you are faced with a problem in that it becomes difficult to simulate all faults on a running engine without breaking it. This led [Fixkick] to create an OBD2 simulator using a secondhand Ford ECU supplied with fake sensor data from an Arduino to persuade it that a real engine was connected.

The write-up is quite a dense block of text to wade through, but if you are new to the world of ECU hacking it offers up some interesting nuggets of information. In it there is described how the crankshaft and camshaft sensors were simulated, as well as the mass airflow sensor, throttle position, and speedometer sensors. Some ECU inputs require a zero-crossing signal, something achieved with the use of small isolating transformers. The result is a boxed up unit containing ECU and Arduino, with potentiometers on its front panel to vary the respective sensor inputs.

We’ve brought you quite a few OBD2 projects over the years, for example, there was this LED tachometer, and a way into GM’s OnStar.

Thanks [darkspr1te] for the tip.

OBDII to Speed Pulse: Atmel ICE

Building An OBD Speed Pulse: Behold The ICE

I am a crappy software coder when it comes down to it. I didn’t pay attention when everything went object oriented and my roots were always assembly language and Real Time Operating Systems (RTOS) anyways.

So it only natural that I would reach for a true In-Circuit-Emulator (ICE) to finish of my little OBDII bus to speed pulse generator widget. ICE is a hardware device used to debug embedded systems. It communicates with the microcontroller on your board, allowing you to view what is going on by pausing execution and inspecting or changing values in the hardware registers. If you want to be great at embedded development you need to be great at using in-circuit emulation.

Not only do I get to watch my mistakes in near real time, I get to make a video about it.

Getting Data Out of a Vehicle

I’ve been working on a small board which will plug into my car and give direct access to speed reported on the Controller Area Network (CAN bus).

To back up a bit, my last video post was about my inane desire to make a small assembly that could plug into the OBDII port on my truck and create a series of pulses representing the speed of the vehicle for my GPS to function much more accurately. While there was a wire buried deep in the multiple bundles of wires connected to the vehicle’s Engine Control Module, I have decided for numerous reasons to create my own signal source.

At the heart of my project is the need to convert the OBDII port and the underlying CAN protocol to a simple variable representing the speed, and to then covert that value to a pulse stream where the frequency varied based on speed. The OBDII/CAN Protocol is handled by the STN1110 chip and converted to ASCII, and I am using an ATmega328 like found on a multitude of Arduino’ish boards for the ASCII to pulse conversion. I’m using hardware interrupts to control the signal output for rock-solid, jitter-free timing.

Walk through the process of using an In-Circuit Emulator in the video below, and join me after the break for a few more details on the process.

Continue reading “Building An OBD Speed Pulse: Behold The ICE”