Giving The Nexus 7 HD Video Recording

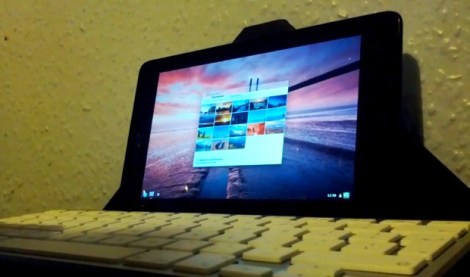
As released, the Nexus 7 tablet includes a 1.2 Megapixel front-facing camera. Even though the camera supports taking pictures at a resolution of 1280 x 960, recording video is limited to a paltry 480p resolution. It turns out the inability to record HD 720p video isn’t a hardware limitation; engineers at either Google or Asus simply didn’t bother telling the Nexus 7 how to record in 720p.

[hillbeast] over on the XDA developers forum came up with a very easy fix for this problem that only involves a quick copy and paste job into the media_profiles.xml file.

After the break you can see two videos recorded with [thehillbeast]’s Nexus 7. The first is a 480p video of a bit of shrubbery and a fence, while the second video is the same scene recorded at 720p. A noticable difference in quality, and a neat hack to give the already awesome Nexus 7 some additional capabilities.

Continue reading “Giving The Nexus 7 HD Video Recording”

Saving A Bricked Phone With A Pencil Lead

[stompyonos] bricked his Samsung Captivate. Not wanting to be without a phone for a while, he researched a fix online and found shorting a pair of pins on the USB port would put the phone into download mode, saving his phone. The only problem for this plan is [stompy] didn’t have any resistors on hand. Instead, he came up with a wonderful MacGyverism using a piece of paper, a bit of graphite, and a pair of paper clips.

The process of unbricking a Captivate requires a 300 or 330 kΩ resistor across pins 4 and 5 of the mini USB port. This can be done with a few resistors, but [stompy] only had a multimeter lying around. After scribbling a good bit of pencil lead on a piece of paper, he attached two paper clips to make a variable resistor, dialed it in to about 300 kΩ, and cut up an old Nokia charger for its USB plug.

Not bad for a very easy fix that didn’t cost [stompyonos] a dime, and certainly better than a $500 paperweight.

PlayStation Gaming On A NOOK Simple Touch

Improvements in processing power really hit home when you see an eBook reader playing PlayStation games. Sure, we’re talking about a system which launched more than 15 years ago (the original PlayStation launched way back in 1995), but this is a $99 device which seems to be playing the games at full speed!

[Sean] wrote in to share the project with us. After rooting the device he installed System 7 (aka Mac OS 7) using Mini vMac for Android. He uses Free PlayStation Emulator (FPSE) to run the games. There is an Android version which provides the touch-screen controls you see above. We figured the graphics would be awful, but the video after the break proves us wrong. Other than being in black and white we think the graphics are fantastic. Just one hack was necessary to make this happen. [Sean] uses NoRefresh to keep the Nook from refreshing the screen which is what causes the film-negative type of flashing after several page turns.

Continue reading “PlayStation Gaming On A NOOK Simple Touch”

Adding Inductive Charging To An Android Tablet

This is a Gemei G9T, a 9.7″ Tablet running Android 4.0. [Carnivore] shows us how to modify it to use inductive charging. The inductive charging hardware is taken from a Palm device (this uses the Touchstone charging hardware seen in several other hacks). It’s easy to interface with the tablet’s electronics, but physically placing the coil and magnets is another story.

The video after the break gives you a full walk-through of the process. He starts by removing the screws and prying the case off of the tablet. From there [Carnivore] shows how to carefully remove the coil, circuit board, shielding, and magnets from a Palm back plate. The magnets are the first to be positioned on the tablet’s back plate. The metal is too thick for them to hold well so he uses a Dremel to grind away just enough material for a strong connection. Unfortunately the metal will shield the magnetic fields the coil needs to work so he cuts a hole in the case the same size as that coil. The area is covered in liquid electrical tape to prevent shorts, and everything is taped in place. Two jumper wires connected from the coil’s circuit board to the 5V charging input are all it takes to finish up the hack.

Continue reading “Adding Inductive Charging To An Android Tablet”

Robot Servo Control Using Smartphone Audio Jack

[Jim] has an old Android phone he’d like to use as a Robot brain. It’s got a lot of the things you’d want in a robot platform; WiFi, Bluetooth, a camera, an accelerometer, etc. But he needed some way to make the mobile, mobile. What he came up with is a chassis with servos that can be controlled by the phone’s audio port.

To start his adventure he crafted a square wave audio file in Audacity and then played it back on the Android music player. By monitoring the output on an oscilloscope he found the wave was well produced, with peaks of about 1V. With that in mind he designed a circuit using two transistors to amplify the signal, thereby creating a usable input for the servo motors. Each motor has one of these circuits connected to it, with the left and right channels from the audio jack driving them separately. In the clip after the break you can see he even wrote a simple Android app to extend the idea to a more usable level.

This is a similar technique as used by the recon robot we saw about a year ago.

Continue reading “Robot Servo Control Using Smartphone Audio Jack”

Teensy Tiny Arduino Board With An ATtiny85

Planning another Arduino build? If you’re just doing something simple like switching a relay or powering a LED, you might want to think about the Digispark. It’s a very small ATtiny-based Arduino compatible board developed and Kickstarted by [Erik].

The Digispark is based on the very popular Atmel ATtiny85, an 8 pin microcontroller that provides a quarter of the Flash storage and RAM as the ‘official Arduino’ ATMega328p. The lower storage space and RAM doesn’t mean the ’85 is a slouch, though; it can run Arduino code without a hitch, providing six pins for whatever small project you have in mind.

Right now, [Erik]’s Kickstarter is offering three Digisparks for the price of a single Arduino. At that price, it’s cheap enough to leave in a project and not be repurposed after the build is over. [Erik] is also working on a few shields for the Digispark – only RGB LED shield for now, but hopefully he’ll get some more finished by the time the Kickstarter ends.

Send Your Nexus 7 Back… To Tighten One Screw?

It seems that some of the Nexus 7 models have an assembly issue that makes the bezel uneven with the screen. It’s just in one spot but your shiny new toy shouldn’t have this kind of problem. Of course it comes as no surprise that Google wants you to send it back for service. What is a surprise is that the fix involves tightening just one screw. Now we can’t stand for shipping something round trip when it comes to this low-skill fix. Luckily neither can [Baddspella]. He shows us just how easy it is to repair the Nexus 7 yourself.

The only tools you need are a guitar pick (or other thin plastic prying device) and a very small Phillips screwdriver. Starting at the top of the tablet he uses the plastic pick to pry off the back of the case. This exposes the screws which hold the bezel in place. Find the loose one, and give the screwdriver a turn. Now just snap the back cover in place and you’re done. We’ve embedded the video after the break for your convenience.

It’s super simple…. so don’t be afraid to crack that thing open.

Continue reading “Send Your Nexus 7 Back… To Tighten One Screw?”