Classic VW Bug Stereo Gets Bluetooth

If any of you deal with older car fanatics, you’ll know that the original dash stereo is a coveted piece of equipment. If they haven’t been removed and replaced with something more modern over the years, they’re usually non functional. [Hadrien] has gone through some trouble to retain his original stereo in his 69 Volkswagen Beetle. First, he did a common hack we see even in modern cars. He added an auxiliary input.

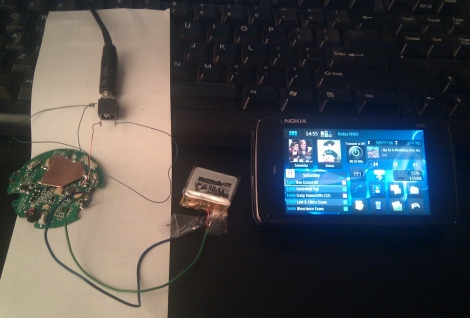
This satiated his desire for modern audio for a while, but he really found the necessity for a cable attachment annoying. He decided he was going to add bluetooth (google translated from french).  To do this, he took a pair of bluetooth headphones and tore them apart. Using an old cassette tape as the case, he rebuilt them as something that could be wired directly to his dash stereo. He even kept the mic just in case he wanted to use this as a hands free device.

Being build in 1969, his car stereo doesn’t use a cassette, so he just keeps it in the glove box. This isn’t optimal, but as he says, at least he doesn’t have to plug in his phone.

Getting Great Bootlegs With The BootlegMIC

Go to any concert, show, or basement band practice, and you’ll find someone recording a bootleg. While these live recordings are sometimes fairly high quality, bootlegs recorded with a cell phone usually sound terrible. The guys over at Open Music Labs have a great solution to these poor quality recordings that only needs a few dollars worth of parts.

The project is called bootlegMIC. It’s a simple modification of an electret microphone – the same type of mic found in cellphones and bluetooth headsets – that allows for some very high quality recording in very noisy environments. According to the open music labs wiki, the modification is as simple as cutting a few traces on the PCB in an electret mic and soldering on a cap and a few resistors.

An electret mic contains a small JFET to amplify the signal coming from the microphone diaphragm; the specific JFET is selected by the manufacturer to ensure the microphone has the right gain and response. Usually these JFETs are chosen with the expectation of a relatively quiet environment, and trying to record a concert only results in a ton of distortion. By putting a resistor between the source of the JFET and ground of the microphone, it’s possible to reduce this distortion.

The circuit is easy enough to solder deadbug style, and should work with most cellphones. The guys at Open Music Lab were able to get their mic working with an iPhone, but they’re still working on figuring out the Android mic input. There’s a great demo video showing the improvement in audio quality; you can check that out after the break.

Continue reading “Getting Great Bootlegs With The BootlegMIC”

Scavenging From Consumer Electronics To Make A Flame-powered Phone Charger

[Gigafide] just finished building this flame-powered phone charger. The concept is not new. He grabbed a Peltier cooler and used the temperature differential between a flame and a heat sink to produce electricity used by the charger. If you search around here enough you’ll find plenty of candle-powered devices, and a few hacks that use a Peltier device in a bit more interesting way. But we really like his high-production value video, straightforward explanation of the concepts, and ability to source the components in consumer devices. We don’t think you’ll be disappointed by his video found after the break.

The Peltier device comes out of a USB drink chiller. It is supported by a metal stand made from electrical box covers and threaded rod. Underneath he’s using a gel fuel can used by the food industry, and above he’s got  CPU heat sink and fan. This setup puts out around 1.5V but he’ll need a boost converter to charge a phone with that. A single AA battery charger meant to power your phone in a pinch is perfect for this application.

Continue reading “Scavenging From Consumer Electronics To Make A Flame-powered Phone Charger”

AVRphone Is A Barebones Touchscreen Cellphone

This little device is a prototype cellphone based on the ATmega128 microcontroller (translated). It boasts a 2.4″ touchscreen display which serves as the keypad, and uses the SIM100S module which takes care of the GSM radio communications. But the hardware isn’t the only attractive part. Judging from the screen shots a fair amount of time went into building the user interface too.

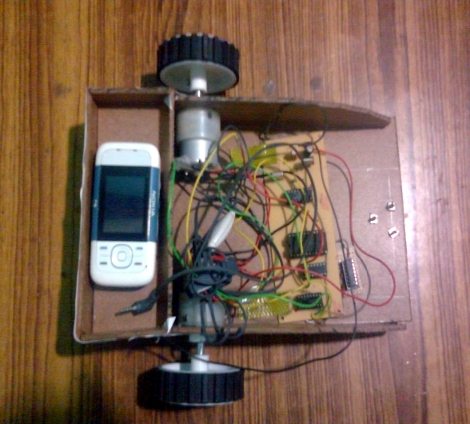
We seem to have a bounty of cellphone builds recently. This one is quite clean, and boasts a smaller footprint, and larger screen than this barebones example. There is a white paper available if you’re interested in digging a little deeper than the overview post. But it’s written in Czech and we didn’t see a way to provide a machine translation other than copying the text from the PDF file and pasting it into a translator.

µPhone Is Small And Home Made

[Victor] popped up in the comments of yesterday’s DIy Cellphone to show off his own home made phone, the µPhone (google translated). [Victor] has put some effort into making this thing very compact. As you can see in the video after the break, he even left off the number pad to save space. Instead, you do everything by using a small joystick and two buttons. He claims that he really only calls a small number of people, so this layout works fine once he has programmed their contact information in.

For some reason none of the pictures are showing up in the extensive forum thread on the project. It is fun though, to follow along as he tries to get this thing working.

Continue reading “µPhone Is Small And Home Made”

DIY Cellphone

Here’s an interesting concept. Lets make a kit to build your own super simple cell phone. Thats basically what a group at the MIT media lab is proposing with this prototype. Consisting of an SM5100b GSM module and a 1.8″ 160×128 pixel LCD screen on a very basic board holding some buttons, this thing is pretty bare bones. Barely any features aside from sending/receiving calls. It does have caller ID though. At$150, it isn’t really that competitive compared to the phones you’d get from your provider, but it is just a prototype.

We particularly like the laser cut flex areas for the buttons on the front.

[Thanks Paul]

QArt Codes, The Better Way To Put Picture In A QR Code

[Russ Cox], current Googler and formerly of Bell Labs, posted an awesome guide to putting images in a QR code. Unlike this terrible attempt I wrote last August, [Russ]’s method does much more than simply paste an image into a QR code and hope the error correction passes. This new method generates a unique URL to be encoded for each QR code. In other words, the embedded image is actually part of the QR code and not just a copy and paste attempt.

The basis of [Russ]’ hack is the ability to change the message contained in a QR code to be made of either ASCII/UTF-8 or decimal numbers coded as binary. By appending an anchor tag (i.e. http://swtch.com/pjw/#123456789...) to the URL that will be encoded, [Russ] can change a whole bunch of pixels in a QR code to make just about any image.

With a few tricks like building new Reed-Solomon encoded blocks, [Russ] can change where in the pixels required by the QR code are placed. This allows for the full-width image of PJW’s binary likeness to be displayed in the QR code.

[Russ] put up a QArt coder that allows anyone to put a pixelated image in any QR code. [Luke Shumaker] (thanks for sending this in, [Luke]) took this tool and put the ‘ol skull ‘n wrenches inside a QR code pointing to hackaday.com. Very nice work from [Russ], and puts my work to shame. I’ll go cry in a corner now.