Excuse Me, My Pinky Is Ringing

We get a lot of email challenging us to hack things. Sometimes we ignore them, other times we send some words of encouragement. But this time around we thought [Tait] had really come up with a great hack; to build a Bluetooth handset into his prosthetic finger. He hasn’t done much hacking in the past and was wondering if we could put out a challenge to our readers to make this happen. After a bit of back-and-forth brainstorming he decided to take on the challenge himself and was met with great success.

Like other Bluetooth handset hacks [Tait] started with a simple ear-mounted module. He extended the volume button with a piece of plastic and placed it under the battery. A couple of wooden matchsticks space the battery just enough so that it can be squeezed to adjust the volume level. He then extended the speaker with some wire. Next, he used the Oogoo recipe from our previous post to mold a false-finger and a thumb-ring. The PCB and battery fit in the finger, which places the microphone near a hole in the pad of the plastic pinky. The thumb ring houses the speaker to finish the look. Don’t miss the photos [Tait] sent in after the break.

Continue reading “Excuse Me, My Pinky Is Ringing”

Permanent Root Exploit Found For G2

The g2 has finally been rooted. Even though a temporary root exploit was found shortly after the phones release, a NAND lock prevented modifying the non-volatile RAM for a permanent root. Some controversy surrounded the g2 when it was erroneously thought to have a rootkit protecting the OS.  Supposedly the rootkit would watch for changes to the file system and then reset the phone to default settings when any unauthorized changes were made.  On the other hand a NAND lock functions by fooling the operating system into thinking there isn’t any memory available, essentially “locking” the memory in key areas.  Once it was discovered to have the NAND lock it was only a matter of time before the g2 was permanently rooted.  NAND locks have become a popular (and unsuccessful) deterrent employed by device makers to stop the jailbreaking comunity.  While this exploit is nothing groundbreaking it is another notch in the belt for the jailbreaking community and a welcome benefit to g2 users.

Using A Cellphone LCD As Auxiliary Linux Display

[Neil] is driving this Siemens A60 LCD using a parallel port on his Linux box. He likes this module because it has an integrated LED back-light, controller IC, and the pads are large enough for a human to solder. He notes that the screen runs on 2.9V, which matches the forward voltage of the LEDs used as back-lights. This means it is possible to use one f the LEDs as a shunt to drop  incoming voltage down to a safe level for the controller. In fact, that’s what he did. The data lines are connected to the parallel port along with some current limiting resistors. The LEDs are connected with resistor calculated for maximum brightness, with the output from the LED used as the source voltage for the LCD controller chip.Whether you want to use one of these screens with a PC or something else, the code that [Neil] worked out should provide the information necessary to do so.

The Nokia cellphone LCD post inspired [Neil] to send in a tip about this project. If you’ve got well documented hacks that you’re just sitting on why not let us know about them?

Cellphone Crowd-pleasers

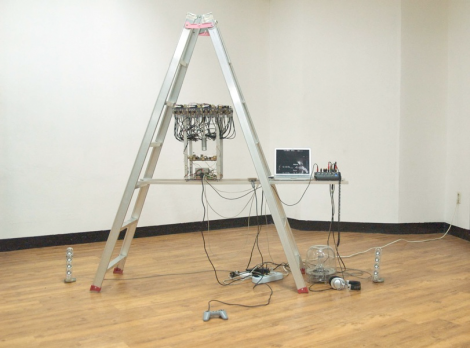
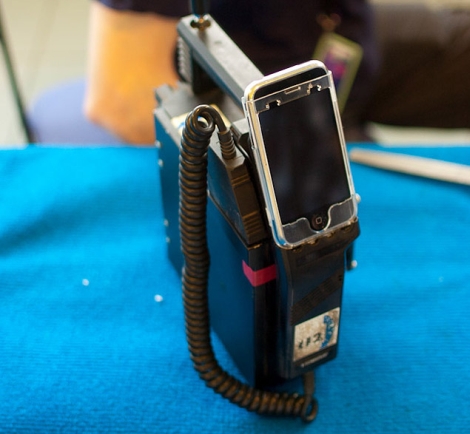
When you start to think about the cellphone waste our society produces it can be quite daunting. How many cell phones have you had in recent years? Now multiply that by five billion cellphone subscribers. [Anthony Goh] and [Neil Mendoza] found something to do with a very minuscule portion of those left-overs; building interactive birds out of the old parts. You’ll have to check out their accomplishments in the video after the break as the image above doesn’t do them justice. Interactivity for the exhibit is provided by an Arduino, which communicates with one working phone via a serial connection. The phone can still make and receive calls, and controls parts from other, less functional cellphones. They can call each other, or receive calls from the audience.

Yes, there is art in garbage. But there’s also a lot of hacks waiting to happen. Take a look at the Nokia cellphone LCD feature and then start scavenging.

Continue reading “Cellphone Crowd-pleasers”

Touring The Available Nokia LCD Screens

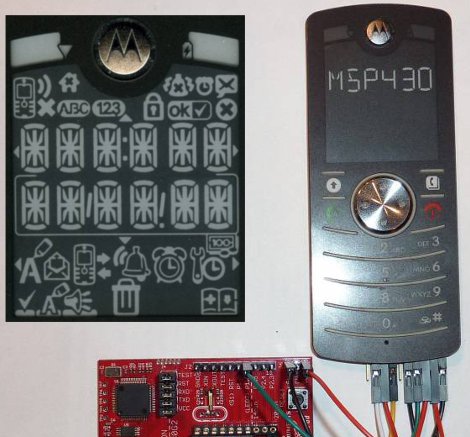
[Rossum’s] taking a look at the Nokia LCD screens that are both plentiful and begging to be bent to your will. For quite some time the Nokia 6100 screens have been used in a lot hacks, but he wanted to see what else is out there. He digs into his junk box of cell phones and comes up with a couple to test; the Nokia 6101 and Nokia 2760. The screens use a 3-wire SPI interface, which he sniffs out with a logic analyzer. At power-up the cellphone polls the screen to determine which type of LCD controller is connected. [Rossum] grabs these commands from the logic analyzer and uses it to determine the hardware in use with each screen.

He made himself a nice breakout board which has connectors for several different screens. The firmware he’s using detects when a screen is attached and switches to the applicable protocol for that display. Take a look at the video after the break.

Continue reading “Touring The Available Nokia LCD Screens”

Macro Lens For A Nexus One

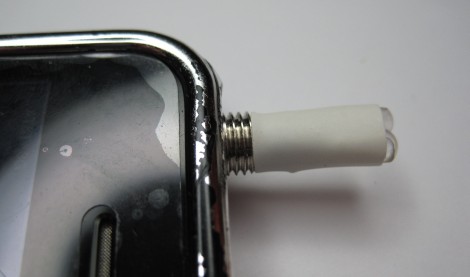
[Thomas] tipped us off about a macro lens attachment for his Nexus One. As you’d expect, adding the lens helps the phone’s camera bring tiny details into focus. He re-purposed a lens from a pair of mini binoculars, using epoxy putty to make a mounting bracket. Now the last time we saw this putty used with a phone it was for a snap-in bracket that cradled the phone and included a lens adapter. Rather than go that route [Thomas] made use of the headphone jack just above the camera lens. An old headphone plug has been epoxied to the macro lens ring, holding it in place securely while remaining easily removable.

Update: Custom Cellphone Induction Charging

This is a custom back plate with induction charging circuitry that [Derek Hughes] build for his HTC HD2 cellphone. When we checked in with him last week he showed us how to add an inductive charger without voiding the warranty but it wasn’t very pretty because the stock back plate blocked the inductive field and couldn’t be used. The solution he came up with will work with any device if you want to put some time into the build.

He took two different aftermarket cases; one fits his cellphone and the other is a BlackBerry case meant for housing a credit card. After cutting a hole in the back of the cellphone case he epoxied the credit card holder in place, smoothed the seam with Bondo, and repainted. Not only does the charger fit in the credit card case, but there’s still room for a credit card. [Derek] also measured the magnetic fields around the circuitry and found they will not damage the magnetic strip on that American Express Black you’ve been keeping on you. In the video after the break he mentions the last step in finishing this case will be to locate a 90-degree USB plug as the current connector is a bit of an eyesore.

[youtube=http://www.youtube.com/watch?v=DgNOqJBSKmQ]