In order to get a margarita just right, the various ingredients need to be mixed together quite vigorously to over-come the different viscosity of the fluids. Looking to create his own barbot of sorts, [TVMiller] decided to make a Margarita Drip Infuser to help make margaritas a bit easier.
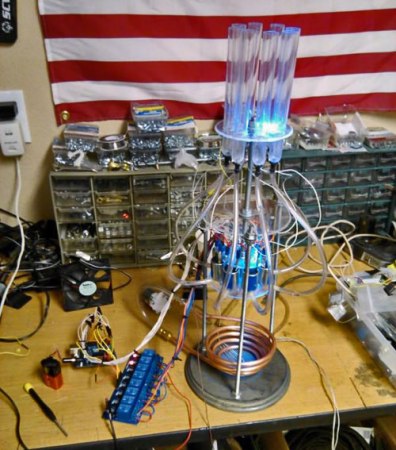
Using various chem lab supplies, [TVMiller] has cobbled together something pretty awesome. The Infuser can take up to 8 different ingredients into its test tube reserves, and after the drink ingredients are programmed on the computer, the magic begins.
An Arduino Uno controls a bank of 8 relays which control small fluid solenoids, with each control pulse releasing just a single droplet of fluid. An LED for each valve is run in parallel adding a bit of a light show to the mixing experience. If that’s not enough, he’s also created a copper cooling coil to chill the drink as it is poured.
Continue reading “Margarita Drip Infuser Ensures A Perfect Mix”
 In the interest of the scientific method [Feynmaniac] (great name, btw) over on Instructables
  Elecrolumiscent displays have seen a huge swing in popularity recently, but only in limited forms like EL wire or flat EL panels. You can, of course, cut and bend these wires and panels to suit any purpose, but custom shaped EL displays are just the bee’s knees. They’re not hard to fabricate, either: with cheap custom PCBs,


