FabGL Has Everything You Need To Write Games For The ESP32

Typically, when one considers writing a video game, the platform is among the first decisions to be made. The PC can be an easy one to start with, and mobile development is fairly accessible too. Of course, you could always develop for a microcontroller platform instead. [Fabrizio Di Vittorio] has built the perfect set of tools to do just that with the ESP32, by the name of FabGL.

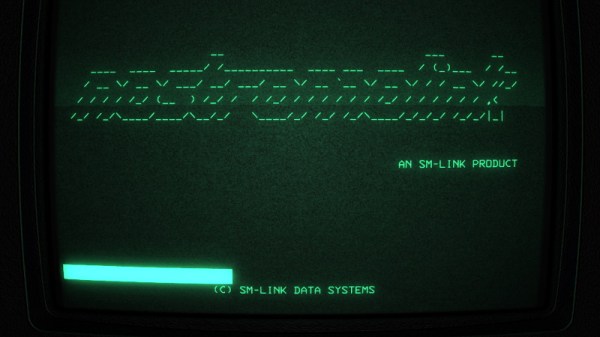
The library contains a laundry list of features that are perfect for developing games. There’s VGA output with up to 64 colors, PS/2 mouse and keyboard inputs, as well as a capable graphics library and game engine. It can even act as an ANSI/VT terminal if necessary.

[Fabrizio] has put the hardware through its paces, with a variety of benchmarks displaying impressive performance with simple balls, polygons and sprites. You could easily produce a 2D game in an early 90s style without running into any hardware limitations — though given the ESP32 clocks in at up to 240MHz, that’s somewhat to be expected.

It’s an impressive project (video after the break), and we’d love to see more games developed on the platform. Once you have a VGA connector wired in you should try out some ESP32 VGA hacks. And for those ESP8266 die hards there’s a game engine for that chip too!

Continue reading “FabGL Has Everything You Need To Write Games For The ESP32”

Concrete USB Hub Isn’t Going Anywhere

When starting a new project, the choice of material can have a big effect on the character of the finished product. Wood is stylish and has a certain elegance to it, while polished or brushed aluminium is great for a more futuristic feel. Sometimes though, you just want big, cheap and heavy – in which case, concrete is your friend!

[BALES] was short on USB ports, and needed a hub with plenty of connectivity. Concrete had the benefits of being solid and heavy, and also impervious to beverages. Thus, a melamine form was produced, chosen as its surface doesn’t give the concrete anything to grab on to. A foam skull was cut out and added to create an inlay for decoration, and the 7-port octopus-style hub was placed inside.

With careful attention paid to the mixture consistency, the concrete was poured into the mold and allowed to set. Care was taken to avoid air bubbles and to ensure the mixture flowed completely into the mold, without leaving air pockets behind the inserted components. After allowing it to set for a few days, the part was demolded, with care taken to minimise edge crumbling. The foam skull was removed, and infilled with black epoxy, with a little more used to coat the top and sides of the hub. As a finishing touch, a foam pad was fitted to the base to allow it to sit on a desk without scratching everything up.

In the end, [BALES] has ended up with a hefty hub that won’t skitter around when plugging and unplugging devices. It should also serve admirably as a sturdy drink coaster on those cold winter nights. If you’re trying a similar project yourself, note that sometimes concrete can be surprisingly conductive. Video after the break.

Continue reading “Concrete USB Hub Isn’t Going Anywhere”

Undertale Pinball Machine Is A Work Of Art

Undertale came out in 2015 and took the world by storm. With a heartwrenching story, compelling characters and a soulful soundtrack, it won legions of fans and became an indie gaming legend. Years later,  [Gornkleschnitzer] decided to begin a pinball machine build, and it became a tribute of epic proportions.

No expense was spared on getting the artwork professionally printed, and the results speak for themselves.

Yes, we’re talking about a living, clacking, and breathing Undertale pinball build. [Gornkleschnitzer] demonstrates not only a deep knowledge of the source content, but also a mastery of pinball construction. The build began with a design in Virtual Pinball, which allowed the basic design to be dialled in. This allows things like trick shots and other features to be tested before cutting real parts. With the design roughed out, the real work starts. Full sets of cabinet and playfield decals were professionally printed, flashers installed, and subway tunnels lasercut in steel. All manner of flippers, slingshots and ball troughs were installed, tested, and tweaked in the pursuit of perfection.

The attention to detail is where this machine really shines. The artwork is stunning, and the game is complete with the original soundtrack, including the death theme. There’s even hidden gems like the Tem Shop and bonuses galore to be had.

It’s a stunning pinball machine, and one we’re dying to play for ourselves. If you’re keen to get your feet wet, why not consider starting with a cardboard build? Video after the break. Continue reading “Undertale Pinball Machine Is A Work Of Art”

Clock Mod Brings Super Game Boy To Competitive Arena

For one time small window between 1994 and 1998, you could play Game Boy games in color with a Super Game Boy. This was a cartridge that plugged into a Super Nintendo, and using proprietary Lock-On™ technology, you could play Game Boy games on the big screen. Inside the Super Game Boy was the guts of a real Game Boy. This was, and still is, the best way to experience everything from Kirby’s Dream Land or the Pokemon of Kanto.

Unfortunately, the Super Game Boy doesn’t exactly replicate the Game Boy experience. The crystal in the Super Game Boy means that games and sound run between 2 and 4% faster. The Super Game Boy is out for competitive speed running, and if you’re using Little Sound DJ, you’ll be out of tune with the rest of the band. The Super Game Boy doesn’t have link cable support, either.

Now, [qwertymodo] over on Tindie has the solution to the faster Super Game Boy. It’s a clock mod, but it’s not just swapping a crystal. This is a board that solders to existing pads, and still allows you to access the speed up and slow down functions available from the Commander controller from Hori. It’s a slightly impressive bit of PCB art, and certainly something that deserves notice.

This mod fixes the 2-4% speedup of the Super Game Boy, but then there’s still one feature missing: the link cable. Well, hold on to your butts, because there’s a mod for this one too. The Super Game Boy Link Port is a small little breakout board that requires fly wires to the main chip in the Super Game Boy. The installation isn’t quite as clean as the crystal hack, but if you’re fixing the clock, you might as well add the link cable port while you’re in there.

[qwertymodo] has a comparison test of the Super Game Boy running Pokemon Red, and this thing is dead on. It runs at exactly the same speed as an original Game Boy, only in color, on a TV. You can check that out below.

Continue reading “Clock Mod Brings Super Game Boy To Competitive Arena”

Mods Keep The WaveBird Kicking In The Switch Era

Nintendo made some questionable decisions during the early 2000’s, but developing the WaveBird certainly wasn’t one of them. Years before wireless controllers were the standard on home game consoles, the WaveBird gave GameCube owners a glimpse into the future. It managed to deliver lag-free gaming without resorting to easily-blocked infrared, and had a battery life and range long enough that there was really no downside to cutting the cord aside from the lack of rumble support.

In fact, the WaveBird was such a good controller that some fans just can’t put the thing down even in 2019. [Bill Paxton] loves his so much that he decided to modify it so he could use it on Nintendo’s latest money printing machine, the Switch, without having to fiddle with any adapters. While he was at it, he decided to fix the only serious drawback of the controller and hack in some rumble motors; arguably making his re-imagined WaveBird superior in just about every way to the original.

It might be counter-intuitive, but the trick here is that [Bill] actually took the internals from a standard wired GameCube controller and fitted it all into the case for the WaveBird. That’s how he got the rumble support back, but where does the signature wireless capability come from?

For that, he took apart a “GBros. Wireless Adapter” from 8BitDo. This gadget is intended to let you use your existing GameCube controllers on the Switch wirelessly, so all he had to do was shove its PCB inside the controller and wire it directly to the pads on the controller’s board. Thankfully, the WaveBird was rather husky to begin with, so there’s enough space inside to add all the extra hardware without much fuss.

Between modifications like this and efforts to reverse engineer the controller’s wireless protocol, hackers aren’t about to let this revolutionary accessory go gently into that good night. You might see a GameCube slaughtered for a meme, but WaveBirds never die.

Continue reading “Mods Keep The WaveBird Kicking In The Switch Era”

Simon Game Is A Story Of Rushed Deadlines And Holiday Cheer

Sometimes the Christmas season can feel like a holiday all about spending money to demonstrate your love for others. Many a maker has attempted to subvert these commercialistic overtones by giving handmade presents to friends and loved ones. [APA] is no exception, and has shared their story of producing a simple Simon game during the holidays.

The circuit is nothing wild – an ATtiny85 microcontroller interfaces a handful of buttons and LEDs to handle the basic Simon gameplay. The real value is in [APA]’s retelling of the development process. It’s an accurate recounting that makes us relive some of our own follies of early projects. There’s the confusion between SMD and through hole versions of the same part, forgotten pull up resistors, as well as hours lost trying to figure out why a chip won’t write, only to learn the bootloader hasn’t been burned yet.

In the end, [APA] was able to push through a rush order and deliver the gifts on time, despite the many pitfalls along the way. The final game provided some laughs around the dinner table at Christmas, so we’d say the mission was definitely accomplished.

We’ve seen similar work before, too – like this tiny Simon game on an ATtiny13.

Pick And Place For Toys

Toys are great for keeping the kids amused at play time, but oftentimes its difficult to get them to understand the importance of tidying up after themselves. It would naturally be ideal to have some manner of robot to help in this regard, and [Paco Garcia] might just be leading the charge in this area.

[Paco]’s project involves combining a robotic arm with computer vision tools in order to allow it to pick and place small objects – in this example, toys. The robot arm is of a gantry type, built on an aluminium frame with 3D printed components. The computer vision side of things is handled by a Raspberry Pi, fitted with the standard camera and running OpenCV software for object recognition. This then passes commands to an Arduino which runs the stepper motors controlling the arm.

[Paco] notes that the hardest part of the build was learning how to generate real-world coordinates from a single camera feed in OpenCV. With that mastered, the rest of the dominoes began to fall. With trigonometry and kinematics knowledge in hand, the robot has grown capable of reliably picking and placing small objects across its range of motion. Future work aims to improve the robot’s abilities to rotate and otherwise manipulate its end effector for more versatility.

Naturally, we typically see pick and place machines used for PCB production – and this build is no exception. Video after the break.

Continue reading “Pick And Place For Toys”