Hardware Tribes Growing Up Around Artisanal Electronics

Consumer electronics are design beasts that must serve many masters. There’s a price point for the product itself, a ceiling for the feature set (lest it not be ‘user friendly’), and to take the risk of actually manufacturing something there needs to be proof of the market. A lot of great things make it through this process, but some really unique and special gear goes completely around it.

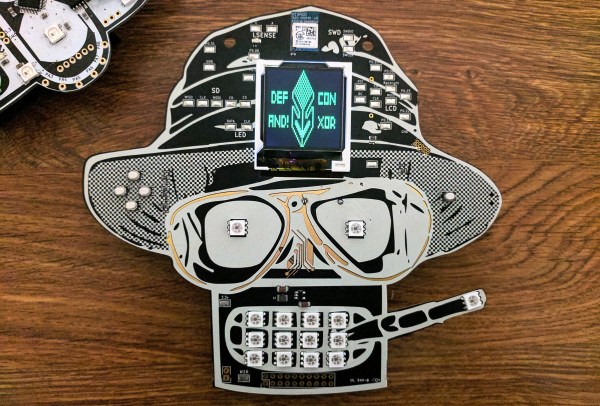
So is the story of this AND!XOR hardware badge being built for DEF CON 25. This is not the official conference badge, but the latest in a growing trend of hardware/firmware engineers and hackers who design their own custom gear for the conference, trying to one-up not just the official badge, but the other hardware tribes doing the same. This unique hardware excitement is a big reason that Hackaday has developed electronic badges for our conferences.

The new badge is a mashup of Bender from Futurama and Raoul Duke from Fear and Loathing in Las Vegas, presents something of monstrosity to hang around your neck. That has certainly never stopped us from having one of these bouncing around our necks as we pound the cattle paths from talk to talk (and the DC23 vinyl record was way more unwieldy anyway).

Bender’s forehead display has now been upgraded from a diminutive OLED to a generous color LCD display. The 433 MHz which used the spring antenna on the previous badge has given way to a Bluetooth Low Energy. The BLE is built into the Rigado BMD-300 SOC that is now in conrol of the badge. We can’t wait to see the shenanigans unlocked with this new hardware — they’re already showing of crazy animations, retro gaming, and teasing a huge multiplayer game with all the badges. Finally, the “Secret Component” at the bottom of their components list delivers the je ne sais quoi to the whole project.

Fans of AND!XOR have already thrown their weight behind it. Unofficial badges have been unavailable to a wider group or only offered in flash-sales that pop up during the con. Last year the team was met with a huge mob throwing money at their supply of 175 badges. Now the AND!XOR team has grown to five people toiling away to make the design, the easter-egg laden firmware, and the manufacturing process better than the amazing work of last year. They just launched a crowd funding campaign on Tuesday and immediately blew past their goal about five times over.

We’re hoping to get our mitts on one of these ahead of DEF CON to give you an early look at what these hardware artists have accomplished. If you’re part of another hardware tribe building custom electronics for the love of it, we’d really like to hear from you. This goes for any conference — we know of at least one other in progress.

The Tiko Printer: What Happens When You Innovate Too Much

Sometime in the very distant future, the Universe will become the domain of black holes. Energy and entropy will be compressed into minuscule quantum fluctuations. Even in this domain of nothingness, there will still be one unassailable truth: you should not buy a 3D printer on Kickstarter.

We’re no strangers to failed 3D printer crowdfunding campaigns. Around this time last year, backers for the Peachy Printer, an inordinately innovative resin printer, found out they were getting a timeshare in Canada instead of a printer. This was unusual not because a crowdfunding campaign failed, but because we know what actually happened. It’s rare to get the inside story, and the Peachy Printer did not disappoint.

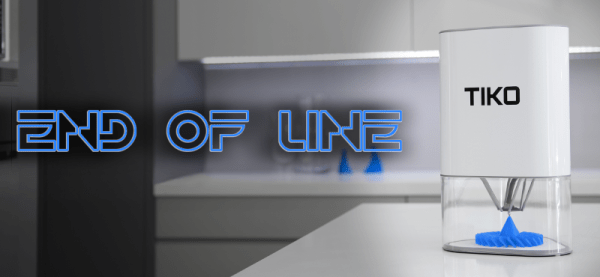
For the last few months, we’ve been watching another crowdfunding campaign on its long walk to the gallows. The Tiko 3D printer is another 3D printer that looks innovative, and at the time of the crowdfunding campaign, the price couldn’t be beat. For just $179 USD, the backers of the Tiko printer would receive a 3D printer. Keep in mind the Tiko launched nearly two years ago, when a bargain-basement printer still cost about $400. Fools and money, or something like that, and the Tiko 3D printer campaign garnered almost three million dollars in pledges.

Now, after almost two years of development, Tiko is closing up shop. In an update posted to the Tiko Kickstarter this week, Tiko announced they are laying off their team and winding down operations. It’s a sad but almost predictable end to a project that could have been cool. Unlike so many other failed crowdfunding campaigns, Tiko has given us a post-mortum on their campaign. This is how the Tiko became a standout success on Kickstarter, how it failed, and is an excellent example of the difference between building one of something and building ten thousand.

Continue reading “The Tiko Printer: What Happens When You Innovate Too Much”

Suddenly, Wireless Power Transmission Is Everywhere

Wireless power transfer exists right now, but it’s not as cool as Tesla’s Wardenclyffe tower and it’s not as stupid as an OSHA-unapproved ultrasonic power transfer system. Wireless power transfer today is a Qi charger for your phone. It’s low power – just a few amps — and very short range. This makes sense; after all, we’re dealing with the inverse square law here, and wireless power transfer isn’t very efficient.

Now, suddenly, we can transfer nearly two kilowatts wirelessly to electronic baubles scattered all over a room. It’s a project from Disney Research, it’s coming out of Columbia University, it’s just been published in PLOS one, and inexplicably it’s also an Indiegogo campaign. Somehow or another, the stars have aligned and 2017 is the year of wirelessly powering your laptop.
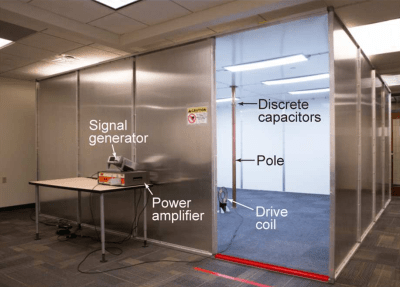
disney-research-quasistatic-cavity-roomThe first instance of wireless power transfer that’s more than just charging a phone comes from Disney Research. This paper describes quasistatic cavity resonance (QSCR) to transfer up to 1900 Watts to a coil across a room. In an experimental demonstration, this QSCR can power small receivers scattered around a 50 square meter room with efficiencies ranging from 40% to 95%. In short, the abstract for this paper promises a safe, efficient wireless power transfer that completely removes the need for wall outlets.

In practice, the QSCR from Disney Research takes the form of a copper pole situated in the center of a room with the walls, ceiling, and floor clad in aluminum. This copper pole isn’t continuous from floor to ceiling – it’s made of two segments, connected by capacitors. When enough RF energy is dumped into this pole, power can be extracted from a coil of wire. The video below does a good job of walking you through the setup.

As with all wireless power transmission schemes, there is the question of safety. Using finite element analysis, the Disney team found this room was safe, even for people with pacemakers and other implanted electronics. The team successfully installed lamps, fans, and a remote-controlled car in this room, all powered wirelessly with three coils oriented orthogonally to each other. The discussion goes on to mention this setup can be used to charge mobile phones, although we’re not sure if charging a phone in a Faraday cage makes sense.
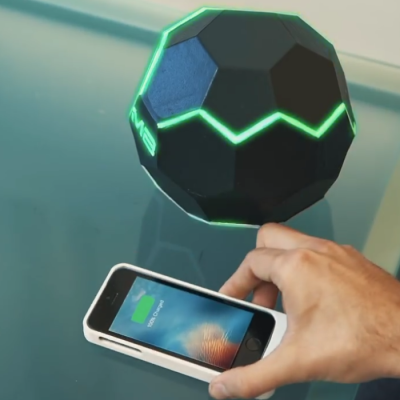
motherbox-charging-phone-squareIf the project from Disney research isn’t enough, here’s the MotherBox, a completely unrelated Indiegogo campaign that was launched this week. This isn’t just any crowdfunding campaign; this work comes straight out of Columbia University and has been certified by Arrow Electronics. This is, by all accounts, a legitimate thing.
The MotherBox crowdfunding campaign promises true wireless charging. They’re not going for a lot of power here – the campaign only promises enough to charge your phone – but it does it at a distance of up to twenty inches.

At the heart of the MotherBox is a set of three coils oriented perpendicular to each other. The argument, or sales pitch, says current wireless chargers only work because the magnetic fields are oriented to each other. The coil in the phone case is parallel to the coil in the charging mat, for instance. With three coils arranged perpendicular to each other, the MotherBox allows for ‘three-dimensional charging’.

Does the MotherBox work? Well, if you dump enough energy into a coil, something is going to happen. The data for the expected charging ranges versus power delivered is reasonably linear, although that doesn’t quite make sense in a three-dimensional universe.

Is it finally time to get rid of all those clumsy wall outlets? No, not quite yet. The system from Disney Research works, but you have to charge your phone in a Faraday cage. It would be a great environment to test autonomous quadcopters, though. For MotherBox, Ivy League engineers started a crowdfunding campaign instead of writing a paper or selling the idea to an established company. It may not be time to buy a phone case so you can charge your phone wirelessly at Starbucks, but at least people are working on the problem. This time around, some of the tech actually works.

Continue reading “Suddenly, Wireless Power Transmission Is Everywhere”

First Look: Macchina M2

In the past few years, we’ve seen a growth in car hacking. Newer tools are being released, which makes it faster and cheaper to get into automotive tinkering. Today we’re taking a first look at the M2, a new device from the folks at Macchina.

The Macchina M1 was the first release of a hacker friendly automotive device from the company. This was an Arduino compatible board, which kept the Arduino form factor but added interface hardware for the protocols most commonly found in cars. This allowed for anyone familiar with Arduino to start tinkering with cars in a familiar fashion. The form factor was convenient for adding standard shields, but was a bit large for using as a device connected to the industry standard OBD-II connector under the dash.

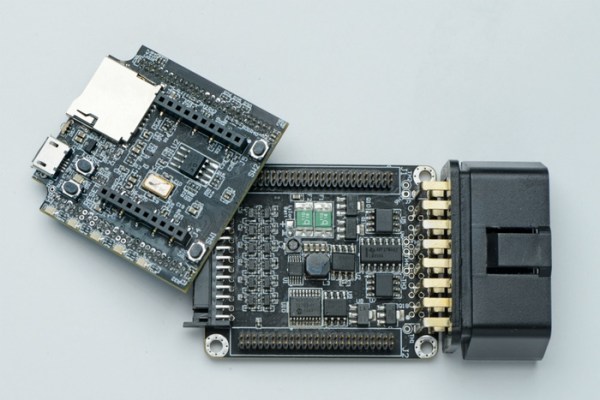
The Macchina M2 is a redesign that crams the M1’s feature set into a smaller form factor, modularizes the design, and adds some new features. With their Kickstarter launching today, they sent us a developer kit to review. Here’s our first look at the device.

Continue reading “First Look: Macchina M2”

This Vacuum Former Sucks

Vacuum formers are useful tools to have around the shop and also an incredibly simple technology. All you need is a plastic sheet, a heater of some kind, a table with a bunch of holes in it, and a vacuum. The simplicity and usefulness of a vacuum former mean they’re perfect for a homebrew build. That said, we haven’t seen many DIY vacuum formers around the Interwebs. Now, there’s a Kickstarter that brings vacuum forming to the desktop. If nothing else, it’s an inspiration to build your own vacuum forming machine.

The Vaquform is pretty much what you would expect from a desktop vacuum forming machine. A 9 x 12 inch forming area is equipped with ceramic heaters to soften the plastic sheet, and interestingly, an infrared probe (think a non-contact digital thermometer) to ensure you’re pulling molds when the plastic is ready, not before.

You can’t push a Kickstarter without some new and novel technology, and the highlight of this product pitch is the Vaquform hybrid system vacuum pump. This vacuum pump, “combines high airflow and high vacuum” and looks like someone slapped a brushless motor on a turbo.

This is a Kickstarter campaign, and so far it appears Vaquform, the company behind this vacuum former, appears to only have prototypes. There’s a big difference between building one of something and building a hundred. As with all Kickstarter campaigns, ‘caveat emptor’ doesn’t apply because ēmptor means ‘buyer’. If you contribute to this Kickstarter campaign, you are not buying anything.

Even though this is a Kickstarter campaign, it is an interesting tool to have around the workshop. Of course, there’s not much to a vacuum former, and we’d be very interested in seeing what kind of vacuum former builds the Hackaday community has already made. Send those in on the tip line.

Counting Laps And Testing Products With OpenCV

It’s been about a year and a half since the Batteroo, formally known as Batteriser, was announced as a crowdfunding project. The premise is a small sleeve that goes around AA and AAA batteries, boosting the voltage to extract more life out of them. [Dave Jones] at EEVblog was one of many people to question the product, which claimed to boost battery life by 800%.

Batteroo did manage to do something many crowdfunding projects can’t: deliver a product. Now that the sleeves are arriving to backers, people are starting to test them in the wild. In fact, there’s an entire thread of tests happening over on EEVblog.

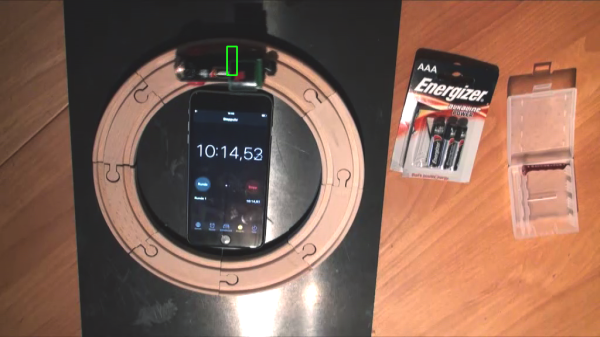
One test being run is a battery powered train, running around a track until the battery dies completely. [Frank Buss] wanted to run this test, but didn’t want to manually count the laps the train made. He whipped up a script in Python and OpenCV to automate the counting.

The script measures laps by setting two zones on the track. When the train enters the first zone, the counter is armed. When it passes through the second zone, the lap is recorded. Each lap time is kept, ensuring good data for comparing the Batteroo against a normal battery.

The script gives a good example for people wanting to play with computer vision. The source is available on Github. As for the Batteroo, we’ll await further test results before passing judgement, but we’re not holding our breath. After all, the train ran half as long when using a Batteroo.

Black Magic Probe: The Best ARM JTAG Debugger?

We don’t always JTAG, but when we do, we use a Black Magic Probe. It’s a completely open ARM-chip debugging powerhouse. If you program the small ARM chips and you don’t have a BMP, you need a BMP. Right now, one of the main producers of these little gems is running a Kickstarter where you can get your hands on a nicely made one and/or a 1Bitsy STM32F415-based development board.

Why is the BMP so great? First off, it’s got a JTAG and a UART serial port in one device. You can flash the target, run your code, use the serial port for printf debugging like you know you want to, and then fall back on full-fledged JTAG-plus-GDB when you need to, all in one dongle. It’s just very convenient.

But the BMP’s killer feature is that it runs a GDB server on the probe. It opens up a virtual serial port that you can connect to directly through GDB on your host computer. No need to hassle around with OpenOCD configurations, or to open up a second window to run [texane]’s marvelous st-util. Just run GDB, target extended-remote /dev/ttyACM0 and you’re debugging. As the links above demonstrate, there are many hardware/software pairs that’ll get you up and debugging. But by combining the debug server with the JTAG hardware, the BMP is by far the slickest.

Full disclosure: we use a BMP that we built ourselves, which is to say that we compiled and flashed the firmware into a $4 STLink clone programmer that we had on hand. Breaking the required signals out required a bit of ugly, fiddly soldering, but we enjoy that sort of thing. If you don’t, the early-bird Kickstarter (with cables) looks like a good deal to us.