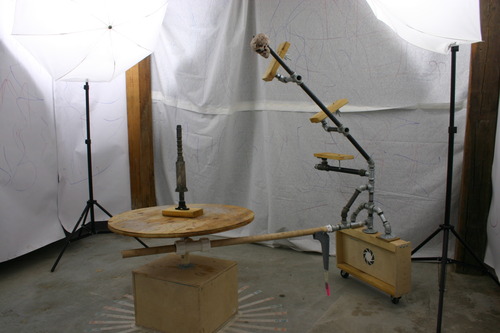
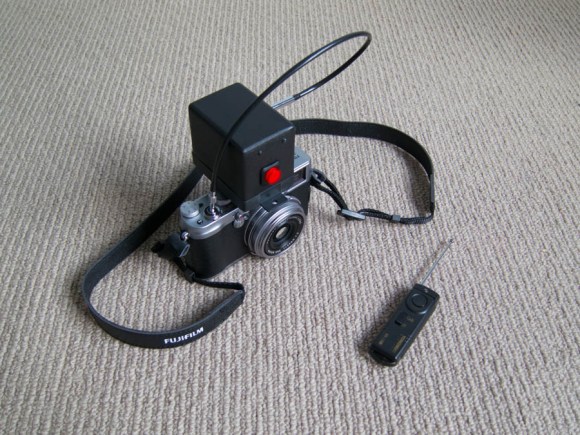
Building A SkyCam-like Camera Mount

With the Olympics on there are a lot of really great camera shots shown during the events. One of the best is the overhead view, which is provided by a camera suspended between cables. It’s not new for the Olympics, SkyCam has been around for over twenty years. What is new is [Dan Royer’s] attempts to build his own aerial camera setup.

He’s not starting from zero with this project. [Dan] has done some really great work with the Drawbot. It’s a two-motor, two-axis plotter which uses CNC to draw on a white board. For this project he combined two Drawbots in order to add a third axis. The image above shows the camera mount suspended between the four strings. He’s been working hard on getting the software ready for this kind of addressing. Along the way he broke the strings a few times because he was too far from the kill switch to stop it in time. But what he’s got is a nice start and we hope to see a more illustrative follow-up soon.

One of the things that SkyCam has going for it is a stabilization system. We wonder if a spinning gyroscope would work as well as it did for that balancing bike.

Atomic Clapperboard

Whether you know it as a clapperboard, a slate, slate board, time slate, or by another name, you probably recognize this staple of movie making. It’s a handy way to help synchronize sound with video, and to keep track of clips when it comes time to edit. But this clapperboard is quite a bit more accurate than most. It’s got an atomic clock source for dead-on accuracy.

The project came from the growing availability of Rubidium clock source modules on eBay. They can be had for under $100 and you’ll enjoy accuracy of 0.1 ppm. [Luddite Tech] grabbed one for himself and included it in this build. As you can see in the clip after the break, the contrast of the eight-digit display is adjustable, and shines brightest when the marker is snapped. We’d guess the cable he connects at the beginning of the demo is used to set the initial time reference. After that the in-built WiFi can be used to push the time markers to a computer.

Continue reading “Atomic Clapperboard”

Never Miss A Roadside Photo-op With An Easy Camera Hack.

When you’re driving for days on the highway, you see some interesting things. If you’re like me, you usually don’t have the time to get your camera out and snap a picture. Especially if it is just a goofy looking car, or an interesting tree or something. This hack will make it really easy to get pictures of sights on the highway by allowing you to snap a picture at the press of a button.

Continue reading “Never Miss A Roadside Photo-op With An Easy Camera Hack.”

Reading Punch Cards With An Arduino And Digital Camera

[digitaltrails] wanted the data on a few old IBM 80-column punch cards he had lying around, but didn’t have decades old computer hardware in his garage. He decided to build his own out of LEGO, an Arduino, a digital camera, and a bit of Python.

The hardware portion of [digitaltrails] build includes a crank-operated feed mechanism made entirely out of LEGO. For each turn of the crank, the feed mechanism sends one card down a chute where a photodetector wired into an Arduino tells a camera to take a picture. After that, a servo is activated, sending the card into the ‘already scanned’ bin.

On the software side of the build, [digitatrails] used the Python Imaging Library to scan one row of pixels where each column is expected to be. The software outputs the code and data contained on the 80-column card as well as a very cool ASCII art version of each card.

Considering you just can’t go down to Fry’s and buy an IBM 80-column punch card reader, we’re loving [digitatrails]’ clever way of getting data off an otherwise unreadable storage medium. Check out the video of the card reader in action after the break.

Continue reading “Reading Punch Cards With An Arduino And Digital Camera”

New Cameras Learning Old Lens Tricks

[Michael H] tipped us off about this guide to using view camera lens parts with DSLR cameras and lenses. We weren’t familiar with the term ‘view camera’ but we certainly recognize the accordion-like bellows that define that type of camera. The idea is that modern cameras with their fixed lenses miss out on some types of shots. Why not work out a way to get the best from both old and new?

The concept behind the view camera is that there are two plates connected by the bellows. One plate holds the film and shutter, the other holds the lens. The two can be adjusted for focal length but can also be set at an angle to each other. This modern adaptation uses an adjustable frame to hold the two plates in position. Custom connectors were made by attaching lens rings to the plates. It’s pretty much the same connection technique as we’ve seen when trying to mate cameras with lenses from a different maker.

Simple Light Painting Bar Build

[SkyWodd] took the easy route when it came time to build this light painting bar. But he was still met with great success. Thanks to his well-documented work you should be able to throw this together for yourself in about an hour.

The idea here is to build a full-color display that will draw a picture in a long-exposure photograph. We’ve seen the concept used with 64 discrete RGB LEDs, but there’s almost no soldering to be done with this project. Instead, [SkyWodd] used an addressable RGB LED strip. It has 64 pixels, all taking commands via the SPI protocol. This helps keep the number of microcontroller connections to a minimum. He lashed the entire system onto a long hunk of wooden dowel and grabbed a camera.

You’ll need a DSLR as each image needs to have an exposure time approaching 10 seconds. One thing to note is that it may be best to leave the LED bar stationary and move the camera. If you use a tripod it should help keep the vibrations to a minimum.

Motorized Camera Rig Makes Panoramic Shooting Simple

diy-panorama-rig

Where some people might see a pile of junk, Hackaday reader and budget-conscious photo nut [FantomFotographer] sees inspiration. He was in search of a rig that would help him take better panoramic photos and found all that he needed to build one right around him.

He had an old tripod kicking around, which serves as the base for rig. At the top sits a pair of servos [FantomFotographer] attached to the tripod with some scrap wood, screws, and glue. The servos are driven by an Arduino Nano, which sits comfortably in a plastic enclosure he scavenged from trash heap. He uses an IR receiver to control the whole thing, which allows him to not only change shooting angles, but camera settings as well.

While it might sound like all is well with his upcycled camera rig, [FantomFotographer] says that like every project, there is some room for improvement. He’s keeping the source code under wraps at the moment, but once he gets everything working to his liking, he says that he’ll release it.

In the meantime, be sure to check out the cool panoramas he has put together.