Quality Sound-Proof Cans From Personal Protective Equipment

Working in a noisy office can be distracting. To combat the problem in his workplace [Rikard Anglerud] bought himself a pair of 3M ear defenders. They were good, but not quite good enough to completely extinguish the noise, so he inserted the drivers from a pair of cheap headphones and played a low-level white noise. This prototype proved effective, so he returned to the project and produced a much nicer pair that approach much more costly cans in their execution.

[Rikard’s] first set of headphones left something to be desired in the quality department. The second set followed with a pair of better-quality drivers sourced online, and more care was taken with cable routing and in their fitting. Finally some filler was used to remove the moulded 3M branding, and make them look more hi-fi than workwear.

From an audiophile perspective these cans might not approach a very high quality pair because their drivers are unlikely to be matched to the acoustic properties of their enclosures. But it sounds as though he’s achieved an adequate result despite that, and completely satisfied his need to exclude office noise.

ESP8266 Controls TiVo Over The Network

Remember the TiVo? The set-top DVR that was once so popular of a hacking target that Hackaday had a dedicated subdomain for it has today largely faded into obscurity as time-shifted viewing has given way to Internet streaming services like Netflix and Hulu. But make no mistake, while the TiVo may no longer be the centerpiece of the average home entertainment center, there’s a diehard group of antennaed aficionados that are still rocking (and hacking) them.

One such TiVotee is [Thomas McQueen], who recently discovered his TiVo-powered Virgin Media V6 DVR was listening for commands on the network. After finding some official documentation for the protocol and firing off a couple of test commands from his computer’s telnet client, he realized he had an opportunity to flex his microcontroller muscle and create a library that would allow controlling the set-top box with the ESP8266 or other network-capable MCU.

[Thomas] built his project on-top of the basic Arduino WiFi library, making every effort to make it as generalized as possible so it could work on a multitude of platforms and with various targets. He even made sure to give all his functions friendly names that won’t leave users scratching their head when they read through example code down the road. We’ve seen far too many software projects that were poorly documented or obtusely programmed, so it’s always good to see somebody putting some forethought into their code.

The library makes it easy to add TiVo control to your project, but [Thomas] went one step further and came up with an example application that provides a web interface on the ESP8266 or ESP32. Any device with a web browser, such as a smartphone, can connect to the UI and fire off commands to the TiVo. His next step is to combine his library with some code to talk to Amazon’s Alexa so he’ll be able to control playback with his voice.

We’ll hand it to these TiVo users, they’re a tenacious lot. Earlier in the year, we covered how one dedicated TiVo fan managed to brute-force the child lock on his DVR using the Arduino and an IR LED.

Does This Timber Have The Right Timbre?

A hi-fi amplifier used to be a rite of passage for the home electronic constructor, back in the days when consumer electronics was still dominated by analogue entertainment. It’s unusual then to see [carbono.silĂ­cio]’s stereo amplifier project, constructed in an open-wire circuit sculpture form on a log. You didn’t read that incorrectly, it’s built not on a breadboard but on a piece of Olea Maderensis, or Madiera Olive wood, complete with bark. This endangered tree was not felled, instead it was a piece blown down after a storm.

The circuit is slightly unusual for a project such as this, in that it uses a pair of LM386 audio amplifier chips. This isn’t an unusual component, but it’s one more commonly seen providing the amplification for a small speaker project than in a stereo hi-fi amplifier. But the construction is beautifully done, with very neatly routed wires, a single central volume knob, and a blue LED power light. A particularly nice touch are the aluminium electrolytic capacitors, we suspect having had their plastic sleeving removed.

We’ve had our share of stereo amp projects here, and some of them are surprisingly simple. We have even been known to partake of them ourselves.

Vintage Philco Radio Looks Stock, Contains Modern Secret: A Raspberry Pi

Antique radio receivers retain a significant charm, and though they do not carry huge value today they were often extremely high quality items that would have represented a significant investment for their original owners. [CodeMakesItGo] acquired just such a radio, a Philco 37-11 made in 1937, and since it was it a bit of a state he set about giving it some updated electronics. Vintage radio purists, look away from the video below the break.

Stripping away the original electronics, he gave it a modern amplifier with Bluetooth capabilities, and a Raspberry Pi. Vintage radio enthusiasts will wince at his treatment of those classic parts, but what else he’s put into it makes up for the laying waste to a bit of ’30s high-tech.The original tuning dial was degraded so he’s given it a reproduction version, and behind that is an optical encoder and two optical sensors. This is used to simulate “tuning” the radio between different period music “stations” being played by the PI, and for an authentic feel he’s filled the gaps with static. The result is a functional and unusual device, which is probably better suited than the original to a 2019 in which AM radio is in decline.

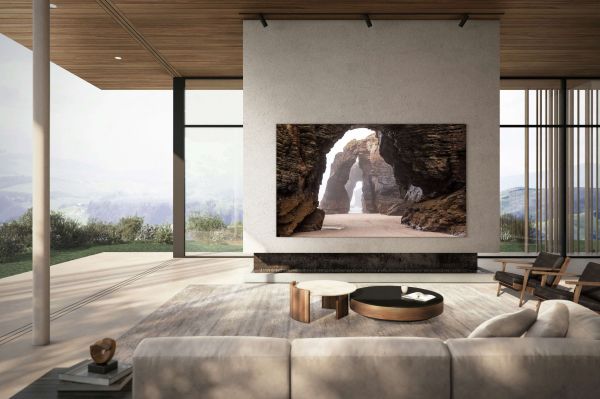
If you think of a high-end set like this Philco as being the ’30s equivalent of perhaps an 8K TV set, you can imagine the impact of AM radio in those early days of broadcasting. We recently took a look at some of the directional antenna tricks that made so many AM stations sharing the band a possibility.

Continue reading “Vintage Philco Radio Looks Stock, Contains Modern Secret: A Raspberry Pi”

Divide To Conquer Capacitive Touch Problems

Back in the day, all of your music was on a shelf (or in milk crates) and the act of choosing what to listen to was a tangible one. [Michael Teeuw] appreciates the power of having music on demand, but misses that physical aspect when it comes time to “put something on”. His solution is a hardware controller that he calls MusicCubes.

Music cube makes selection using RFID, and touching to the right raises the volume level

This is a multi-part project, but the most recent rework is what catches our eye. The system uses cubes with RFID tags in them for each album. This part of the controller works like a charm, just set the cube in a recessed part of the controller — like Superman’s crystals in his fortress of solitude — and the system knows you’ve made your decision. But the touch controls for volume didn’t work as well. Occasionally they would read a false touch, which ends up muting the system after an hour or so. His investigations led to the discovery that the capacitive touch plates themselves needed to be smaller.

Before resorting to a hardware fix, [Michael] tried to filter out the false positives in software. This was only somewhat successful so his next attempt was to cut the large touch pads into four plates, and only react when two plates register a press at one time.

He’s using an MPR121 capacitive touch sensor which has inputs for up to 12-keys so it was no problem to make this change work with the existing hardware. Surprisingly, once he had four pads for each sensor the false-positives completely stopped. The system is now rock-solid without the need to filter for two of this sub-pads being activated at once. Has anyone else experienced problems with large plates as the touch sensors? Can this be filtered easily or is [Michael’s] solution the common way to proceed? Share your own capacitive touch sensor tips in the comments below!

Want to get a look at the entire project? Start with step one, which includes a table of contents for the other build logs.

Yet Another Concrete Speaker Build

Concrete is great if you feel like making something heavy on the cheap. [Marek Unger] decided to have a go, using the material to cast speaker cabinets for a home hi-fi rig (Youtube link, embedded below).

Initial attempts involved creating a laser-cut MDF outer mold, with a styrofoam core inside to be removed later. This was unsuccessful, and [Marek] developed the design further. The second revision used an inner core also made from lasercut MDF, designed to be left inside after casting. This inner mold already includes the mounting holes for the speaker drivers, making assembly easier too.

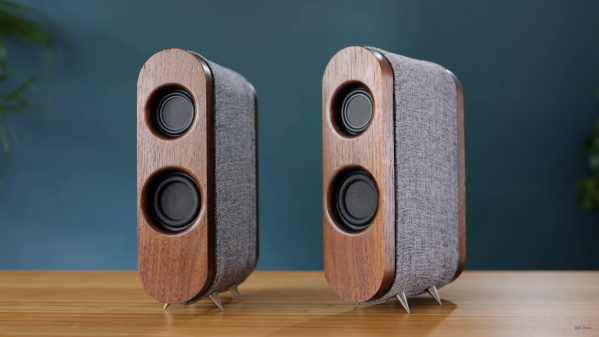
Once cast, the enclosures were fitted with Tang-Band W4-1320SIF drivers. These are a full-range driver, meaning they can be used without needing crossovers or other speakers to fill in the frequency range. Each cabinet weighs just over 10kg, and they’re ported for extra response in the lower frequency bands. Sound tests are impressive, and the rough-finished aesthetic of the final product looks great in [Marek]’s living room.

We’ve seen concrete used for all manner of projects, from furnaces to USB hubs. Video after the break.

Continue reading “Yet Another Concrete Speaker Build”

Finally, A TV For Portrait Videos

Vertical video is bad, or so we’re told, and you shouldn’t shoot a video with your phone in a vertical position. Why? Because all monitors are wider than they are tall. This conventional wisdom is being challenged by none other than Samsung. There is now a vertical TV (Korean, Google Translate link) , engineered specifically videos shot on mobile phones.

“Samsung Electronics analyzed the characteristics of the Millennial generation, which is familiar with mobile content, and presented a new concept TV ‘The Sero’ (loosely translated as ‘The Vertical’), which is based on the vertical screen, unlike the conventional TV,” so goes the press release.

Features of The Sero TV include synchronization between the screen and a mobile device, and mirroring functions based on NFC. This display is no slouch in the audio department, either: it features a 4.1 channel, 60-watt high-end speaker. A built-in microphone and support for Samsung’s Bixby voice assistant means artificial intelligence can easily control various functions of the display.

The Sero will be released in Korea at the end of May, with a reported price tag of 18,900,000 South Korean Won. A quick Google search tells us that converts to an implausible-sounding $16,295 USD, but it’s not as if you were going to buy one anyway.

Nevertheless, there actually is a market for ‘vertical’ or portrait displays; thanks to the ever-widening of aspect ratios by LCD manufacturers, it makes sense to edit documents with a vertically-oriented monitor. You can fit more code on the screen if you just rotate your monitor. Apple was one of the first companies to realize this with the release of the Macintosh Portrait Display in 1989, providing a wondrous 640×870 grayscale resolution display for desktop publishing. Of course, the Radius full page display was released a few years earlier and the Xerox Alto had a vertically oriented screen. But wait a minute, can’t you just rotate your monitor and save $16k?