Quality Sound-Proof Cans From Personal Protective Equipment

Working in a noisy office can be distracting. To combat the problem in his workplace [Rikard Anglerud] bought himself a pair of 3M ear defenders. They were good, but not quite good enough to completely extinguish the noise, so he inserted the drivers from a pair of cheap headphones and played a low-level white noise. This prototype proved effective, so he returned to the project and produced a much nicer pair that approach much more costly cans in their execution.

[Rikard’s] first set of headphones left something to be desired in the quality department. The second set followed with a pair of better-quality drivers sourced online, and more care was taken with cable routing and in their fitting. Finally some filler was used to remove the moulded 3M branding, and make them look more hi-fi than workwear.

From an audiophile perspective these cans might not approach a very high quality pair because their drivers are unlikely to be matched to the acoustic properties of their enclosures. But it sounds as though he’s achieved an adequate result despite that, and completely satisfied his need to exclude office noise.

This Micro Deltesian Is Easy For Children To Use

[Ekaggrat Singh Kalsi] submits this interesting printer he built for his daughter to use. He admits that the project started simply out of curiosity about the strange deltesian movement. In this configuration, the X and Z-axis are a delta mechanism while the Y-axis is a regular Cartesian bed on rails. There’s not a load of advantages to this movement, but it is really neat.

Eventually, he had a hammer in search of a nail and decided to make the printer easy enough for his daughter to use. To this end, he added a few kid-friendly modifications. The unheated bed is removable and snaps in and out of place with magnets. Considerable attention was paid to the filament loading and unloading to make it easy for small hands to perform the process. This was accomplished through a lever based latch mechanism.

As you can see in the video after the break, the project was a success, and his daughter is growing up with access to her very own 3D printer. If you’re curious abou the classic delta robot, check out this golf ball sorter.

Continue reading “This Micro Deltesian Is Easy For Children To Use”

Flying Batteries For Drones

Power is the bane of drone pilots. You’d like to fly longer which means a bigger battery. But a bigger battery will weigh more which leads to less flight time. You have to strike a balance and for most consumer drones that balance is about 20 minutes of flight time, more or less. Researchers at Berkeley have a different idea: don’t use a bigger battery, but simply replace the battery in flight.

The idea isn’t completely new. After all, many planes refuel in flight — a technically sophisticated operation, but it occurs every day. The scheme here is to have a primary battery and a secondary battery. When the secondary battery is low, the drone ejects it while running on the primary battery. Another secondary battery flies to the drone and docks with it becoming the new main power source.

Continue reading “Flying Batteries For Drones”

The World’s Smallest Vacuum In An Altoids Tin

There’s been a lot of Altoids tin hacks over the years, but a vacuum cleaner in a tin is something new. In [Toby Bateson]’s first project on Hackaday, he used simple household items to create a functioning vacuum cleaner to use for sucking crumbs out of your keyboard or paper punch holes off your desk.

The vacuum features a retractable suction tube, a low-profile switch, and a bagless waste collection system (the waste is stored and discarded out from the tin itself). A brushed motor and impeller provide the airflow. A scrap of a beer can mounted on the shaft is used for an impeller blade, and two bolts with a thin metal sheet between them are made into a switch (the instructions recommend you finish your drink before using the scrap metal). A sponge is used for filtering the dirt from the motor while a hole is cut out of the top of the tin to provide airflow.

[Bateson] is looking to put his name in the world record book for the world’s smallest vacuum tube, as he recently created an even smaller vacuum in a 1cc tube.

“Oh dear, I’ve spilled something on my desk, whatever am I going to do? Luckily, I have my vacuum cleaner in an Altoids tin…”

Continue reading “The World’s Smallest Vacuum In An Altoids Tin”

Robotic Laundry Line Reels You In

It may not be a laundry-folding robot, but this robotic launders line build by [Radical Brad Graham] is pretty neat. He has a 75-foot hanging laundry line from his house to a woodshed, and decided to roboticize it using some bits that were lying around. The result is a simple build that adds push-button control to pull the line back and forward, making it easier to hang everything out to dry. It’s a simple build, but [Brad] did a great job of documenting what he did and why, from mounting the posts that support the line to wiring up the control buttons.

Continue reading “Robotic Laundry Line Reels You In”

Dealing With Missing Pin Allocations

Blindsided by missing pin allocations? Perhaps you’re working on a piece of hardware and you notice that the documentation is entirely wrong. How can you get your device to work?

[Dani Eichhorn]’s troubles began when running an IoT workshop using a camera module. Prior to the work, no one had through to check if all of the camera modules ordered for the participants were the same. As it turns out, the TTGO T-CAM module had a number of revisions, with some even receiving a temperature/pressure sensor fixed on top of the normal board.

While the boards may have looked the same, their pin allocations were completely different.Changing the pin numbers wouldn’t have been difficult if they were simply numbered differently, but because the configurations were different, errors started to abound: Could not initialize the camera

As it turns out, even the LillyGo engineers – the manufacturers of the board – may have gotten a bit lost while working on the pin allocations, as [Eichhorn] was able to find some of the pins printed right onto the PCB, hidden behind the camera component.

To find information not printed on the board, a little more digging was required. To find the addresses of the devices connected to the I2C bus, running a program to find peripherals listening on the bus did the trick. This was able to print out the addresses of the SSD1306 OLED display driver and the microphone for the board at hand.

To find the pins of peripherals not printed on the PCB or hidden on the silkscreen, a GPIO scanner did the trick. This in particular worked for finding the PIR (passive infrared) motion sensor.

We picked up a few tips and tricks from this endeavor, but also learned that reverse-engineering anything is hard, and that there isn’t any one method for finding pin allocations when the documentation’s missing.

Make Your Own Plasma Cutter

Of all the tools that exist, there aren’t many more futuristic than the plasma cutter, if a modern Star Wars cosplay if your idea of futuristic. That being said, plasma cutters are a powerful tool capable of making neat cuts through practically any material, and there are certainly worst ways to play with high voltage.

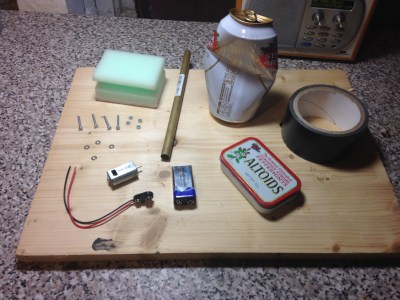
Lucky enough, [Plasanator] posted their tutorial for how to make a plasma cutter, showing the steps through which they gathered parts from “old microwaves, stoves, water heaters, air conditioners, car parts, and more” in the hopes of creating a low-budget plasma cutter better than any on YouTube or from a commercial vendor.

The plasma cutter does end up working up quite an arc, with the strength to slice through quarter-inch steel “like a hot knife through butter”.

Its parts list and schematic divide the systems into power control, high current DC, low voltage DC, and high voltage arc start:

  • The power control contains the step down transformer and contactor (allows the DC components to come on line)
  • The high current DC contains the bridge rectifier, large capacitors, and reed switch (used as a current sensor to allow the high voltage arc to fire right when the current starts to travel to the head, shutting down the high voltage arc system when it’s no longer necessary)
  • The low voltage DC contains the power switch, auto relays, 12V transformer, 120V terminal blocks, and a terminal strip
  • The high voltage arc start contains the microwave capacitor and a car ignition coil

At the cutting end, 13A is used to cut through quarter-inch steel. Considering the considerably high voltage cutter this is, a 20 A line breaker is needed for safety.

Once the project is in a more refined state, [Plasanator] plans on hiding components like the massive capacitors and transformer behind a metal or plastic enclosure, rather than have them exposed. This is mainly for safety reasons, although having the parts exposed is evocative of a steampunk aesthetic.

In several past designs, stove coils were used as current resistors and a Chevy control module as the high voltage arc start. The schematic may have become more refined with each build, but [Plasanator]’s desire to use whatever components were available certainly has not disappeared.

Continue reading “Make Your Own Plasma Cutter”