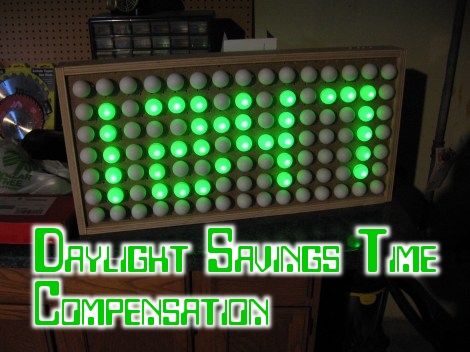
How To Properly Fly With Electronics

Some electronics professionals have to fly relatively frequently. One such person, [Steve Hoefer] shares with us how to properly fly with your exposed wires and bits without getting nabbed by the TSA for suspicion of being a terrorist. The article is fairly in depth with tips on how to handle most situations including being pulled aside and put in a tiny room for questioning. Most of it boils down to the fact that you can’t expect the TSA agents to be experts in everything. They see stuff that is slightly out of the norm, they have to follow up. We’re not talking about pat-downs and body scanners here, we’re talking about circuit boards, duct tape, and battery packs.

One story [Steve] shares is especially humorous. He noted that the servos had been disconnected from one of his robots. He wonders, why disconnect them? If they were suspected of being an explosive, they shouldn’t have messed with them. If they weren’t… why did they un-plug them?

Want A Two Person Self Destruct Button, But Tired Of Pesky Microcontrollers?

We all know that our precious cruisers/warships/assets can not fall into the wrong hands, and what better way to assure that information security than incorporating a self destruct button into the design? While the general premise is simple enough the only real way to make sure some crazy space-virus can’t infect your captain and force him to destroy your ship is to add a two button security system! Wait, what if it’s a computer virus?! Well [Andrea] has it covered with this two hand hand control switch. We guess you could also just use the scheme to flip on a dangerous piece of equipment, since it forces the operator to remove both hands from the machine to operate the buttons, but where is the drama in that?

The buttons are timed using a combination of voltage dividers and caps to activate transistors, one to activate the 555 timer and another to disable the button input after a half second or so. Since it’s all resistor capacitor timing your circuit may require just a bit of tuning (or precision components) to get everything right.  There is a bit of an issue with using two people to trigger the output, as the second button actually operates the output relay directly. If the second button is held it will only remain active until the timer’s output is triggered, but if your second in command gets cold feet and releases the button before the core goes thermo, well, you’ll have an embarrassing jog to the escape pods.

Check the video after the jump to see [Andrea] fiddling around with the switch.

Continue reading “Want A Two Person Self Destruct Button, But Tired Of Pesky Microcontrollers?”

Updating Your Workspace For More Organized And Efficient Hacking

workspace-upgrade

If you’ve ever looked at one of [Todd Harrison’s] teardown or how-to videos closely, you would likely notice that his work bench looks like a standard hacker workspace. While we all try to keep our work areas clear of clutter, it’s not uncommon for components to pile up, cords to tangle, and things to get messy. [Todd] decided it was time to get a bit more organized, so he recorded a video showing how he went about the process.

Part of [Todd’s] work revolved around adding shelves to his bench so that he didn’t have measurement equipment stacked on top of one another. He also spent a good amount of time adding 30 additional plug sockets to his work space, replacing the single socket he had been struggling with for years.

Obviously this is not really a hack in and of itself, though this sort of reorganization is an important to efficient hacking all the same. We like the fact that [Todd] took the time to explain his process and materials in great detail – it will no doubt be helpful to those new to hacking.

Continue reading to see [Todd’s] video in its entirety, or swing by his blog for more pictures and details.

Continue reading “Updating Your Workspace For More Organized And Efficient Hacking”

Reverse Engineering A 1.5 Inch Photoframe

Little, no name, 1.5 inch LCD photo key-chains are all over the place for practically nothing. Not too surprisingly these things do not vary much in the parts that they use, some flash ram, a little lipo battery and a 16 bit color LCD. Wanting to find a way to reuse that LCD [Simon] Has an excellent tutorial on how to reuse a FTM144D01N LCD with a ILITEK ILI9163 LCD driver for your electronic projects.

Two units were used, one was ripped apart and soldered to a home made breakout board, the other was kept intact so its logic could be sniffed out with an oscilloscope. A pin-out was quickly determined since these things typically use a 8 or 16 bit data bus. Then a driver library was put together for AVR micro controllers, which includes some basic shape drawing and a 5×8 font.

While you may not be lucky enough to get this exact LCD screen from your local bargain store, there are a lot of pointers in here to hopefully get you up and going. We will be trying our luck on a very similar screen this afternoon as these things do have a decent picture and fairly quick response times already packaged in a hand-held case.

Join us after the break for a quick video.

Continue reading “Reverse Engineering A 1.5 Inch Photoframe”

Analog Joypad For Your Retro PC

Part of the fun with old computers is playing some old school games, and while you could play them with a keyboard it is much more fun with a joystick. You can get old joysticks all day long on auction sites, but you have to watch out. Some are digital, which wont work for many games on many systems. Some were cheap to begin with and probably worn out, and many are flight sticks … ever play pac-man with a giant flight stick?

What I really wanted was a game pad like device for my 1986 Apple //c , using one of the modern thumbstick analog controllers. Using a thumbstick out of an old XBOX(1) controller, some generic parts from Radio Shack, and a little bit of effort , I ended up with exactly what I wanted.

Join us after the break and I will show you how to get there!

Continue reading “Analog Joypad For Your Retro PC”

Tutorial: Build A Manifold Clock For $10

Every once in a while, the Hack a Day tip line gets a submission that is cool, but screams to be built in a few hours, possibly while consuming adult beverages. When [Shay] and [Ben] sent in their Manifold Clock Kickstarter, I knew what I had to do. To make a long story short, there’s a manifold clock hanging on my wall right now. Check out my manifold clock how-to guide after the break.

Continue reading “Tutorial: Build A Manifold Clock For $10”

Make A Simple O-scope With A FTDI Board And A Couple Of ADC’s

[RandomTask] has posted a nice tutorial on how to use a FTDI serial to usb converter, and a couple analog to digital converters to make a simple software oscilloscope. Using a “Universal Serial to USB converter” and one of many FTDI break out boards, he first reprograms the chip using FTDI’s programming software to put the device into a FIFO (first in first out) mode.

From there a pair of ADC0820 8 bit digital to analog converters are wired up, and input is fed to a couple 555’s for testing. It should be noted that there is no input protection, so things like voltages above 5 volts, or negative voltages are a big no-no with this setup. It still could be very handy while working with micro controllers or other digital circuits.

Data is then sent to the computer and displayed using a VB.net program, which has some basic features like scale and triggering, but also contains a couple bonuses like Calc Freq and Calc V delta calculation.

Many people have these little serial to usb converters, and might be in need of a simple scope. If you’re one of them, then you can cobble this together pretty darn quickly, and cheaply.