Rattle Generator Is A New Type Of Dynamo For A Bicycle

rattle-generator-bicycle-spokes

This project is in one of our favorite categories; the kind where asking “why?” is the wrong question. [Berto A.] built the device after observing some power generation by placing a large magnet next to a mechanical relay coil and quickly clicking the relay’s lever. From this humble beginning he built up the RattleGen, a bicycle spoke driven generator.

To get the most power possible he searched around for a massive relay and found one which was originally meant for telephone exchanges. He cut the case open and strapped a big bar magnet to the side of the coil. Next he fabricated an arm which will press against the relay’s lever. To that he added a small wheel which is pressed each time a spoke from the bicycle passes by it. This repeated clicking of the relay lever generates a current (and a rattling sound) that is harvested by the joule thief circuit built on some protoboard. An LED is illuminated, with excess current stored in the capacitor bank. Don’t miss the build and demonstration video after the break.

Continue reading “Rattle Generator Is A New Type Of Dynamo For A Bicycle”

Generating Electricity From Alcohol

thermoelectric-generator-lamp

Here’s a thermoelectric generator which [x2Jiggy] built. The concept uses heat from a flame, biased against cooler temperatures produced by that huge heat sink making up the top portion of the build to produce electricity via the Peltier effect.

The build is passively cooled, using a sync assembly that takes advantage of heat pipes to help increase the heat dissipation. A nearly flat heat sink makes up the mounting surface for the hot side, which faces down toward a flame driving the generator. [x2Jiggy] started the project by using a can, wick, and olive oil as the heat source. He managed to get about 2V out of the system with this method. What you see here is the second version. It swaps out the olive oil lamp for an alcohol stove. The cans with holes punched in them act as a wind screen while also providing a stable base. This rendition produces about 3V, but it doesn’t sound like there are any precise measurements of what it can do under load.

Windmill Made From Washing Machine, 555 Chip

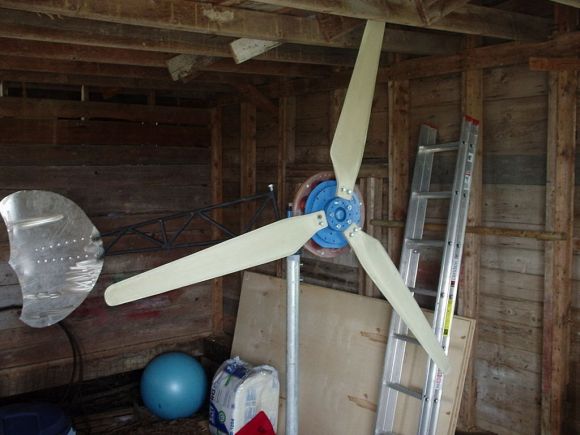
Green hacks implement one of two philosophies. The first is über-technical, with very expensive, high-quality components. The other side of this coin creates green power out of junk. [Timot] obviously took the latter choice, building a windmill out of an old washing machine motor and a few bits of PVC.

The generator for the windmill is based on a Fisher and Paykel direct drive usually found in clothes washing machines, rewired to provide 12 Volts at low RPM. At high speeds, the generator can produce 80 Volts, so a charge controller – even one based on a 555 chip – was an excellent addition.

For the other miscellaneous mechanical parts of the build, [Timot] cut the blades of the windmill out of 200 mm PVC pipe and sanded them down a bit for a better aerodynamic profile. With a custom fiberglass spinner, [Timot] whipped up a very attractive power station that is able to provide about 20 watts in normal conditions and 600 watts when it’s very windy. Not enough to power a house by any means, but more than enough to charge a cellphone or run a laptop for a few hours out in the back country.

LiFePO4 Batteries Work Much Better In A Camera Than NiMH

SAMSUNG

We agree with [Zapmaker] that Canon cameras chew through nickel metal hydride batteries. But we’re not going to use Alkaline because we think it’s wasteful. His solution is to use a battery that has a higher voltage rating. What you see here is a single lithium iron phosphate cell paired with a dummy cell to increase life between charges.

The reason that NiMH batteries don’t last very long is that they’re only rated at 2.4V. It won’t take long for that voltage to drop below the camera’s cutoff threshold since they didn’t start very high to begin with. But a single LiFePO4 cell has the same form-factor but produces 3.2V and maintains voltage well through it’s discharge cycle.

The size is right, but using one cell won’t work by itself. He built a filler for the other slot which is just a wood dowel with a screw all the way through it. The point was ground down and a bit of foil added to ensure a proper connection. We’d be interested to hear back about how this performs over the long term.

Deploying An Open Source Pollution Monitoring Network

pollution-monitoring-network

[Kasey] and [Guyzmo] have been working for the past couple of years on a side project that lets them monitor pollution using a network of sensors. They’ve just decided to make the project open source, both hardware and software. The details of the system are available at their GitHub repository.

There are two main components to the system. On the right is a base station which collects the data from the array of sensor, one of which is shown on the left. Each sensor runs off of a battery, but features a PV solar panel which keeps the power source topped off. It uses an Arduino to drive the system, and an XBee radio for communications. Some info about the sensors can be found on this summary page. There’s a PM10 particle pollution sensor, temperature, sound, nitrogen, and oxygen sensors. We also wonder if any data can be gleaned from how much electricity the solar panel is able to harvest?

The base station also uses an XBee radio to poll the network, but it’s not driven by an Arduino. They’ve gone with the ARM-based BeagleBone to manage the data.

Cardboard Lampshade Makes Ordinary Recycling A Centerpiece Of Your Room

This cube lamp was assembled using common cardboard. Not only does it look interesting, but it’s basically free with every Ikea purchase since all you need is a source of cardboard, cutting implements, and glue.

[Lindarose92] fabricated the shade out of narrow strips of corrugated cardboard. This particular lamp also has a cardboard base but we’re sure you could use it for just about any light source with doesn’t generate enough heat to cause problems. The build starts out with the tedious process of cutting 5mm by 8cm strips, and you’re going to need a lot of them. Each strip is cut perpendicular to the corrugation, which allows the light to shine through the wave pattern. The strips are then glued into 8cm x 8cm squares, which are in turn glued together into the four by four panels that make up each side of the cube.

Boom, you’re done. And if you get tired of it, just toss the thing in your recycling bin.

[via Hacked Gadgets]

Briquette Press For Rocket Stove Fuel

briquette-press-for-rocket-stove

[Gregory] uses a rocket stove for heating when it’s cold outside. He’s been trying out all kinds of different materials as fuel when the idea of making his own briquettes from waste materials came to mind. Obviously the project works. As you can see in the image above, he has just formed a lump of fuel using a mixture of newspaper pulp and sawdust.

The orange device with the ax handle seen in the background is his own creation. You can see the device in action in the video after the break. In the video comments he also links to a CAD file if you’re interested in building your own.

If it’s a rocket stove you’re interested in there’s always the option of building your own.

Continue reading “Briquette Press For Rocket Stove Fuel”