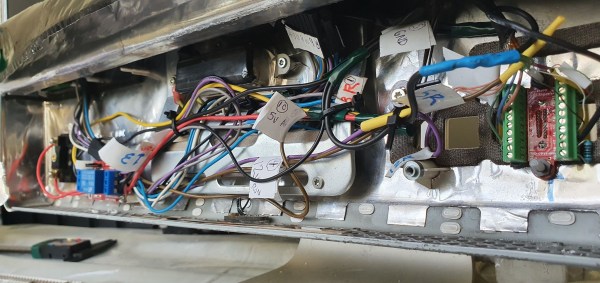
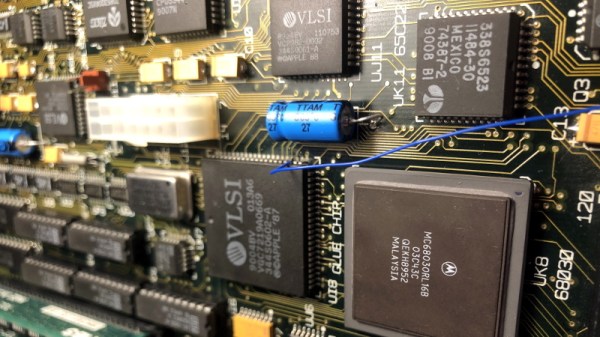
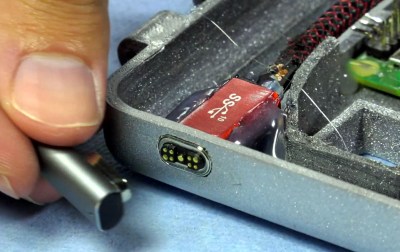
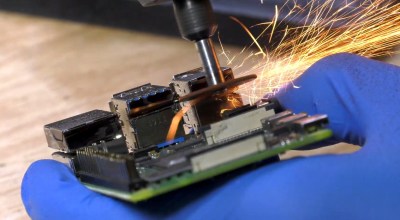
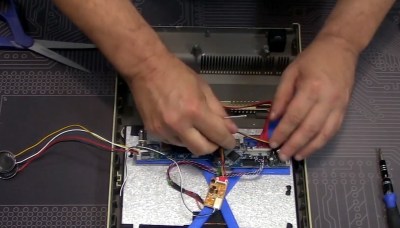
Re-Capping An Ancient Apple PSU

It sometimes comes as a shock when you look at a piece of hardware that you maybe bought new and still consider to be rather high-tech, and realise that it was made before someone in their mid-twenties was born. It’s the moment from that Waylon Jennings lyric, about looking in the mirror in total surprise, hair on your shoulders and age in your eyes. Yes, those people in their mid-twenties have never even heard of Waylon Jennings.

[Steve] at Big Mess o’Wires has a Mac IIsi from the early 1990s that wouldn’t power up. He’d already had the life-expired electrolytic capacitors replaced on the mainboard, so the chief suspect was the power supply. That miracle of technology was now pushing past a quarter century, and showing its age. In case anyone is tempted to say they don’t make ’em like they used to, [Steve]’s PSU should dispel the myth.

It’s easy as an electronic engineer writing this piece to think: So? Just open the lid, pop out the old ones and drop in the new, job done! But it’s also easy to forget that not everyone has the same experiences and opening up a mains PSU is something to approach with some trepidation if you’re not used to working with line power. [Steve] was new to mains PSUs and considered sending it to someone else, but decided he *should* be able to do it so set to work.

The Apple PSU is a switch-mode design. Ubiquitous today but still a higher-cost item in those days as you’ll know if you owned an earlier Commodore Amiga whose great big PSU box looked the same as but weighed ten times as much as its later siblings. In simple terms, the mains voltage is rectified to a high-voltage DC, chopped at a high frequency and sent through a small and lightweight ferrite-cored transformer to create the lower voltages. This means it has quite a few electrolytic capacitors, and some of them are significantly stressed with heat and voltage.

Forum posts on the same PSU identified three candidates for replacement – the high voltage smoothing capacitor and a couple of SMD capacitors on the PWM control board. We’d be tempted to say replace the lot while you have it open, but [Steve] set to work on these three. The smoothing cap was taken out with a vacuum desoldering gun, but he had some problems with the SMD caps. Using a hot air gun to remove them he managed to dislodge some of the other SMD components, resulting in the need for a significant cleanup and rework. We’d suggest next time forgoing the air gun and using a fine tip iron to melt each terminal in turn, the cap only has two and should be capable of being tipped up with a pair of pliers to separate each one.

So at the end of it all, he had a working Mac with a PSU that should be good for another twenty years. And he gained the confidence to recap mains power supplies.

If you are tempted to look inside a mains power supply you should not necessarily be put off by the fact it handles mains voltage as long as you treat it with respect. Don’t power it up while you have it open unless it is through an isolation transformer, and remember at all times that it can generate lethal voltages so be very careful and don’t touch it in any way while it is powered up. If in doubt, just don’t power it up at all while open. If you are concerned about high voltages remaining in capacitors when it is turned off, simply measure those voltages with your multimeter. If any remain, discharge them through a suitable resistor until you can no longer measure them. There is a lot for the curious hacker to learn within a switch mode PSU, why should the electronic engineers have all the fun!

This isn’t the first recapping story we’ve covered, and it will no doubt not be the last. Browse our recapping tag for more.

Finally, An Acceptable Use Of The Apple Watch

For many of us, we remember the days of the Apple Classic Macintosh. For [Erich Styger], his days of development in Pascal and Modula-2 are long over, but he still gets warm and tingly thinking back to the classic white box we knew and loved. So he decided to 3D print a Classic Mac to use as his Apple Watch charging station.

He started with an existing model on Thingiverse and modified it to better suit his needs — sharing CAD makes the design process go ever so much faster. It consists of two parts, an outer shell that looks like a Classic Mac, and an inner structure that holds the stock charger for your Apple Watch.

The result is an adorably small Classic Mac to sit on your desk in miniature form. It’s perhaps the most acceptable use of a $1000 Apple Watch we have ever seen.

Seriously though, the Apple Watch is nicely built — just take a look at the tear-down we covered.

A Digital Canvas That’s Hard To Spot

While sorely lacking in pictures of the innards of this digital canvas, we were extremely impressed with the work that went into making such a convincing object. [Clay Bavor] wanted a digital picture frame, but couldn’t find one on the market that did what he wanted. They all had similar problems, the LCDs were the lowest quality, they were in cheap bezels, they had weird features, they had no viewing angle, and they either glowed like the sun or were invisible in dark environments.

[Clay] started with the LCD quality, he looked at LCD specs for the absolute best display, and then, presumably, realized he lived in a world where money is no object and bought a 27″ iMac. The iMac has a very high pixel density, no viewing angle, and Apple goes through the trouble of color balancing every display. Next he got a real frame for the iMac, cut a hole in the wall to accommodate it, and also had a mat installed to crop the display to a more convincing aspect ratio for art. One of the most interesting part of the build is the addition of a Phidgets light sensor. Using this, he has some software running that constantly adjusts the Mac to run at a brightness that’s nearly imperceptible in the room’s lighting.

Once he had it built he started to play around with the software he wrote for the frame. Since he wanted the frame to look like a real art print he couldn’t have the image change while people were looking, so he used the camera on the Mac and face detection to make sure the image only changed when no one was looking for a few minutes. He also has a mode that trolls the user by changing the image as soon as they look away.

We admit that a hackier version of this would be tearing the panel out of a broken iMac and using a lighter weight computer to run all the display stuff. [Clay] reached the same conclusion and plans to do something similar for his version 2.0.

Continue reading “A Digital Canvas That’s Hard To Spot”

Steampunk IMacs With Real Turning Gears

Macs have always been favorites of case modders, with projects ranging from turning a Mac Plus into an aquarium to retrofuturistic machines that look like they came from the set of [Terry Gilliam]’s Brazil. Some of these casemods are of the steampunk variety, an aesthetic that usually means gluing gears to wood. [Valeriy] and [Cyrill] are bucking that trend with a beautiful iMac crafted from wood, brass, and leather (Russian, Google Translate)

The machine in question is a late-model, impossibly thin iMac. Unlike the old all-in-one computers with clunky CRTs, there’s not much space to dig around inside this iMac, and doing so would probably ruin the machine, anyway. Instead of a complete disassembly a wooden frame was constructed around the display, the aluminum base was covered in veneer, and the back of the iMac was covered in leather.

This is a steampunk computer, though, and that means gears. In this case, the gears and steam elements actually do something. The front of the computer is adorned with a decent replica of the drivetrain of a locomotive that spins with the help of an electric motor. There’s a USB port attached to the front, ensconced in a cylindrical enclosure that opens when a switch is flipped.

If a complete reworking of a modern iMac isn’t enough, the build also included the steampunkification of the Apple Bluetooth keyboard. That in itself is an amazing build, but to see the entire thing in action, you’ll have to check out the video below.

Continue reading “Steampunk IMacs With Real Turning Gears”

Better Networking With A Macintosh Classic

While it may not be the case anymore, if you compare a Mac and a PC from 1990, the Mac comes out far ahead. PCs suffered with DOS, while the Mac enjoyed real, non-bitmapped fonts. Where a Windows PC required LANMAN to connect to a network, the Mac had networking built right into every single machine. In fact, any Mac from The Old Days can use this built-in networking to connect to the Internet, but most old Mac networking hacks have relied on PPP or other network to serial conversion. [Pierre] thought there was an incomplete understanding in getting old Macs up on the Internet and decided to connect a Mac Classic to the Internet with Apple’s built-in networking.

Since the very first Macintosh, Apple included a simple networking protocol that allowed users to share hard drives, folders, and printers over a local network. This networking setup was called LocalTalk. It wasn’t meant for internets or very large networks; the connection between computers was basically daisy chained serial cables and later RJ-11 (telephone) cables.

LocalTalk stuck around for a long time, and even now if you need to do anything with a Mac made in the last century, it’s your best bet for file transfer. Because of LocalTalk’s longevity, routers and LocalTalk to Ethernet adapters can be found fairly easily. The only problem is finding a modern device that speaks both TCP/IP and LocalTalk. You can’t use a new Mac for this; LocalTalk has been gone from OS X since Snow Leopard. You can do it with a Raspberry Pi, though.

With a little bit of futzing about with MacTCP and a few other pieces of software from 1993 or thereabouts, [Pierre] can even get his old Mac Classic online. Of course the browsers are all horribly outdated (making the Hackaday retro edition very useful), but [Pierre] was able to load up rotten.com. It takes a while with an 8MHz CPU and 4MB of RAM, but it does get the job done.

You can check out [Pierre]’s demo video below.

Continue reading “Better Networking With A Macintosh Classic”

Thorough Macbook Charger Teardown Reveals Some Complex Circuitry

Apple has a reputation in the tech world as being overpriced, and nowhere is that perception more common than in the Hackaday comments. The standard argument, of course, is that for a device with equivalent specs, Apple charges a lot more than its competitors. That argument is not without its flaws, especially when you consider factors other than simple specs like RAM and processor speed, and take into account materials used and build quality. But, as this teardown by [Ken Shirriff] shows, Apple’s attention to detail extends beyond simply machining Macbook bodies out of aluminum.

In his teardown, [Ken Shirriff] thoroughly investigates and describes all of the components and circuitry that go into the ubiquitous Macbook charger. Why does it cost $79? Other than the MagSafe connector, what makes it any better than the charger that came with your Toshiba Satellite in the ’90s? Isn’t it just a transformer to convert AC power to DC?

components1

[Ken Shirriff] answers all of this and more, and you may be surprised by what he found. As it turns out, the Macbook charger isn’t just a transformer in a plastic case with a fancy magnetic connector. There is a lot of high-quality circuitry involved to make the power output as clean and stable as possible, and to avoid potential damage to your Macbook that could be caused by dirty power or voltage spikes. Does it justify the costs, even with so many reported failures? That’s for you to decide, but there is no questioning that Apple put more thought into their chargers than simply converting AC to DC.

A Third Scale Mini PowerMac

We’re surrounded by tiny ARM boards running Linux, and one of the most popular things to do with these tiny yet powerful computers is case modding. We’ve seen Raspberry Pis in Game Boys, old Ataris, and even in books. [Aaron] decided it was time to fit a tiny computer inside an officially licensed bit of miniature Apple hardware and came up with the Mini PowerMac. It’s a 1/3rd scale model of an all-in-one Mac from 1996, and [Aaron] made its new hardware fit like a glove.

Instead of an old Mac modified with an LCD, or even a tiny 3D printed model like Adafruit’s Mini Mac Pi, [Aaron] is using an accessory for American Girl dolls released in 1996. This third-scale model of an all-in-one PowerPC Mac is surprisingly advanced for something that would go in a doll house. When used by American Girl dolls, it has a 3.25″ monochrome LCD that simulates the MacOS responding to mouse clicks and keypresses. If you want to see the stock tiny Mac in action, here’s a video.

The American Girl Mini Macintosh is hollow, and there’s a lot of space in this lump of plastic. [Aaron] tried to fit a Raspberry Pi in the case. A Pi wouldn’t fit. An ODROID-W did, and with a little bit of soldering, [Aaron] had a computer far more powerful than an actual PowerMac 5200. Added to this is a 3.5″ automotive rearview display, carefully mounted to the 1/3rd size screen bezel of the mini Mac.

The rest of the build is exactly what you would expect – a DC/DC step down converter, a USB hub, and a pair of dongles for WiFi and a wireless keyboard. The software for the ODROID-W is fully compatible with the Raspberry Pi, and a quick install of the Basilisk II Macintosh emulator and an installation of Mac OS 7.5.3 completed the build.