Fingertip Heart Rate Monitor

[Embedded lab] has a nice tutorial on building your own heart rate monitor. The monitor works by shining infrared light into the fingertip and looking at the changes in the reflected infrared signal caused by a heartbeat.  The IR detector produces a very small AC signal so a couple of op-amps are used to filter and amplify the signal. The output of the filter circuit is then read in by a PIC16F628A, which counts the beats and displays it on a seven segment display.  This might be a good project to try if you’ve got your microcontrollers down and you are looking to learn some analog electronics. Its noted at the end that the two main problems with building a circuit like this are going to be cross talk and adjusting the filters. The infrared diode and receiver should be close to each other to allow maximum reflection but you also need to make sure that you don’t allow the emitter to shine directly into the detector because the reflected light will be drowned out by the bright emitter.

[via make]

Your First Digital To Analog Converter Build

Have you ever built a Digital to Analog Converter before? This is a circuit that can take the 0 or 5V coming off of several digital logic pins, combine them together, and spit out one analog voltage that represents that value. If you’ve never made one, here’s your chance. [Collin Cunningham] over at Make put together another lab video about DACs which we’ve embedded after the break.

The circuit above uses an R-2R resistor network – often called a resistor ladder – which you can learn much more about from the reference page that [Collin] links to. Although a DAC in an IC package is by far the most commonly found application, we do see these R-2R networks in audio hacks from time to time.

Continue reading “Your First Digital To Analog Converter Build”

Electronic Tolling System

For us the hardest part of any project is coming up with the seminal idea. Once in a while you just need to cheat by recreating an existing product. That’s what EngineersGarage did with this toll plaza project. If you take a look around the various tabs at the top of that article you’ll see that they’ve used an 8051 microcontroller to bring together a character LCD, RFID reader, and a keypad. From there it’s a slew of coding to add the functionality for reading multiple tags, looking up stored value, and creating a replenishment system. Sure, it’s not really of much use in this form, but it’ll give you something to do with those shiny parts you have sitting around, and it might just lead you down a path to something more meaningful. As usual, there’s a demonstration video of this after the break.

If this doesn’t float your boat, perhaps this other RFID access system is more your thing.

Continue reading “Electronic Tolling System”

38 KHz IR Communications Tutorial

Learning about how infrared remote controls work is a great way to expand your electronics knowledge. That’s because this technology is invisible to our eye, and happening faster than we can comprehend without help from test equipment. This tutorial over at Pyroelectro talks about the theory behind how the data is transferred and shows you how to build a couple of circuits to experiment with and communicate through infrared light transmissions.

Instead of going with an IR receiver module you’ll build your own using a photo-transistor and an operational amplifier. The Opamp is used to amplify and invert the signal picked up from the IR transmission of a common home entertainment remote control. From there the digital signal is read by a PIC 18F452 microcontroller for processing. But if you want to use a different microcontroller there’s still more than enough usable information to get you across the finish line.

Voice-controlled Rolling Robot

rolling_voice_controlled_robot

[societyofrobots] recently posted an Instructable on how to build a voice controlled robot in just a few hours time. This robot isn’t particularly cheap, weighing in at about $230, but it is a fun project if you have the means. The bot is driven around by a pair of servos, taking their directions from an Axon II MCU. A VRbot voice recognition module is used to listen for commands, enabling the user to record up to 32 custom triggers for directing the robot.

All of the source code for the robot is included, as well as instructions on how to get started programing the microcontroller. The code provides some basic functionality, but there’s likely plenty more that can be done with the powerful on-board ATmega460. While this robot would make for a great beginner/intermediate project as-is, it should be noted that [societyofrobots] manufactures and sells the Axon II, so this Instructable is half guide/half self-promotion. Have any of you had experience with the Axon II? Let us know what you think.

Keep reading to see a video of the build process as well as the robot doing its thing.

Thanks, [Bill Porter].

Continue reading “Voice-controlled Rolling Robot”

Learn To Debug Msp430 Chips Using IAR

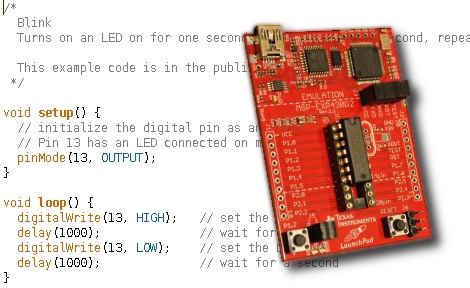
If you haven’t done any debugging with microcontroller programs [Kphlight] posted a follow-along guide for debugging MSP430 chips. You can see above that he’s using the TI Launchpad and has chosen the free (but code limited) IAR Embedded Workbench that is one of the IDE’s that TI provides for the kit. The example builds a Pomodoro timer with just five LEDs and one resistor. You’ll flash the code to the chip, step through each line of the firmware, and learn how to manipulate register data during code execution.

It’s a great primer for the uninitiated, and we’d love to see one using open-source tools like DDD and GDB. If you do write one, don’t forget to send us a tip about it. If you want to give open source a try with this hardware check out our own tutorial.

IR-controlled Musical Alarm Clock

Music-Playing-Alarm-Clock

Forum user [Frank] shared with us his recent project, a musical alarm clock. More than just a simple alarm clock, his creation allows the user to load music onto a micro SD card, has alarm settings for each day of the week, and best of all, can be controlled using an IR remote. He uses a Teensy++ to control most of the clock’s functions including the display, delegating the time keeping to a DS1307 real-time clock. All of the audio playback is handled by a separate music decoder mounted on a breakout board.

His Instructables writeup is extremely detailed, with tons of annotations, pictures, diagrams, and source code available. He walks through each step in detail, making this a great learning guide for others looking to start in on AVR programming.

His final presentation is a great lesson in recycling, though unfortunately a bit lackluster, as the clock is packaged in an old SparkFun cardboard box. He does mention that there were some time constraints towards the end, which may explain this choice – it would be nice to see a revised version of this clock packaged in a nice plexi case.